Category: Default Page 1 of 2

How Much To Replace Garage Door Tension Spring – A 24 Hour Door Service

Replacing a Garage Door Repair Madison MS tension spring is a task that requires skill and knowledge of garage door mechanisms.

The cost of replacing a garage door tension spring can vary depending on factors such as the type of spring, the size and weight of the garage door, and whether professional installation is required. Let’s explore this topic in more detail to understand the factors influencing the cost of replacing a garage door tension spring.

Understanding Garage Door Tension Springs: Garage door tension springs are essential components of the garage door system, responsible for counterbalancing the weight of the door and facilitating smooth opening and closing. There are two main types of garage door tension springs:

  1. Torsion Springs: Torsion springs are mounted above the garage door and wind up and unwind to generate the necessary tension. They are typically used in heavier garage doors and provide smoother operation compared to extension springs.
  2. Extension Springs: Extension springs are mounted on either side of the garage door and stretch and contract to provide tension. They are commonly used in lighter garage doors and are less expensive than torsion springs.

Factors Influencing Cost: Several factors can influence the cost of replacing a garage door tension spring:

  1. Type of Spring: The type of spring being replaced—whether torsion or extension—affects the cost. Torsion springs are generally more expensive than extension springs due to their design and installation requirements.
  2. Size and Weight of Door: The size and weight of the garage door play a significant role in determining the appropriate size and strength of the tension spring needed. Larger and heavier doors require stronger springs, which can increase the cost.
  3. Quality of Spring: The quality of the replacement spring can vary depending on factors such as material, durability, and manufacturer. Higher-quality springs may come with a higher price tag but offer better performance and longevity.
  4. Professional Installation: While some homeowners may attempt to replace garage door tension springs themselves, professional installation is recommended due to the potential safety risks and technical challenges involved. Hiring a professional garage door technician will incur additional labor costs but ensures the job is done safely and correctly.
  5. Additional Parts and Services: In some cases, replacing a garage door tension spring may require additional parts or services, such as cable replacement, bearing replacement, or adjustments to the garage door opener. These additional components and services can add to the overall cost.
  6. Warranty and Guarantees: Some garage door companies offer warranties or guarantees on their replacement springs, which may affect the cost. Opting for a higher-priced spring with a longer warranty period may provide added peace of mind and value in the long run.

Average Cost Range: The cost of replacing a garage door tension spring can vary widely depending on the factors mentioned above. On average, homeowners can expect to pay anywhere from $150 to $300 for a single garage door tension spring replacement. However, this cost may increase for larger or heavier doors, higher-quality springs, professional installation, or additional services.

Conclusion: Replacing a Garage Door Repair Madison MS tension spring is an important maintenance task that ensures the safe and efficient operation of the garage door. The cost of replacement can vary depending on factors such as the type of spring, size and weight of the door, quality of the spring, professional installation, additional parts and services, and warranty options. Homeowners should carefully consider these factors and consult with a reputable garage door technician to determine the best course of action for their specific needs and budget. Investing in high-quality replacement springs and professional installation can provide long-term reliability and peace of mind.

A 24 Hour Door Service

417 Post Oak Cove, Madison, MS 39110, United States

1-601-664-8935

Are There Any Specific Areas Or Regions Served By J Chavez Landscaping Service – Green Earth Services


 Land scaping Services Keller TX is committed to providing high-quality landscaping services to clients in various areas and regions. While the specific areas served may vary depending on the company’s location, resources, and service radius, J Chavez strives to accommodate clients within their service area to meet their landscaping needs effectively.

Here’s an overview of the typical areas or regions served by J Chavez Landscaping Service:

  1. Local Communities: J Chavez Landscaping often serves clients within the local community where their business is based. This may include neighborhoods, subdivisions, and residential areas within a certain radius of their headquarters or main office location. By focusing on local communities, J Chavez can provide personalized service and timely support to clients in close proximity.
  2. Cities and Towns: J Chavez Landscaping extends its services to clients in nearby cities and towns within its service area. This may include urban, suburban, and rural areas where residential and commercial properties require professional landscaping services. Whether in densely populated urban centers or rural countryside, J Chavez aims to meet the landscaping needs of clients across diverse settings.
  3. Suburban Developments: Suburban developments, including planned communities, housing estates, and suburban neighborhoods, often benefit from J Chavez’s landscaping services. These areas typically feature a mix of residential properties with varying landscape sizes and styles. J Chavez works with homeowners, property managers, and homeowner associations (HOAs) to enhance curb appeal and maintain outdoor spaces in suburban developments.
  4. Commercial Districts: J Chavez Landscaping also caters to commercial clients in business districts, retail centers, office parks, and industrial areas. Commercial properties, including corporate offices, shopping malls, restaurants, and hotels, rely on professional landscaping to create inviting outdoor environments for employees, customers, and visitors. J Chavez provides tailored landscaping solutions to enhance the aesthetic appeal and functionality of commercial properties.
  5. Institutional Facilities: Institutions such as schools, universities, hospitals, parks, and government buildings often require landscaping services to maintain their grounds and outdoor amenities. J Chavez serves institutional clients by providing landscaping maintenance, design, and enhancement services that meet their specific needs and requirements. From school campuses to public parks, J Chavez helps create attractive and functional outdoor spaces for the community to enjoy.
  6. Residential Neighborhoods: Residential neighborhoods, including single-family homes, townhouses, condominiums, and apartment complexes, benefit from J Chavez’s landscaping expertise. Whether working with individual homeowners or property management companies, J Chavez offers a range of landscaping services tailored to residential properties. From lawn care and maintenance to landscape design and installation, J Chavez helps homeowners and residents enhance the beauty and value of their properties.
  7. Rural Areas and Estates: In rural areas and country estates, J Chavez Landscaping provides landscaping services to homeowners with large properties, farms, ranches, and rural estates. These clients may require specialized services such as pasture management, tree care, and land clearing in addition to traditional landscaping services. J Chavez leverages its expertise and resources to address the unique needs of clients in rural settings.
  8. Custom Service Areas: While J Chavez Landscaping may have a primary service area defined by geographic proximity to their headquarters or main office, they may also accommodate clients outside of this area on a case-by-case basis. Depending on factors such as project scope, scheduling, and availability, J Chavez may extend its services to clients in adjacent areas or regions upon request.

By offering personalized service, expert craftsmanship, and attention to detail,  Land scaping Services Keller TX to exceed client expectations and establish long-lasting relationships within the communities they serve.

Green Earth Services

1110-1130 Mossy Rock Dr, Keller, TX 76248, United States

1-817-966-5292

https://maps.app.goo.gl/7GipKvmBaWW6KQ2HA

How Can I Schedule A Consultation With J Chavez Landscaping – Green Earth Services


Southlake Landscaping Keller TX Here are several ways you can schedule a consultation with J Chavez Landscaping:

  1. Online Appointment Booking:
    • J Chavez Landscaping may offer an online appointment booking system on their official website. Clients can visit the website, navigate to the “Contact” or “Schedule Consultation” page, and follow the prompts to select a date, time, and preferred method of consultation (in-person or virtual). The online booking system allows clients to view available appointment slots and schedule consultations at their convenience.
  2. Phone Call or Email Inquiry:
    • Clients can reach out to J Chavez Landscaping directly via phone or email to inquire about scheduling a consultation. The company’s contact information, including phone numbers and email addresses, is typically listed on their website or other marketing materials. Clients can contact the company, speak with a representative, and request a consultation appointment based on their availability.
  3. Contact Form Submission:
    • Many landscaping companies, including J Chavez Landscaping, provide a contact form on their website for clients to submit inquiries and appointment requests. Clients can fill out the form with their contact details, project requirements, and preferred consultation dates and times. The company’s staff will then follow up to confirm the appointment and provide additional information as needed.
  4. Social Media Messaging:
    • Some landscaping companies leverage social media platforms such as Facebook, Instagram, and Twitter to communicate with clients and schedule consultations. Clients can send direct messages or comments to the company’s social media accounts expressing their interest in a consultation. The company’s social media team will respond promptly to coordinate the consultation details.
  5. Referral or Word of Mouth:
    • Clients who have been referred to J Chavez Landscaping by friends, family, or colleagues can mention the referral when contacting the company to schedule a consultation. Referrals often receive priority treatment, and mentioning the referral source can facilitate the scheduling process.
  6. Visit to the Office or Showroom:
    • Some clients prefer to schedule consultations in person by visiting the office or showroom of J Chavez Landscaping. Clients can drop by during business hours, speak with a representative, and schedule a consultation appointment based on availability. Visiting the office or showroom also allows clients to view portfolio samples, discuss project ideas, and meet the team in person.
  7. Event or Trade Show Attendance:
    • J Chavez Landscaping may participate in local events, trade shows, or home and garden expos where clients can meet company representatives, learn about their services, and schedule consultations on the spot. Clients attending these events can approach the company’s booth or display area to express their interest in scheduling a consultation.

Southlake Landscaping Keller TX By providing multiple avenues for scheduling consultations, the company aims to accommodate the diverse needs and preferences of clients, ensuring a seamless and convenient experience from start to finish.

Green Earth Services

1110-1130 Mossy Rock Dr, Keller, TX 76248, United States

1-817-966-5292

How To Install Overhead Storage In The Garage – Platinum Garage Solutions

Garage Storage Solution Bennington NE Overhead storage units can accommodate bulky items, seasonal decorations, and other items that are not frequently used, freeing up valuable floor space for parking or other activities.

Here’s a step-by-step guide on how to install overhead storage in your garage:

1. Assess Your Garage Space:

  • Before you begin, assess the available space in your garage and determine the best location for overhead storage. Consider factors such as the height of your garage ceiling, the location of garage door tracks and lighting fixtures, and any obstacles that may affect installation.

2. Choose the Right Storage System:

  • Select the appropriate overhead storage system based on your storage needs and garage layout. Options include ceiling-mounted racks, shelves, or hoists. Consider factors such as weight capacity, adjustability, and accessibility when choosing a storage system.

3. Gather Tools and Materials:

  • Gather the necessary tools and materials for the installation, including a stud finder, measuring tape, pencil, drill, screws or bolts, mounting brackets or supports, and the overhead storage units themselves. Ensure that you have all the tools and hardware required for the job.

4. Locate Ceiling Joists:

  • Use a stud finder to locate the ceiling joists in your garage. Ceiling joists provide the necessary support for mounting overhead storage units. Mark the positions of the joists on the ceiling using a pencil or masking tape.

5. Plan the Installation Layout:

  • Plan the layout for the overhead storage units, taking into account the dimensions of the units and the spacing between them. Ensure that the units are evenly spaced and aligned with the ceiling joists for proper support.

6. Install Mounting Brackets or Supports:

  • Follow the manufacturer’s instructions to install the mounting brackets or supports for the overhead storage units. Use a drill and appropriate drill bit to create pilot holes for the screws or bolts, then secure the brackets or supports to the ceiling joists using screws or bolts.

7. Assemble the Storage Units:

  • If your overhead storage system requires assembly, follow the manufacturer’s instructions to assemble the units. This may involve attaching shelves, brackets, or other components together using screws, bolts, or other fasteners.

8. Lift the Storage Units into Place:

  • With the help of a friend or family member, lift the assembled storage units into place and align them with the mounting brackets or supports installed on the ceiling. Ensure that the units are level and securely positioned before proceeding.

9. Secure the Storage Units:

  • Once the storage units are in position, use the provided hardware to secure them to the mounting brackets or supports. This may involve tightening screws or bolts to ensure a secure connection between the units and the ceiling.

10. Test Stability and Weight Capacity:

  • Test the stability and weight capacity of the overhead storage units by placing a few items on the shelves or racks. Ensure that the units can support the intended load without sagging or buckling. Make any necessary adjustments to the installation if needed.

11. Organize and Arrange Items:

  • Once the overhead storage units are installed and secure, organize and arrange your items on the shelves or racks. Group similar items together and label bins or containers for easy identification. Consider using storage bins or totes to keep smaller items contained and organized.

12. Safety Considerations:

  • Be mindful of safety considerations when installing overhead storage in your garage. Ensure that the units are securely mounted to the ceiling and can support the intended load. Avoid overloading the storage units or placing heavy items near the edges. Regularly inspect the installation for signs of wear or damage and make any necessary repairs or adjustments.

Conclusion:

Garage Storage Solution Bennington NE By following these steps and safety precautions, you can install overhead storage units that meet your needs and help you make the most of your garage space.

Platinum Garage Solutions

15225 Harvest Ln #1, Bennington, NE 68007, United States

1-402-739-8444

Chamberlain Garage Door Openers: Features and Models – Ramona Valley Garage Door & Gates

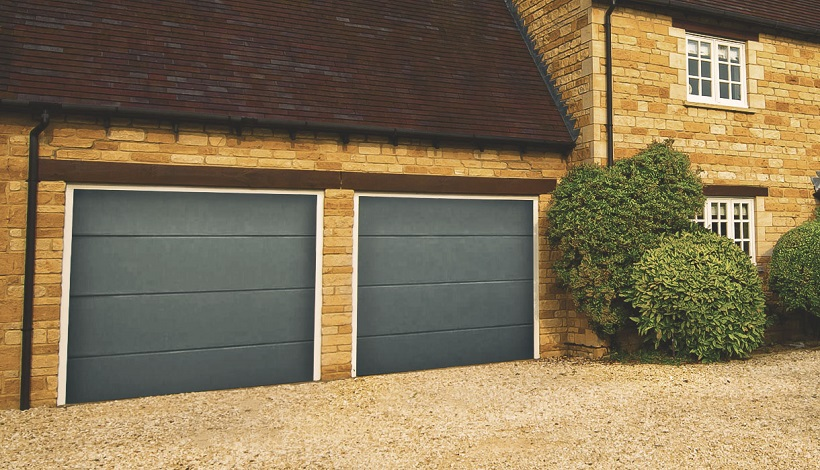
As a homeowner who values innovation, reliability, and seamless functionality, the quest for the perfect garage door opener led me to explore the renowned world of Chamberlain. Renowned for their cutting-edge technology and commitment to quality, Chamberlain garage door openers have become a staple in modern homes.

Here are the features and models that make Chamberlain a standout choice for those seeking not just a garage door opener but a comprehensive solution that integrates convenience, security, and advanced technology based from Garage Door Repair.

The Chamberlain Advantage: Setting the Standard

Before delving into the specific features and models, it’s crucial to understand the overarching advantages that make Chamberlain garage door openers a preferred choice among homeowners.

**1. Reliability and Durability

Chamberlain has built a solid reputation for manufacturing garage door openers that prioritize reliability and durability. With a commitment to quality materials and meticulous engineering, Chamberlain products are designed to withstand the test of time, ensuring a long lifespan and consistent performance.

Why I Chose Chamberlain: Reliability was a non-negotiable factor for me, and Chamberlain’s reputation for durable and robust garage door openers resonated with my desire for a long-lasting solution.

**2. Advanced Safety Features

Safety is paramount when it comes to garage door openers, and Chamberlain incorporates advanced safety features to protect both people and property. These features include motion sensors, automatic reversal mechanisms, and secure code encryption to prevent unauthorized access.

Why I Chose Chamberlain: As a homeowner prioritizing safety, Chamberlain’s commitment to advanced safety features aligned with my values, providing peace of mind for my family and me.

**3. Smart Home Integration

Chamberlain embraces the era of smart homes, offering garage door openers with seamless integration into smart home ecosystems. From smartphone control to compatibility with virtual assistants like Amazon Alexa and Google Assistant, Chamberlain garage door openers bring convenience to the forefront of the user experience.

Why I Chose Chamberlain: The prospect of integrating my garage door opener into my smart home ecosystem was a game-changer. Chamberlain’s commitment to smart home compatibility was a decisive factor in my choice.

**4. Whisper-Quiet Operation

Gone are the days of noisy and disruptive garage door openers. Chamberlain takes pride in providing whisper-quiet operation, ensuring that the garage door opens and closes smoothly without disturbing the peace and quiet of the home.

Why I Chose Chamberlain: Living in close proximity to bedrooms, the promise of a whisper-quiet operation was an attractive feature. Chamberlain’s commitment to minimizing noise aligned with my desire for a harmonious living environment.

Feature Highlights: What Sets Chamberlain Apart

Now, let’s explore the standout features that distinguish Chamberlain garage door openers and contribute to their reputation as leaders in the industry.

**1. MyQ Technology: Remote Control at Your Fingertips

Chamberlain’s MyQ technology is a standout feature that transforms the way homeowners interact with their garage door openers. With the MyQ app, users can remotely control and monitor their garage door from anywhere using their smartphone. This includes the ability to open, close, and receive real-time alerts about the status of the garage door.

Why I Appreciate It: The MyQ technology provided a level of convenience that exceeded my expectations. The ability to check and control my garage door remotely added a new layer of flexibility to my daily routine.

**2. Battery Backup: Uninterrupted Access

Chamberlain understands the importance of access, even during power outages. Their garage door openers come equipped with a battery backup system that ensures uninterrupted operation during power failures. This feature provides peace of mind, especially in emergency situations.

Why I Appreciate It: The reliability of a battery backup system was a crucial factor for me. Knowing that I could access my garage even when the power was out added an extra layer of convenience and security.

**3. Security+ 2.0: Encrypted Signal Technology

Security is a top priority for Chamberlain, and their Security+ 2.0 technology reflects this commitment. This feature employs a rolling code system that generates a new, encrypted code with every use, preventing unauthorized access and enhancing the overall security of the garage.

Why I Appreciate It: Security+ 2.0 provided a level of confidence in the security of my garage. The encrypted signal technology added an extra layer of protection against potential threats.

**4. PosiLock: Protecting Against Forced Entry

Chamberlain’s PosiLock system is designed to thwart forced entry attempts. This feature ensures that the garage door remains securely locked when closed, making it significantly more challenging for intruders to gain access.

Why I Appreciate It: The PosiLock system contributed to my sense of security. Knowing that my garage door was fortified against forced entry attempts provided peace of mind for my family and me.

**5. Timer-to-Close: Set and Forget

The Timer-to-Close feature allows users to preset the time it takes for the garage door to close automatically after being opened. This not only adds convenience to daily routines but also ensures that the garage door is never left open unintentionally.

Why I Appreciate It: The Timer-to-Close feature was a game-changer in terms of convenience. Being able to set a timer and not worry about whether I had left the garage door open brought a new level of ease to my daily life.

Chamberlain Models: A Diverse Range for Every Need

Chamberlain offers a diverse range of garage door opener models, each catering to specific needs and preferences. Let’s explore some notable models that have garnered attention in the market.

**1. Chamberlain B970: Power and Performance

The Chamberlain B970 is a high-powered garage door opener known for its exceptional performance. With a 1.25 HP equivalent motor, it can effortlessly handle heavy garage doors. The MyQ technology, battery backup, and Security+ 2.0 features make it a comprehensive and reliable choice.

Why It Stands Out: The B970’s combination of power, performance, and advanced features positions it as a top choice for homeowners with larger and heavier garage doors.

**2. Chamberlain B550: Smart and Efficient

The Chamberlain B550 strikes a balance between smart technology and efficiency. With a 1/2 HP motor, it caters to the needs of standard garage doors. The MyQ technology, Timer-to-Close, and PosiLock features make it a smart and secure choice for everyday use.

Why It Stands Out: The B550’s focus on smart features and efficiency makes it an ideal choice for homeowners seeking a reliable and user-friendly garage door opener.

**3. Chamberlain C273: Affordable Reliability

The Chamberlain C273 is designed for those who prioritize reliability on a budget. With a 1/2 HP motor, it delivers consistent performance for standard garage doors. The inclusion of MyQ technology and a durable chain drive system makes it an affordable yet reliable option.

Why It Stands Out: The C273’s affordability combined with essential features makes it an attractive choice for homeowners seeking reliable performance without breaking the bank.

Choosing the Right Chamberlain Garage Door Opener

Selecting the right Chamberlain garage door opener involves considering individual needs, preferences, and the specifications of your garage door. Here are some key considerations to guide your decision:

**1. Garage Door Size and Weight

Consider the size and weight of your garage door, as this will influence the power of the garage door opener you need. Heavier and larger doors may require higher horsepower for optimal performance.

Why It Matters: Choosing a garage door opener that aligns with the size and weight of your door ensures smooth and efficient operation.

**2. Smart Home Integration

If smart home integration is a priority for you, ensure that the Chamberlain model you choose is compatible with your preferred smart home ecosystem. Check for compatibility with platforms like MyQ, Amazon Alexa, Google Assistant, or Apple HomeKit.

Why It Matters: Smart home integration adds a layer of convenience, allowing you to control your garage door using voice commands or smartphone apps.

**3. Security Features

Evaluate the security features offered by different Chamberlain models. Consider features such as Security+ 2.0, PosiLock, and encryption technologies to ensure the safety of your home and belongings.

Why It Matters: Prioritizing security features contributes to your peace of mind, knowing that your garage is protected against potential threats.

**4. Budget Considerations

Chamberlain offers a range of models with varying features and price points. Establish a budget and choose a model that aligns with your financial considerations while still meeting your essential requirements.

Why It Matters: Setting a budget helps narrow down options and ensures that you find a Chamberlain garage door opener that meets your needs without overspending.

Conclusion: Elevating Your Garage Experience with Chamberlain

In the realm of garage door openers, Chamberlain stands as a beacon of excellence, combining innovation, reliability, and advanced technology. As I navigated the world of garage door openers, Chamberlain’s commitment to quality and user-centric features drew me in, ultimately influencing my decision to elevate my garage experience.

Whether you prioritize the power and performance of the B970, the smart features of the B550, or the budget-friendly reliability of the C273, Chamberlain offers a diverse range of models to cater to every homeowner’s needs. The MyQ technology, battery backup, and advanced security features position Chamberlain as a brand that not only meets but exceeds the expectations of discerning homeowners.

Overall, according to Garage Door Repair and in the journey of upgrading my garage door opener, Chamberlain emerged as a trusted companion, seamlessly integrating into my daily life and providing a level of convenience and security that transformed the way I interacted with my garage. As you embark on your quest for the perfect garage door opener, consider the features and models offered by Chamberlain—a brand that continues to set the standard for excellence in the realm of garage door technology.

Ramona Valley Garage Door & Gates

842 B St #6, Ramona, CA 92065, United States

760-970-8367

What are the Common Mistakes to Avoid in Window Installation? – Window Replacement Experts Mckinney

As a homeowner who has experienced both successful and less-than-ideal window installations, I’ve learned that the devil is in the details. Proper window installation can significantly impact a home’s energy efficiency, aesthetics, and overall comfort.

I’ll discuss the common mistakes to avoid in window installation, based from Window Replacement McKinney TX and on my own experiences.

1. Ignoring Professional Help: DIY Gone Wrong

One of the most significant mistakes I’ve witnessed is homeowners attempting to install windows themselves without the necessary expertise. DIY window installation can lead to costly mistakes, including incorrect measurements, improper sealing, and unstable frames. To avoid this mistake, I recommend consulting with professional window installers who have the experience and knowledge to get the job done right.

2. Incorrect Measurements: Measure Twice, Cut Once

Measurements are the foundation of a successful window installation. The mistake of inaccurate measurements can lead to windows that don’t fit, leaving gaps and compromising the home’s energy efficiency. To prevent this, always measure the window openings meticulously and, if necessary, consult professionals for guidance.

3. Choosing the Wrong Window Type: Compatibility Matters

Selecting the wrong type of window for your home’s specific needs is a common mistake. Different window types serve various purposes, from double-hung for ventilation to casement for unobstructed views. I’ve learned that it’s crucial to choose windows that match your home’s style and functional requirements. Consulting with window professionals can help you make the right choice.

4. Neglecting Energy Efficiency: The Costly Oversight

Overlooking energy efficiency during window selection and installation is a mistake I made early on. Energy-efficient windows, such as those with low-E coatings and double or triple glazing, can significantly reduce heating and cooling costs. I now prioritize these features to create a more comfortable and cost-effective living environment.

5. Improper Sealing and Insulation: Drafts and Leaks

Improper sealing and insulation during window installation can lead to drafts, leaks, and energy loss. In my experience, a tight, well-sealed fit between the window and the opening is essential. Weatherstripping and proper caulking play a vital role in keeping the elements outside and maintaining indoor comfort.

6. Rushing the Installation Process: Patience Pays Off

Rushing the installation process is a mistake that can result in subpar work. I’ve learned that it’s essential to allow professionals the time they need to complete the installation properly. Cutting corners to save time can lead to long-term issues, so I prioritize patience and quality over speed.

7. Skipping Frame Inspection and Maintenance: A Neglected Aspect

I’ve made the mistake of not inspecting and maintaining the window frames during installation. It’s crucial to check for any damage, rot, or defects in the frames before installation begins. Addressing frame issues before installation ensures a solid foundation for your windows.

8. Failing to Check Local Codes and Permits: Regulatory Oversights

Neglecting to check local building codes and permit requirements can lead to issues down the road. I’ve learned to ensure that all necessary permits and inspections are in place before window installation begins. Compliance with local regulations is essential to avoid potential legal complications.

9. Poorly Placed Windows: View and Privacy Matters

Another common mistake is poorly placed windows that compromise privacy or obstruct desirable views. To prevent this, I carefully consider the window placement, taking into account the home’s layout and surroundings.

10. Neglecting Aesthetics: A Missed Opportunity

Aesthetic considerations are often neglected during window installation. I’ve come to appreciate the impact of window styles, finishes, and accessories on the home’s overall look. Aesthetic choices should complement the home’s architecture and interior design.

11. Overlooking Security Features: Safety First

In my early experiences, I overlooked security features when selecting windows. Ensuring that windows have proper locks, laminated or tempered glass, and other security enhancements is essential to protect your home and family.

12. Not Considering Future Maintenance: Long-Term Planning

The mistake of not considering future maintenance during installation can lead to issues later on. I now opt for window designs and materials that are easy to clean and maintain, reducing the hassle of upkeep.

13. Forgetting About Ventilation: Fresh Air Matters

Proper ventilation is essential for indoor air quality. I’ve learned that windows should not obstruct airflow but instead facilitate it. This consideration is especially vital in areas like kitchens and bathrooms.

14. Failing to Insulate Gaps: Preventing Air Infiltration

After installation, it’s a mistake to overlook gaps and openings that need insulation. Properly insulating any remaining gaps, especially around the frame and window sill, is crucial to prevent air infiltration and maintain energy efficiency.

15. Not Hiring Professionals: A Valuable Investment

One of the most significant lessons I’ve learned is the value of hiring professional window installers. They have the expertise and experience to avoid these common mistakes, ensuring a successful and trouble-free installation.

In conclusion, as per Window Replacement McKinney TX, window installation is a complex process that requires attention to detail and expertise. By learning from my own experiences and avoiding these common mistakes, I’ve been able to enjoy the benefits of well-installed windows that enhance my home’s comfort, energy efficiency, and overall appeal. Whether you’re considering window replacement or new installation, taking the time to avoid these errors will lead to a more successful and satisfying outcome.

Window Replacement Experts Mckinney

9932 Prairie Dog Ln, McKinney, TX 75071, United States

972-895-8221

How to Reset Travel on Chamberlain Garage Door Opener – Colleyville Gates & Garage Doors

Resetting the travel limits on a Chamberlain garage door opener is an essential maintenance task that ensures your garage door opens and closes properly. These limits determine how far the door travels in both the open and closed positions. If they’re not set correctly, your Garage Door Repair Colleyville TX may not operate safely or efficiently. Before you begin, make sure you have the owner’s manual for your specific Chamberlain model, as the procedure may vary slightly depending on the model.

Below are detailed steps to reset the travel limits on a Chamberlain garage door opener:

Before You Begin

  1. Safety First: Always prioritize safety when working with garage doors. Disconnect the power to the garage door opener to prevent any accidental activation during the process.
  2. Gather Your Tools: You may need a ladder, a tape measure, a flathead screwdriver, and a partner to assist with some steps.
  3. Read the Manual: Familiarize yourself with your specific Chamberlain garage door opener’s manual. While this guide offers general instructions, your model may have unique features or requirements.

Step 1: Open the Garage Door

To reset the travel limits, start with your garage door fully open. If your door is stuck or malfunctioning, resolve any issues before attempting to reset the limits.

Step 2: Locate the Adjustment Screws

Chamberlain garage door openers typically have two adjustment screws for setting the travel limits. These screws are usually labeled “Up Limit” and “Down Limit.” You can find them on the main unit, which is often located near the motor or the front of the opener.

Step 3: Reset the Down Limit

  1. Adjust Down Limit Screw: Use a flathead screwdriver to turn the “Down Limit” screw counterclockwise. This will increase the travel distance of the door in the downward direction.
  2. Set the New Limit: With the help of a partner, lower the garage door manually until it’s about 2 inches from the floor. Measure this distance with a tape measure.
  3. Adjust Down Limit Screw (Continued): Turn the “Down Limit” screw clockwise to set the door to the measured distance. Be gradual and cautious, making small adjustments at a time.
  4. Test: Activate the garage door opener and observe the door’s movement. It should stop and reverse when it touches the floor. If it doesn’t, you may need to make further adjustments.

Step 4: Reset the Up Limit

  1. Adjust Up Limit Screw: Use a flathead screwdriver to turn the “Up Limit” screw clockwise. This will increase the travel distance of the door in the upward direction.
  2. Set the New Limit: With the door fully open, measure the distance from the bottom of the door to the header or ceiling.
  3. Adjust Up Limit Screw (Continued): Turn the “Up Limit” screw counterclockwise to set the door to the measured distance. As before, make small adjustments and test the door’s movement.
  4. Test: Activate the garage door opener and observe the door’s movement. It should stop when fully open. If it doesn’t, adjust the “Up Limit” screw accordingly.

Step 5: Fine-Tune the Limits

After performing the initial adjustments, it’s important to fine-tune the travel limits to ensure the door operates smoothly and safely.

  1. Test Both Directions: Open and close the garage door several times using the remote or wall button. Pay close attention to any unusual noises, jerky movements, or obstructions.
  2. Adjust as Needed: If you notice any issues during the testing, make small adjustments to the respective limit screws until the door operates smoothly and without problems.
  3. Safety Reversal Test: Perform a safety reversal test by placing an object (such as a block of wood) in the path of the closing door. The door should immediately reverse when it comes into contact with the object. If it doesn’t, consult your manual for troubleshooting or contact a professional.

Step 6: Secure the Adjustment Screws

Once you’re satisfied with the travel limits and the door’s performance, tighten the adjustment screws securely to prevent them from shifting.

Step 7: Reconnect Power

Reconnect the power to the garage door opener.

Step 8: Test Again

Test the garage door opener a few more times to ensure it operates as expected.

Step 9: Maintenance and Regular Checks

To maintain the proper operation of your garage door opener, periodically check the travel limits, lubricate moving parts, and inspect the safety features. Follow the manufacturer’s recommendations for maintenance intervals.

In conclusion, resetting the travel limits on your Chamberlain Garage Door Repair Colleyville TX opener is a crucial task to ensure the safe and efficient operation of your garage door. Always follow the specific instructions provided in your owner’s manual, and if you encounter any issues or difficulties, consider seeking professional assistance to avoid any safety hazards. Regular maintenance and testing will help keep your garage door opener in excellent working condition.

Colleyville Gates & Garage Doors

6508 Colleyville Blvd, Colleyville, TX 76034, United States

1-817-755-6231

How To Get A Replacement Garage Door Opener – BH Garage Doors and Gates

Losing or damaging your Garage Door Repair Rockwall TX opener can be a frustrating experience, but the good news is that getting a replacement is typically a straightforward process.

This guide will walk you through the steps to obtain a replacement garage door opener, including identifying your needs, selecting the right type, considering compatibility, purchasing options, and programming.

Step 1: Identify Your Needs

  1. Type of Opener: Determine whether you need a remote control, keypad, or both as a replacement. If your existing opener is part of a home automation system, you might also want to explore smart opener options.
  2. Brand and Model: Identify the brand and model of your current garage door opener if possible. This information can help you find a compatible replacement.

Step 2: Select the Right Type

  1. Remote Control: Replacement remote controls come in various designs and functionalities. Choose one that suits your preferences, whether it’s a compact single-button remote or a multi-button remote with additional features.
  2. Keypad: If you need a replacement keypad, consider whether you want a wired or wireless option. Wireless keypads offer more flexibility in terms of installation location.
  3. Smart Opener: If you’re interested in a smart garage door opener, research options that integrate with your home’s existing smart technology. These openers can often be controlled through smartphone apps and voice assistants.

Step 3: Consider Compatibility

  1. Brand Compatibility: Check if the replacement opener is compatible with your garage door opener brand. Most manufacturers provide information on their websites or packaging about compatible models.
  2. Frequency: Garage door openers operate on specific radio frequencies. Ensure that the replacement opener operates on the same frequency as your existing system to ensure proper communication.

Step 4: Purchasing Options

  1. Local Retailers: Visit home improvement stores or specialized garage door retailers in your area. They often have a variety of replacement openers in stock and knowledgeable staff to assist you.
  2. Online Retailers: Online platforms like Amazon, eBay, and specialized garage door websites offer a wide range of replacement openers. Make sure to read reviews and check for authenticity when purchasing from online sources.
  3. Manufacturer Websites: Many garage door opener manufacturers have official websites where you can find replacement parts and accessories. This is a reliable source for finding compatible replacements.

Step 5: Programming

  1. Read the Manual: Replacement garage door openers come with user manuals that guide you through the programming process. Familiarize yourself with the steps outlined in the manual.
  2. Existing Opener: If you have your old opener, follow the manual’s instructions to program the new remote or keypad to work with your existing opener.
  3. Pairing Mode: Some openers require you to put the existing opener in a pairing or learn mode before programming the new device. Consult the manual for specific instructions.

Step 6: Testing and Troubleshooting

  1. Test Operation: After programming the replacement opener, test its functionality by opening and closing the garage door. Make sure it’s responding as expected.
  2. Troubleshooting: If the replacement opener isn’t working correctly, consult the troubleshooting section of the manual. Common issues might include incorrect programming or weak batteries.

Conclusion: A Seamless Transition

Obtaining a replacement Garage Door Repair Rockwall TX opener doesn’t have to be a daunting task. By identifying your needs, selecting the right type of opener, considering compatibility, exploring purchasing options, programming the new device, and testing its functionality, you can ensure a seamless transition back to the convenience of operating your garage door effortlessly. With the right replacement opener in hand, you’ll regain the peace of mind that comes with a functioning and secure garage door access system.

BH Garage Doors and Gates

1-972-807-7936

How to Setup the Garage Door Opener? – Team Taylor Garage Doors

Setting up a garage door opener is an important process that allows you to automate the opening and closing of your garage door. While the specific steps may vary depending on the model and manufacturer, this guide will provide you with a general step-by-step procedure to help you set up your garage door opener effectively.

Here’s how you can set up your garage door opener based from Garage Door Mission KS:

Step 1: Gather the Necessary Tools and Materials First, I gather all the tools and materials I’ll need for the installation:

  • The garage door opener kit, which includes the motor unit, remote controls, and necessary hardware.
  • A step ladder for reaching high areas.
  • A power drill for attaching the motor unit and rail system.
  • A screwdriver with both flathead and Phillips head tips.
  • A measuring tape to ensure accurate placement.
  • A pencil for marking measurements.
  • Safety glasses for eye protection.

Step 2: Install the Motor Unit I choose a suitable location on the ceiling of my garage for mounting the motor unit. It needs to be close to a power outlet. Using the measuring tape, I determine the proper distance from the door based on the manufacturer’s guidelines. Then, I attach the motor unit securely to the ceiling using the provided hardware. I make sure to use a power drill and the appropriate screws for stability.

Step 3: Install the Rail System and Trolley Following the manufacturer’s instructions, I assemble the rail system by connecting the rail sections with the provided bolts. Once the rail system is assembled, I attach it to the motor unit, ensuring proper alignment. Next, I hang the trolley from the rail, making sure it slides smoothly along the entire length without any obstructions.

Step 4: Install the Safety Sensors I locate the safety sensor brackets included in the kit. I attach these brackets to the vertical tracks on each side of the garage door, ensuring they are at the same height. Then, I mount the safety sensors onto the brackets, making sure they face each other and are properly aligned. To complete the installation, I connect the safety sensor wires to the motor unit following the provided instructions.

Step 5: Program the Remote Controls I insert the batteries into the remote controls, if needed. Next, I find the “Learn” or “Sync” button on the motor unit. Pressing and releasing this button initiates the programming process, and the indicator light on the motor unit starts flashing. Within 30 seconds, I press the desired button on the remote control I want to program. The indicator light on the motor unit stops flashing, indicating successful programming. I repeat this process for each remote control I wish to program.

Step 6: Test the Garage Door Opener With all the installation steps complete, it’s time to test the garage door opener. I make sure there are no obstructions in the door’s path and stand clear of the door. Then, I press the programmed button on one of the remote controls. I observe the garage door as it smoothly opens or closes. If necessary, I can adjust the travel and force settings on the motor unit to optimize the door’s operation, following the manufacturer’s instructions.

Step 7: Additional Features and Safety Precautions If my garage door opener supports additional features like keypad entry or smartphone control, I refer to the manufacturer’s instructions to set up those features. Additionally, I ensure that all safety features, including the safety sensors and emergency release, are fully operational. Regularly testing these safety features helps maintain safe operation of the garage door.

Conclusion

By following these steps from Garage Door Mission KS, I can successfully set up my garage door opener. However, it’s important to note that the specific instructions may vary depending on the model and manufacturer. Always consult the provided user manual for detailed instructions tailored to your particular garage door opener. Proper installation and programming of the opener ensure convenient and safe operation of your garage door.

Team Taylor Garage Doors

8621 Johnson Dr, Mission, KS 66202, United States

913-270-0912

How to Paint an Aluminum Garage Door? – Ramona Valley Garage Door & Gates

Painting an aluminum garage door can enhance its appearance and protect it from the elements.

I’m going to guide you through the process from Garage Door Ramona CA on painting an aluminum garage door. It’s a great way to improve its appearance and protect it from the elements. Let’s get started!

First, I need to clean the garage door thoroughly. I’ll mix a mild detergent with water and grab a soft-bristle brush or sponge. I’ll scrub away any dirt, dust, and grease, making sure to cover every inch of the door. Once I’m done, I’ll rinse it off with water and let it dry completely.

Next, if there’s any old paint on the door that’s peeling or flaking, I need to remove it. I’ll grab a paint scraper or sandpaper and gently scrape off the loose paint until I reach a firm surface. This step is essential to ensure the new paint adheres properly.

Now it’s time to sand the surface. I’ll grab some fine-grit sandpaper or a sanding block and lightly sand the entire garage door. I want to create a smooth and rough surface to help the new paint stick better. Afterward, I’ll wipe away the dust with a clean cloth.

Since aluminum surfaces require a primer, I’ll need to apply one. I’ll choose a high-quality metal primer suitable for outdoor use. After thoroughly stirring the primer, I’ll use a brush or roller to apply it evenly onto the garage door. I’ll make sure to follow the manufacturer’s instructions for drying time.

Choosing the right paint is crucial. I need to select an exterior-grade paint specifically designed for metal surfaces. I’ll look for one that works well with aluminum or a multi-surface paint that can adhere to different materials. I’ll consider the color and finish that will best complement the overall look.

Now, I’ll prepare the paint. I’ll give it a good stir to achieve an even consistency. If the paint requires thinning, I’ll follow the manufacturer’s instructions and use a clean container for the process. I’ll be careful not to add more thinner than necessary, as it could affect the durability of the paint.

It’s finally time to start painting! I’ll grab a brush or roller and begin with the corners and edges of the garage door. Then, I’ll move on to the larger areas, applying the paint evenly with long, smooth strokes in the same direction. I’ll make sure to overlap each stroke slightly for consistent coverage. If I’m using a roller, I’ll use a low-nap roller suitable for smooth surfaces.

After each coat, I need to allow sufficient drying time. I’ll refer to the drying time mentioned on the paint can, keeping in mind that factors like humidity and temperature can affect it. It’s crucial to let each coat dry completely before applying the next one.

For optimal coverage and durability, I’ll apply multiple coats of paint. Most paint brands recommend two to three coats. I’ll be patient and allow enough drying time between each coat. Before applying a new layer, I’ll lightly sand the surface with fine-grit sandpaper to create a smooth finish.

Once the final coat is dry, I’ll inspect the garage door for any touch-ups or areas that need improvement. I’ll use a small brush to fix any imperfections or missed spots. If there are any paint drips or smudges, I’ll clean them up with a cloth and the appropriate cleaning solution.

Lastly, I’ll clean up properly. I’ll dispose of used paint cans, brushes, and other materials according to local regulations. I’ll clean the brushes and rollers with water or the recommended solvent, depending on the paint type.

By following these steps from Garage Door Ramona CA, you can paint an aluminum garage door effectively, giving it a fresh and attractive appearance while ensuring long-lasting protection. Remember to take necessary safety precautions, such as wearing protective goggles and gloves, and work in a well-ventilated area.

Ramona Valley Garage Door & Gates

842 B St #6, Ramona, CA 92065, United States

760-970-8367

Page 1 of 2

Powered by WordPress & Theme by Anders Norén