Tag: Garage Floor Omaha NE

What Are The Best Materials For Garage Floor Covering? –  The Garage Floor Company Omaha

Garage Floor Omaha NE for your garage can significantly impact its durability, appearance, and functionality. With a wide range of options available, from traditional concrete to modern epoxy coatings, selecting the best material for your garage floor covering requires careful consideration of factors such as budget, usage, maintenance requirements, and aesthetic preferences.

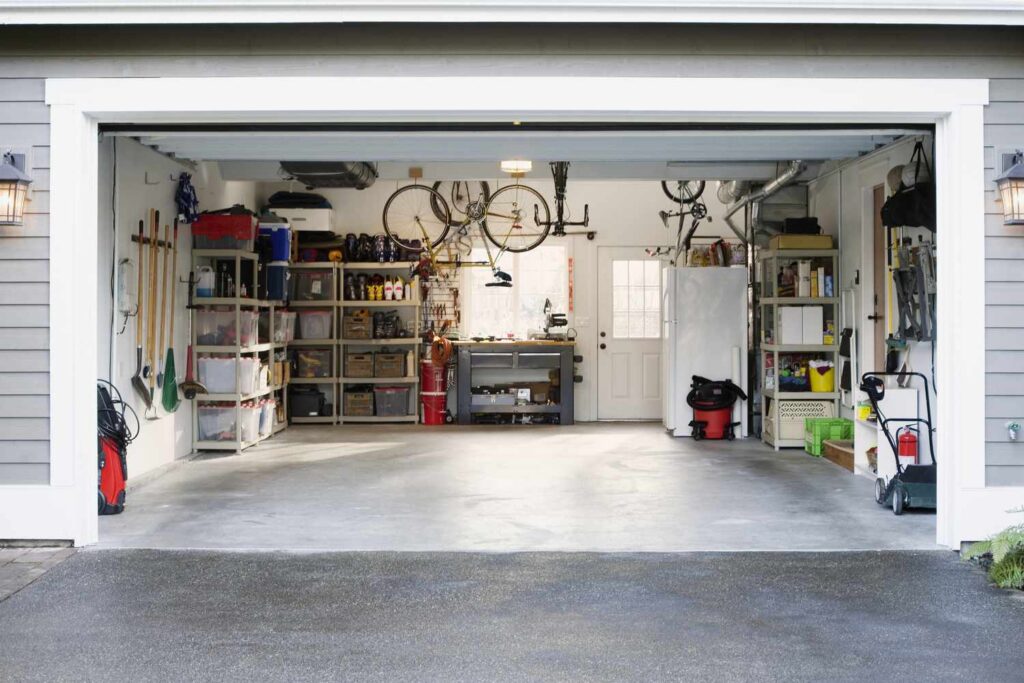
In this comprehensive guide, we’ll explore some of the best materials for garage floor covering, highlighting their features, benefits, and considerations to help you make an informed decision that meets your needs and enhances your garage space.

1. Concrete

Features:

  • Traditional and widely used material for garage floors.
  • Durable, strong, and resistant to heavy loads.
  • Easy to clean and maintain.
  • Can be customized with stains, dyes, or coatings for added aesthetics.

Benefits:

  • Cost-effective option compared to other materials.
  • Provides a solid foundation for parking vehicles and storing heavy equipment.
  • Resistant to stains, chemicals, and abrasion.
  • Suitable for both residential and commercial garage spaces.

Considerations:

  • Prone to cracking and pitting over time, especially in areas with freeze-thaw cycles.
  • May require sealing or coating for enhanced durability and aesthetics.
  • Hard surface can be uncomfortable to stand on for extended periods.
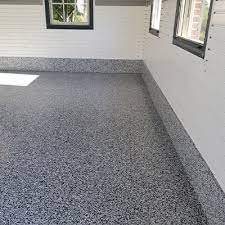
2. Epoxy Coating

Features:

  • High-performance flooring system composed of epoxy resin and hardener.
  • Provides a seamless, durable, and attractive surface.
  • Available in a variety of colors, textures, and finishes.
  • Resistant to stains, chemicals, abrasion, and UV damage.

Benefits:

  • Enhances the appearance of the garage with a glossy, professional finish.
  • Protects the concrete substrate from moisture, oil, and other contaminants.
  • Easy to clean and maintain, requiring periodic reapplication of topcoat.

Considerations:

  • Requires proper surface preparation and application by trained professionals.
  • Initial installation cost may be higher than other options.
  • May yellow or fade over time with exposure to sunlight.

3. Rubber Flooring Tiles

Features:

  • Interlocking tiles made of durable rubber or PVC material.
  • Available in various thicknesses, colors, and surface textures.
  • Easy to install without the need for adhesives or specialized tools.
  • Provides cushioning and noise reduction properties.

Benefits:

  • Offers excellent impact resistance and shock absorption.
  • Protects the concrete floor from damage caused by dropped tools or heavy equipment.
  • Resistant to stains, chemicals, and moisture.

Considerations:

  • May have a strong odor initially, which dissipates over time.
  • Surface texture may trap dirt, requiring regular cleaning.
  • Can be more expensive than other flooring options.

4. Vinyl Composite Tiles (VCT)

Features:

  • Commercial-grade flooring tiles made of vinyl composite material.
  • Available in a wide range of colors, patterns, and sizes.
  • Durable, resilient, and easy to maintain.
  • Can be installed with or without adhesive, depending on the application.

Benefits:

  • Provides a smooth, seamless surface that is resistant to stains, chemicals, and abrasion.
  • Easy to clean and maintain with regular sweeping and mopping.
  • Suitable for high-traffic areas and heavy-duty applications.

Considerations:

  • May require periodic stripping, waxing, and resealing to maintain appearance.
  • Susceptible to indentation and scratching from heavy furniture or equipment.
  • Installation may require professional expertise for proper alignment and adhesion.

5. Polyurea Coating

Features:

  • Advanced coating system composed of polyurea resin and catalyst.
  • Provides a durable, flexible, and waterproof surface.
  • Rapid curing time allows for quick installation and use.
  • Resistant to chemicals, abrasion, and temperature fluctuations.

Benefits:

  • Offers superior adhesion and impact resistance compared to epoxy coatings.
  • Provides excellent protection against moisture, oil, and automotive fluids.
  • Available in a variety of colors, textures, and finishes.

Considerations:

  • Requires professional installation by trained applicators.
  • Higher initial cost compared to traditional epoxy coatings.
  • Limited availability and may be more challenging to find qualified installers.

6. Porcelain Tile

Features:

  • High-quality ceramic tiles made from natural clay and minerals.
  • Durable, dense, and resistant to scratches, stains, and moisture.
  • Available in a wide range of colors, sizes, and finishes.
  • Suitable for indoor and outdoor applications, including garage floors.

Benefits:

  • Offers exceptional durability and longevity with proper installation and maintenance.
  • Provides a luxurious, upscale appearance that enhances the overall aesthetic of the garage.
  • Easy to clean and maintain with regular sweeping and occasional mopping.

Considerations:

  • Requires a flat, level substrate for proper installation.
  • May be more expensive than other flooring options, especially premium porcelain tiles.
  • Installation may require professional expertise and specialized tools for cutting and fitting.

7. Concrete Stain

Features:

  • Decorative coloring system applied to existing concrete floors.
  • Penetrates the surface to create rich, translucent hues and variegated patterns.
  • Available in acid-based and water-based formulations.
  • Enhances the natural beauty of concrete while providing protection.

Benefits:

  • Offers unlimited design possibilities with customizable colors and effects.
  • Provides long-lasting color retention and UV resistance.
  • Low maintenance requirements with occasional resealing.

Considerations:

  • Requires proper surface preparation and application techniques for optimal results.
  • Acid-based stains can be hazardous to health and require careful handling.
  • Results may vary depending on the condition and composition of the concrete substrate.

8. Interlocking Plastic Tiles

Features:

  • Modular flooring system made of high-impact polypropylene or PVC material.
  • Interlocking design allows for easy installation and customization.
  • Available in various colors, patterns, and surface textures.
  • Provides a durable, slip-resistant surface for garage floors.

Benefits:

  • Offers excellent resistance to stains, chemicals, and abrasion.
  • Easy to clean and maintain with regular sweeping and occasional mopping.
  • Can be installed over existing concrete or other hard surfaces.

Considerations:

  • May be susceptible to warping or discoloration with prolonged exposure to sunlight.
  • Surface texture may trap dirt and require periodic deep cleaning.
  • Limited color and design options compared to other flooring materials.

9. Acrylic Sealer

Features:

  • Clear, protective coating applied to concrete garage floors.
  • Enhances the appearance of concrete while providing protection against stains and moisture.
  • Available in solvent-based and water-based formulations.
  • Offers a glossy or matte finish depending on the desired look.

Benefits:

  • Provides a cost-effective solution for sealing and enhancing concrete garage floors.
  • Offers UV resistance and color enhancement for decorative effects.
  • Easy to apply with a roller or sprayer and dries quickly for fast results.

Considerations:

  • Requires periodic reapplication to maintain effectiveness and appearance.
  • May not provide as much durability or protection as epoxy or polyurea coatings.
  • Application may be affected by temperature, humidity, and surface conditions.

10. Natural Stone Tile

Features:

  • Luxurious flooring option made from natural stone such as granite, marble, or slate.
  • Offers unparalleled beauty, durability, and elegance.
  • Available in a variety of colors, patterns,

The Garage Floor Company Omaha

15125 Industrial Rd, Omaha, NE 68144, United States

1-402-576-5599

How To Paint Garage Floor – Omaha’s Best Epoxy Garage Floor

A Epoxy Garage Floor Omaha NE that has been properly painted not only looks great but also offers durability and protection. By following the steps outlined in this guide, you’ll be able to transform your garage floor into a functional and visually appealing space.

Preparing the Garage Floor

Before you begin painting, it is crucial to prepare the garage floor properly. This involves gathering the necessary tools and materials, clearing the area, repairing any damage, and thoroughly cleaning the floor.

Gathering the Necessary Tools and Materials

To paint your garage floor, you will need the following tools and materials:

  • Broom or brush
  • Vacuum cleaner
  • Pressure washer or hose
  • Concrete cleaner or degreaser
  • Scrub brush or broom with stiff bristles
  • Concrete patching compound
  • Putty knife or trowel
  • Floor sander or grinder (if needed)
  • Painter’s tape
  • Epoxy or latex paint
  • Paint roller with extension handle
  • Paint tray
  • Paintbrush
  • Clear sealant

Ensure that you have all the necessary items before proceeding with the next steps.

Clearing the Area

Remove any items, vehicles, or obstacles from the garage to create an empty space. This will make it easier for you to work and ensure that the paint does not accidentally splatter on anything you want to keep clean.

Repairing Any Damage

Inspect the garage floor for any cracks, pits, or other damage. Use a concrete patching compound to fill in these imperfections. Follow the manufacturer’s instructions for mixing and applying the compound. Smooth the patched areas using a putty knife or trowel.

Cleaning the Floor

Thoroughly clean the garage floor to remove dirt, dust, grease, and any other contaminants. Start by sweeping the floor with a broom or brush to remove loose debris. Use a vacuum cleaner to pick up finer particles. For stubborn stains or oil stains, use a concrete cleaner or degreaser. Follow the instructions on the product label for dilution and application. Apply the cleaner to the floor and scrub with a scrub brush or broom with stiff bristles to remove any embedded dirt or grime. Rinse the floor thoroughly with a pressure washer or hose to ensure all cleaning residues are removed.

Applying Primer

Priming the garage floor is an essential step to ensure proper adhesion of the paint and enhance its longevity. Follow these guidelines to apply primer effectively.

Choosing the Right Primer

Select a high-quality concrete primer that is specifically designed for garage floors. The primer should be compatible with the type of paint you will be using. Epoxy-based primers are commonly used for garage floors due to their excellent adhesion and durability.

Applying Primer to the Floor

Using a paint roller with an extension handle, apply the primer evenly to the garage floor. Start from the corners and edges, working your way towards the center of the floor. Make sure to coat the entire surface with a smooth and consistent layer of primer. Allow the primer to dry completely as per the manufacturer’s instructions before proceeding to the next step.

Choosing the Paint

Selecting the right paint for your garage floor is crucial for achieving a professional and long-lasting finish. Consider the following factors when choosing the paint.

Epoxy Paint vs. Latex Paint

Epoxy paint is highly recommended for garage floors due to its superior durability and resistance to chemicals, stains, and abrasion. It provides a thick and hard coating that can withstand heavy use and vehicular traffic. Latex paint, on the other hand, is more budget-friendly and easier to apply but may not offer the same level of protection and durability as epoxy paint.

Selecting the Color

Choose a color that suits your personal preference and complements the overall aesthetic of your garage. Lighter colors can make the space appear larger and brighter, while darker colors can hide stains and imperfections.

Considering Additional Additives

Certain additives can be mixed with the paint to enhance its performance. For example, anti-slip additives can provide traction and prevent accidents, while moisture barrier additives can protect against moisture-related issues.

Applying the Paint

Now it’s time to apply the paint to your garage floor. Follow these step-by-step instructions for a smooth and professional finish.

Preparing the Paint

If you are using epoxy paint, mix the two components (resin and hardener) according to the manufacturer’s instructions. Stir the mixture thoroughly to ensure proper blending. For latex paint, ensure that it is well-mixed and free of lumps or clumps.

Starting from the Corners and Edges

Using a brush, start by cutting in along the corners and edges of the garage floor. Apply a thin and even coat of paint, ensuring that there are no drips or excess paint. This process is known as “cutting in” and helps create a clean and defined boundary for the main painting process.

Using a Roller for the Main Surface

Once you have completed the cutting-in process, switch to a paint roller. Attach an extension handle to the roller for easier application. Dip the roller into the paint tray, removing any excess paint by rolling it on the textured area of the tray. Begin rolling the paint onto the main surface of the garage floor, working in small sections at a time.

Roll the paint in a back-and-forth motion, applying even pressure to achieve a smooth and consistent coat. Make sure to overlap the painted areas slightly to avoid any gaps or unevenness. Continue this process until the entire garage floor is covered.

Applying Additional Coats

After the first coat of paint has dried completely, inspect the

Continue writing pleaseChatGPT

floor for any thin or uneven areas. If necessary, apply a second coat of paint to ensure complete coverage and a more durable finish. Follow the same process of cutting in along the corners and edges before using a roller for the main surface. Allow each coat to dry according to the paint manufacturer’s instructions before proceeding.

Adding a Sealant

Applying a sealant is an optional but highly recommended step to protect your painted garage floor and enhance its longevity. A sealant adds an extra layer of durability, resistance to stains and chemicals, and provides a glossy or satin finish.

The Importance of a Sealant

A sealant acts as a protective barrier, guarding the painted surface against wear, moisture, and other environmental factors. It helps to prevent the paint from chipping or peeling and extends the lifespan of your garage floor.

Applying the Sealant

Choose a clear sealant specifically designed for painted garage floors. Follow the manufacturer’s instructions for application. Generally, you will need to use a paint roller or brush to apply the sealant evenly over the entire painted surface. Allow the sealant to dry and cure according to the recommended drying time.

Drying and Curing

Proper drying and curing of the paint are essential for achieving a durable and long-lasting garage floor finish. Follow these guidelines to ensure optimal results.

Allowing Sufficient Drying Time

After applying the final coat of paint and sealant, allow the garage floor to dry completely before using it. The drying time may vary depending on factors such as temperature, humidity, and the type of paint used. Refer to the manufacturer’s instructions for the recommended drying time.

Curing the Paint

Curing is the process of allowing the paint to fully harden and reach its maximum durability. This usually takes several days or even weeks, depending on the type of paint. Avoid placing heavy objects or subjecting the floor to heavy traffic during the curing period to prevent any damage.

Maintaining Your Painted Garage Floor

To ensure the longevity and appearance of your painted garage floor, it’s important to implement regular maintenance practices. Here are some tips to help you maintain your painted floor:

Regular Cleaning

Sweep or use a dust mop to remove loose debris and dirt from the surface regularly. Periodically wash the floor with a mild detergent and water solution to remove stains or spills. Avoid using harsh chemicals or abrasive cleaners that can damage the paint.

Avoiding Harsh Chemicals

When cleaning your garage floor, avoid using chemicals such as bleach, ammonia, or solvents that can cause discoloration or damage to the paint. Opt for gentle cleaning agents specifically formulated for painted surfaces.

Preventing Scratches and Damage

Place floor mats or rugs in high-traffic areas to prevent scratches from vehicles or heavy equipment. Use furniture pads or protective coasters under heavy objects to avoid indentations or damage to the paint.

Conclusion

Painting your Epoxy Garage Floor Omaha NE is a worthwhile investment that enhances both the aesthetics and functionality of your space. By following the step-by-step process outlined in this guide, you can achieve a beautiful and durable garage floor that will stand the test of time. Enjoy the transformation and the benefits it brings to your garage!

Omaha’s Best Epoxy Garage Floor

5060 Dodge St, Omaha, NE 68132

1-402-814-8957

Powered by WordPress & Theme by Anders Norén