Tag: Garage Door Repair Arlington TX Page 1 of 2

How To Reset Skylink Garage Door Keypad – Arlington Overhead & Garage Doors

Resetting your Skylink Arlington Garage Door Repair is a straightforward process that involves a series of steps to ensure a successful reset.

Follow these instructions carefully to effectively reset your Skylink garage door keypad.

: Locate the Keypad

Start by locating the Skylink garage door keypad on the wall near your garage door. Typically, it is mounted outside for easy access.

: Access the Battery Compartment

Open the battery compartment on the back of the keypad. Depending on your model, you might need a screwdriver to remove a cover or a simple sliding motion might be sufficient.

: Remove Batteries

Take out the batteries from the compartment. Ensure you are using fresh batteries, as old or weak batteries may cause issues during the reset process.

: Wait for a Few Minutes

Allow the keypad to remain without batteries for at least 5 minutes. This waiting period is crucial for the keypad to reset completely.

: Press and Hold the Program Button

While the batteries are still removed, locate the program button on the keypad. This button is typically situated on the side or bottom of the keypad. Press and hold it down.

: Reinsert Batteries

While still holding down the program button, reinsert the batteries into the keypad. Continue holding the program button for an additional 5 seconds.

: Release the Program Button

After holding the program button for 5 seconds, release it. This action completes the reset process.

: Test the Keypad

Now that you have reset the keypad, test its functionality. Enter your PIN code and press the appropriate buttons to operate the garage door. Ensure that the keypad is working correctly.

: Reprogram if Necessary

If your garage door opener requires reprogramming after the reset, refer to the manufacturer’s instructions for your specific model. This typically involves inputting a new PIN code.

: Secure the Keypad

Close the battery compartment securely and ensure that the keypad is mounted properly on the wall.

: Additional Troubleshooting

If, after following these steps, the keypad still does not work, consult the user manual for your Skylink garage door opener or keypad. The manual may contain specific troubleshooting steps or provide information on contacting customer support.

By following these detailed steps, you should successfully reset your Skylink Arlington Garage Door Repair. Always refer to the user manual for your specific model for the most accurate and detailed instructions. If you encounter any challenges, don’t hesitate to seek assistance from the manufacturer’s customer support.

Arlington Overhead & Garage Doors

817-646-2532

How To Program Ram Garage Door Opener – Lake Arlington Gates & Garage Doors

 Garage Door Repair Arlington TX have become an integral part of modern living, providing convenience and security. If you own a RAM garage door opener and need to program it, follow these comprehensive steps to ensure a successful setup.

Gather Necessary Materials Before you start programming, make sure you have all the required materials at hand. This typically includes the RAM garage door opener manual, a ladder, and possibly a screwdriver or other tools depending on your specific model.

Locate the “Learn” Button Most modern garage door openers, including RAM models, come equipped with a “Learn” or “Program” button. This button is usually located on the main unit of the garage door opener. Consult your manual or visually inspect the unit to find this button.

Clear Memory If this is a new installation or you are reprogramming the opener, it’s crucial to clear the memory first. Press and hold the “Learn” button until the indicator light on the opener unit blinks or changes color. This indicates that the memory is cleared and ready for new programming.

Choose a PIN (Personal Identification Number) Select a secure and memorable PIN for your garage door opener. This PIN will be used to sync your remote control with the opener. Avoid easily guessable PINs, such as birthdays or sequential numbers.

Program the Remote Control Take the remote control that you want to pair with the RAM garage door opener. Locate the button that you intend to use to open and close the garage door. Press and release this button. Immediately afterward, press the “Learn” button on the garage door opener unit. The indicator light should flash, signaling that the remote control is successfully programmed.

Test the Remote Control After programming the remote control, it’s essential to test its functionality. Stand at a reasonable distance from the garage door, press the programmed button, and observe the door’s movement. If the door operates smoothly, your remote control is successfully programmed.

Programming Additional Remotes If you have multiple remote controls for your garage door opener, repeat the process outlined in Step 5 for each remote. This ensures that all your remotes are synchronized with the garage door opener.

Keypad Programming If your RAM garage door opener is equipped with a keypad for keyless entry, you may want to program it as well. Follow the instructions in your manual to set up a secure PIN for keypad entry. This enhances security and provides an alternative method for accessing your garage.

Homelink Compatibility Some vehicles come equipped with a feature called Homelink that allows you to program your garage door opener into the vehicle’s system. Refer to both your vehicle’s manual and the garage door opener manual for instructions on how to sync them.

Troubleshooting If you encounter any issues during the programming process, consult the troubleshooting section of your RAM garage door opener manual. Common issues include interference from other devices or a low battery in the remote control.

Conclusion:

Programming your RAM Garage Door Repair Arlington TX may seem daunting initially, but by following these step-by-step instructions, you ensure a smooth and successful setup. Regularly review your garage door opener manual for additional tips and maintenance guidelines to keep your system operating optimally. With a properly programmed garage door opener, you’ll enjoy the convenience and security it brings to your daily life.

Lake Arlington Gates & Garage Doors

4101 W Green Oaks Blvd #305-318, Arlington, TX 76016, United States

1-817-993-6623

What Hp Garage Door Opener Do I Need – Arlington Overhead & Garage Doors

Choosing the right horsepower (HP) for your  Garage Doors Repair Arlington TX is a critical decision that can impact the performance, longevity, and efficiency of your garage door system.

The appropriate HP depends on various factors, and understanding these considerations will guide you toward making an informed decision tailored to your specific needs.

1. Garage Door Size and Weight:

The size and weight of your garage door are primary considerations when determining the necessary HP for your opener. Single-car garage doors are generally lighter than double-car doors. Larger and heavier doors require more powerful openers. Measure the height, width, and weight of your garage door to assess its demands.

2. Door Material and Construction:

The material of your garage door influences its weight. Wooden doors, for instance, are heavier than aluminum or steel doors. Additionally, insulated doors, designed to regulate temperature, may be heavier. Consider the material and construction of your door when evaluating HP requirements.

3. Frequency of Use:

How often you use your garage door plays a crucial role in selecting the appropriate HP. If your garage door is frequently opened and closed, you might need a higher HP to handle the increased workload. Conversely, if your garage door is used sparingly, a lower HP might suffice.

4. Motor Type and Efficiency:

Garage door openers come with different motor types, including chain-driven, belt-driven, and screw-driven. Each type has its own efficiency and power requirements. Belt-driven systems are known for their quiet operation, while chain-driven systems are more economical. Consider the motor type and its efficiency when determining HP.

5. Climate Considerations:

Extreme weather conditions can affect the performance of your garage door opener. In regions with temperature extremes, a more powerful opener may be necessary to ensure smooth operation in adverse conditions. Additionally, consider the impact of humidity on the durability of the opener.

6. Additional Features and Technology:

Modern garage door openers often come with advanced features such as Wi-Fi connectivity, smart home integration, and battery backup systems. These additional features may influence the overall power requirements of the opener. Factor in these technological aspects when making your decision.

7. Professional Advice:

When in doubt, seek guidance from a professional garage door installer or technician. These experts can assess your specific garage door and usage patterns, providing personalized recommendations. A professional evaluation ensures that the chosen opener is well-matched to your garage door’s unique requirements.

8. Noise Preferences:

Consider your preference for noise levels. Higher HP openers may generate more power, but they can also produce more noise. If a quiet operation is essential, explore options such as belt-driven systems, which are known for their smooth and quiet performance.

In conclusion, selecting the right HP for your Garage Doors Repair Arlington TX is a nuanced decision that involves assessing your door’s size, weight, material, usage patterns, and desired features. Taking the time to understand these factors will lead to a well-informed decision, ensuring that your garage door opener meets the specific needs of your garage door and provides reliable, efficient operation for years to come. If uncertain, consulting with a professional ensures that you make the best choice for your unique circumstances.

Arlington Overhead & Garage Doors

817 – 646 – 2532

How To Program The Garage Door Opener In My Car – Lake Arlington Gates & Garage Doors

Programming a Garage Door Repair Arlington TX in your car can vary depending on the make and model of your vehicle and the type of garage door opener you have.

However, I can provide you with a general guide that should cover most scenarios. Please note that it’s essential to consult your car’s manual and your garage door opener’s manual for specific instructions, as there may be variations. Here’s a step-by-step guide:

1. Gather Information:

  • Locate the owner’s manual for your car and the manual for your garage door opener. These documents will provide specific instructions for your vehicle and opener model.

2. Identify the Type of Garage Door Opener:

  • Determine whether your garage door opener uses rolling code or fixed code technology. Rolling code systems are more secure and common in newer openers.

3. Locate the Car’s Garage Door Opener Buttons:

  • In most vehicles, the buttons to program your garage door opener are typically located on the rearview mirror, visor, or center console. Consult your car’s manual to find the exact location.

4. Clear Existing Codes:

  • If you’ve previously programmed the car with a different opener, it’s essential to clear any existing codes before programming a new one. This step may involve holding down specific buttons for a few seconds. Refer to your car’s manual for instructions.

5. Prepare the Garage Door Opener:

  • Find the “Learn” or “Program” button on your garage door opener. This button is usually located near the opener’s motor unit. Press and release it.

6. Enter Programming Mode on the Car:

  • In your car, press and hold the button you want to program for your garage door opener. Hold it until the indicator light on the rearview mirror or visor starts flashing rapidly (this usually takes 20-30 seconds). The flashing indicates that the car is in programming mode.

7. Program the Car with the Opener’s Code:

  • While the car is in programming mode (rapid flashing), aim the remote control from your garage door opener at the car’s button and press the button on the remote control. Hold it until the car’s indicator light changes behavior (e.g., stops flashing or flashes differently).

8. Test the Garage Door Opener:

  • To ensure the programming was successful, press the programmed button in your car and check if your garage door opens or closes. If it doesn’t work, repeat the programming steps, ensuring you follow the instructions accurately.

9. Repeat for Additional Buttons (if applicable):

  • If your car has multiple buttons for garage door openers, repeat the programming process for each button, using the same procedure.

10. Finalize the Programming: – Once you’ve successfully programmed your car with the garage door opener, confirm that it works reliably. If there are any issues, consult your manuals for troubleshooting tips.

11. Secure Your Opener and Remote: – Keep your garage door opener remote and your car’s owner’s manual in a secure place. If lost or stolen, someone could potentially access your garage.

12. Safety and Security Considerations: – Ensure your garage door opener is secure, and consider changing the access code periodically for security. Additionally, avoid programming your garage door opener in public places to prevent unauthorized access.

13. Seek Professional Help (if needed): – If you encounter difficulties or if your garage door opener is an advanced model with additional features, consider seeking assistance from a professional garage door technician or contacting the manufacturer for support.

In summary, programming a Garage Door Repair Arlington TX in your car involves a series of steps that may vary slightly depending on your specific car and garage door opener models. It’s crucial to follow the instructions provided in your vehicle’s manual and the garage door opener’s manual for precise guidance. By doing so, you can ensure that your garage door opener is programmed correctly, providing you with convenient access to your garage.

Lake Arlington Gates & Garage Doors

4101 W Green Oaks Blvd #305-318, Arlington, TX 76016, United States

1-817-993-6623

Choosing Insulated Garage Doors: Guidance from the Pros – Arlington Overhead & Garage Doors

As a homeowner who values energy efficiency, comfort, and the overall functionality of my living space, I recently embarked on a journey to upgrade my garage doors to insulated ones. The decision wasn’t made in haste; it involved careful consideration and guidance from professional experts in the field.

By following Garage Door Repair Arlington TX, choosing insulated garage doors, highlighting the invaluable advice and insights I received from the pros along the way.

1. The Initial Motivation

The journey toward insulated garage doors began when I noticed several recurring issues related to my existing garage doors:

  • Temperature Fluctuations: My garage often felt like an oven in the summer and an icebox in the winter, making it an uncomfortable space for various activities.
  • Energy Efficiency: I realized that my HVAC system had to work harder to compensate for the temperature extremes in the garage, leading to increased energy bills.
  • Noise Levels: The non-insulated garage doors allowed noise from the street and neighborhood to penetrate, affecting the tranquility of my home.

My Experience: The motivation to address these issues prompted me to explore the benefits of insulated garage doors.

2. Seeking Professional Guidance

Understanding the complexity of garage door upgrades, I decided to consult professionals who specialized in garage doors and insulation. Their expertise was invaluable in making informed decisions.

Expert Tip: When seeking professional guidance, look for garage door companies with a proven track record, experience with insulation, and a commitment to customer satisfaction.

My Experience: I contacted a local garage door company with a reputation for excellence. The technician who arrived for the consultation was not only knowledgeable but also a great communicator.

3. Understanding Insulation Options

One of the initial topics of discussion revolved around the various insulation options available for garage doors. Insulated garage doors typically feature one of the following types of insulation:

  • Polystyrene (EPS): This type of insulation consists of rigid foam panels inserted into the door’s core. It offers good insulation and soundproofing properties.
  • Polyurethane: Polyurethane insulation is sprayed into the door’s core, expanding and adhering to the surface. It provides superior insulation and structural reinforcement.

Expert Tip: The choice between polystyrene and polyurethane insulation depends on your climate, budget, and desired level of insulation.

My Experience: The technician explained the differences between these insulation types and their respective benefits. They also provided recommendations based on my local climate and insulation needs.

4. Assessing R-Values

Understanding the R-value of insulation is essential when choosing insulated garage doors. The R-value measures the insulation’s effectiveness—the higher the R-value, the better the insulation.

Expert Tip: Consult with a professional to determine the appropriate R-value for your garage door based on your climate and insulation goals.

My Experience: The technician conducted an assessment of my garage and recommended insulated doors with an R-value suitable for my region. This ensured that my garage would remain comfortable year-round.

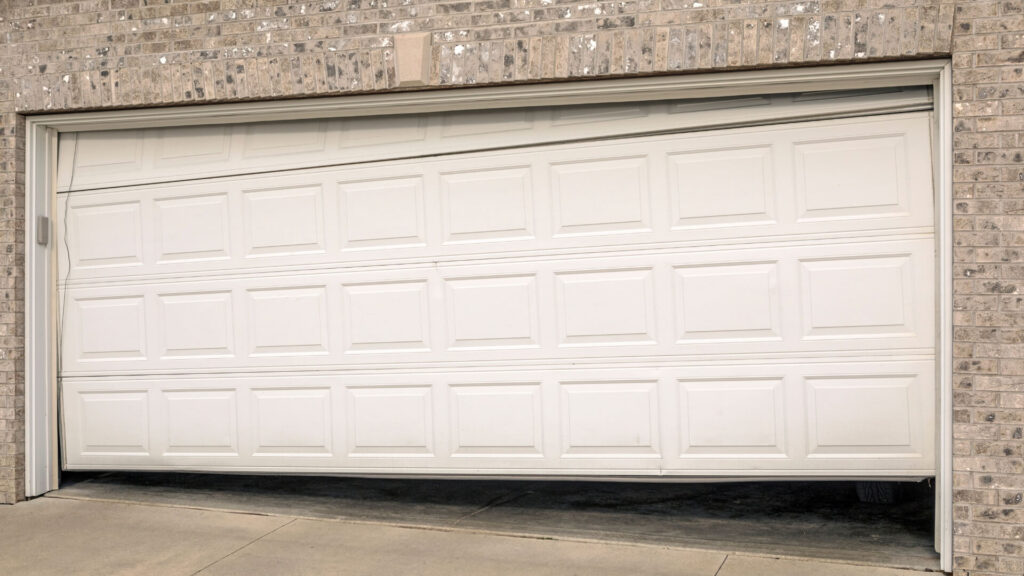
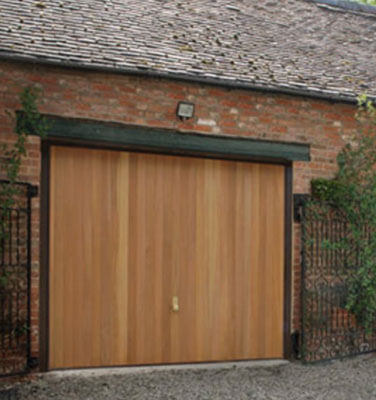
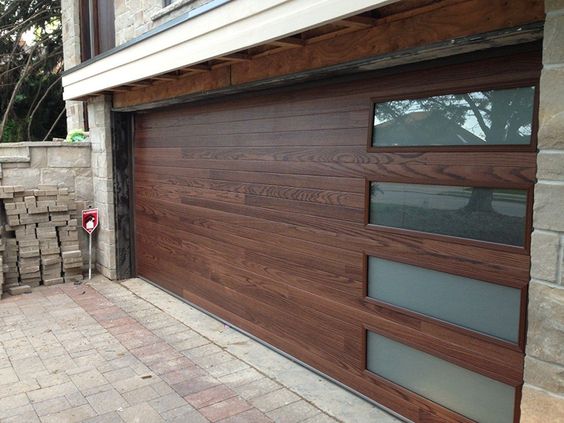
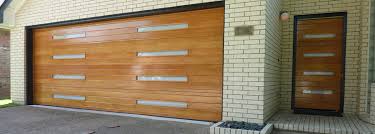
5. Material Selection

Insulated garage doors are available in various materials, including steel, aluminum, and wood. The choice of material can impact not only the insulation but also the aesthetics and maintenance requirements.

Expert Tip: Consider factors such as durability, maintenance, and design preferences when selecting the material for your insulated garage doors.

My Experience: I appreciated the technician’s insight into material options. We discussed the advantages of steel for its durability and low maintenance, which aligned with my preferences.

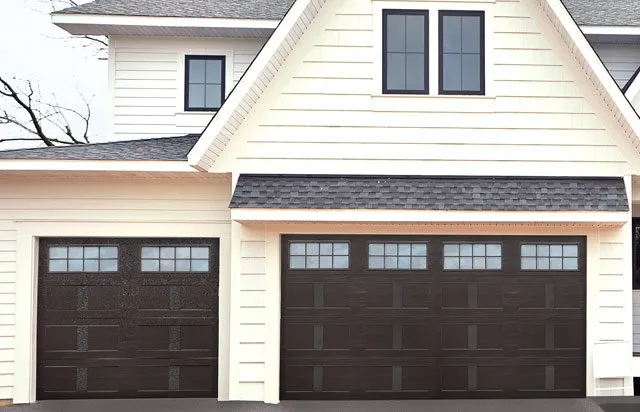
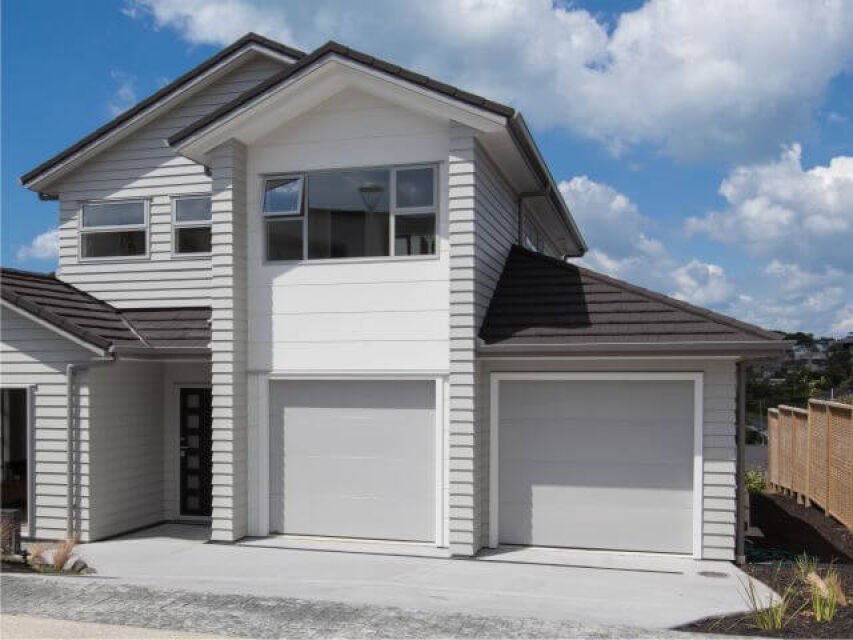
6. Aesthetics and Design

The aesthetics of garage doors play a significant role in enhancing a home’s curb appeal. I consulted with the professionals on design options that complemented my home’s architectural style.

Expert Tip: Look for garage door manufacturers that offer a variety of design options, including colors, finishes, and window styles, to match your home’s exterior.

My Experience: The technician showed me catalogs of insulated garage doors with various design elements. We discussed customization options to ensure the doors blended seamlessly with my home’s exterior.
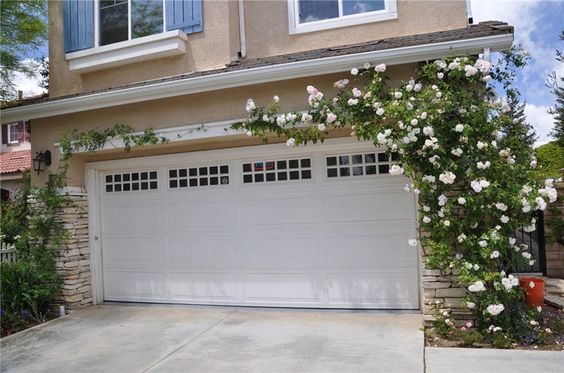
7. Window Choices

For those interested in adding windows to their insulated garage doors, there are several window styles and placement options to consider. Windows not only enhance the visual appeal but also allow natural light into the garage.

Expert Tip: Discuss window choices with a professional to ensure they complement the door’s design and maintain insulation efficiency.

My Experience: I decided to incorporate windows into my insulated garage doors to improve natural lighting. The technician helped me select window styles and placements that aligned with the overall design.

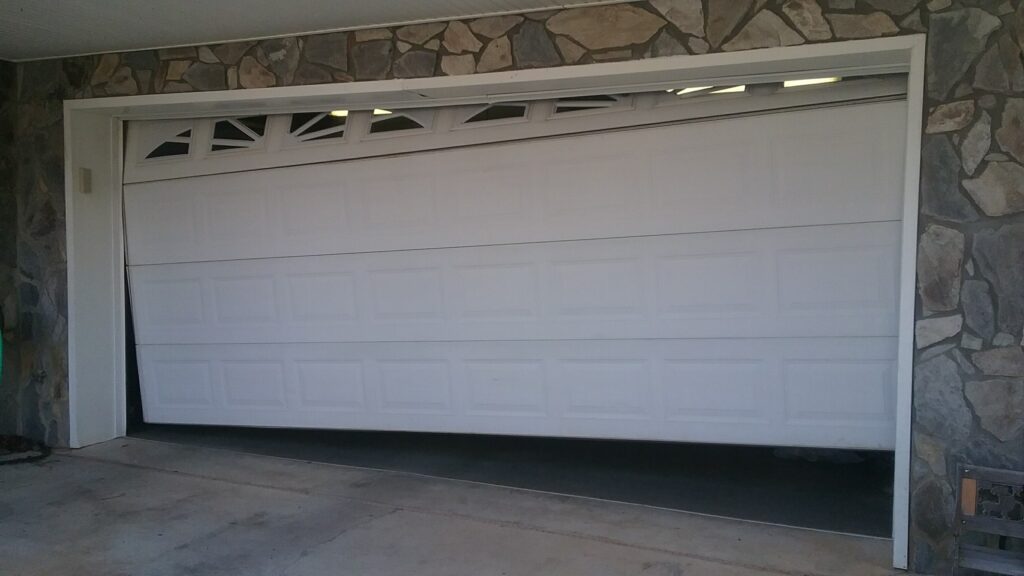
8. Professional Installation

One of the most crucial aspects of the process was professional installation. Even the best-insulated garage doors won’t perform optimally without proper installation by experienced technicians.

Expert Tip: Choose a reputable garage door company that offers professional installation services to ensure the doors are installed correctly.

My Experience: The installation process was efficient and meticulous. The technicians paid attention to detail, ensuring that the insulated doors were fitted snugly and sealed properly.

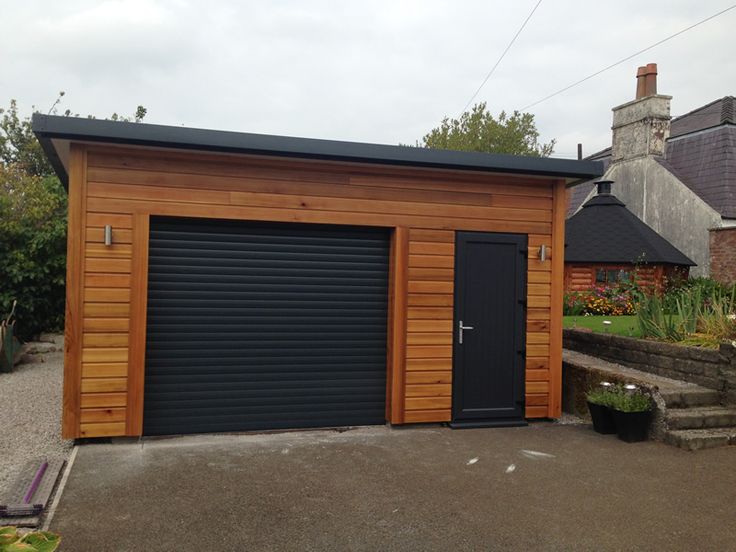
9. Additional Benefits

During the consultation, the professionals highlighted several additional benefits of insulated garage doors:

  • Improved Durability: Insulated doors often have a reinforced structure that enhances their durability and resistance to damage.
  • Soundproofing: The insulation not only regulates temperature but also reduces noise from outside, creating a quieter indoor environment.
  • Energy Savings: With improved insulation, my HVAC system no longer had to work as hard, resulting in reduced energy bills.

Expert Tip: Consider the long-term benefits of insulated garage doors, such as energy savings and increased property value.

My Experience: Learning about these added benefits solidified my decision to invest in insulated garage doors. The long-term advantages made the investment worthwhile.

10. Personal Satisfaction

The culmination of the process was the satisfaction of seeing my new insulated garage doors in place. The transformation was remarkable, both in terms of aesthetics and functionality.

My Experience: The newly installed insulated garage doors not only looked fantastic but also improved the comfort of my garage space. I no longer experienced extreme temperature fluctuations, and the reduction in outside noise was noticeable.

Conclusion

In summary, as stated in Garage Door Repair Arlington TX, choosing insulated garage doors, with guidance from the pros, was a decision that significantly enhanced the comfort, energy efficiency, and security of my home. The invaluable advice and expertise provided by professionals in the field ensured that I made informed choices throughout the process. The end result was not just functional garage doors but an upgrade that added value to my property and improved my overall quality of life. For homeowners seeking similar improvements, consulting with experts in garage door insulation is a step toward a more comfortable and energy-efficient living space.

Arlington Overhead & Garage Doors

700 Secretary Dr, Arlington, TX 76015, United States

817-646-2532

How To Reprogram Garage Door Opener Remote – Arlington Overhead & Garage Doors

Reprogramming a Garage Door Repair Arlington TX is a relatively straightforward process that allows you to control your garage door with ease and security.

Whether you’re setting up a new remote or need to reprogram an existing one due to malfunction or security concerns, this guide will walk you through the step-by-step process. By following these instructions, you’ll regain control over your garage door access and ensure your home’s safety.

Before you begin, ensure you have the following items ready:

  • A ladder (if needed to access the garage door opener unit)
  • Your garage door opener’s owner’s manual
  • The remote control you want to reprogram
  • A pen and paper for jotting down codes (optional)
  1. Clearing Old Codes:

a. Locate the “Learn” or “Smart” button on your garage door opener unit. This button is typically found on the back or side of the opener motor, near the lightbulb.

b. To clear old codes, press and hold the “Learn” button for about 10 seconds until the indicator light next to it turns off. This erases all previously programmed codes.

  1. Preparing Your Remote:

a. If your remote has a battery compartment, open it and ensure the battery is working. Replace the battery if needed.

b. Check the remote’s buttons to identify the “Program,” “Learn,” or “Sync” button. This button may vary depending on the remote model.

  1. Syncing the Remote to the Garage Door Opener:

a. Stand close to the garage door opener unit, typically within 20 feet.

b. Press and release the “Learn” button on the garage door opener unit. The indicator light should light up or blink, indicating that it’s ready to accept a new code.

c. Within 30 seconds of pressing the “Learn” button, press and hold the “Program,” “Learn,” or “Sync” button on your remote. Continue holding until the garage door opener unit’s indicator light blinks or flashes.

d. Release the remote button and wait for the indicator light on the garage door opener unit to turn off or stop flashing. This indicates successful programming.

e. If you have multiple remotes to program, repeat steps b to d for each one, using the same “Learn” button on the garage door opener.

  1. Testing the Remote:

a. Stand back and press the button on your newly programmed remote. The garage door should respond by opening or closing.

b. Test the remote from different distances and angles to ensure it functions reliably.

  1. Troubleshooting Tips:

a. If the garage door doesn’t respond to the remote, check the following:

  • Ensure the battery in the remote is not depleted.
  • Verify that you followed the programming steps correctly.
  • Make sure you’re within range of the garage door opener when testing the remote.

b. If problems persist, consult your garage door opener’s owner’s manual for specific troubleshooting instructions or contact the manufacturer’s customer support.

  1. Conclusion:

Reprogramming a Garage Door Repair Arlington TX is an essential skill for every homeowner. By following these steps and consulting your owner’s manual, you can regain control over your garage door access and enhance your home’s security. Remember to keep your remote in good working order and reprogram it whenever necessary to maintain the safety and convenience of your home.

Arlington Overhead & Garage Doors

700 Secretary Dr, Arlington, TX 76015, United States

1-817-646-2532

Can Garage Door Openers Be Reprogrammed – Lake Arlington Gates & Garage Doors

Lake Arlington Gates & Garage Doors openers can indeed be reprogrammed. Reprogramming a garage door opener involves resetting its programming codes and synchronizing it with the remote controls, wireless keypads, and other accessories. Reprogramming might be necessary for various reasons, such as adding new remotes, addressing remote malfunctions, enhancing security, or resolving issues with the existing programming.

Here’s a comprehensive guide on how to reprogram a garage door opener:

  1. Check the Manual: The first step is to consult the manufacturer’s manual that came with your garage door opener. Different models and brands have varying reprogramming procedures, and the manual will provide you with accurate instructions specific to your opener.
  2. Access the Programming Button: Most garage door openers have a programming or “Learn” button located on the opener itself. This button is usually found on the motor unit near the ceiling of the garage. You might need a ladder to reach it.
  3. Clear Existing Codes: To start reprogramming, you usually need to clear out the existing codes from the opener’s memory. This ensures that only the remotes you want to use can access the garage. To do this, press and hold the programming button until the indicator light on the opener blinks or changes in some way.
  4. Select a Remote: With the opener’s memory cleared, you can now reprogram the remotes one by one. Press the button on the remote you want to program. Some openers require you to do this within a certain timeframe after clearing the memory.
  5. Programming Confirmation: After pressing the remote button, the opener’s indicator light might change again, confirming that the remote has been successfully programmed. This light might flash, turn solid, or change color depending on your opener model.
  6. Repeat for Additional Accessories: If you have additional accessories like wireless keypads or car homelink systems, follow similar steps to program them. You might need to enter a PIN on the keypad or follow the car’s instructions for homelink programming.
  7. Test the Programming: Once you’ve programmed all the devices you want to use with your opener, test them to ensure they open and close the garage door as expected. This step is crucial to make sure the reprogramming was successful.
  8. Troubleshooting: If you encounter any issues during reprogramming, consult the manual for troubleshooting guidance. If problems persist, you can contact the manufacturer’s customer support or a professional garage door technician for assistance.
  9. Secure Code Changes: Some garage door openers use rolling codes for security. This means that the code sent by the remote changes each time the door is operated. When reprogramming, the opener and the remote need to be in sync with the new codes.
  10. Document the Changes: It’s a good practice to document the changes you’ve made, especially if you have multiple remotes or accessories. This helps you keep track of what’s programmed and makes future adjustments easier.
  11. Regular Maintenance: Remember that garage door openers, like any other technology, require regular maintenance. Keep the opener clean, ensure components are well-lubricated, and check the batteries in your remote controls periodically.
  12. Professional Help: If you’re unsure about reprogramming or encounter technical difficulties, consider seeking help from a professional garage door technician. They can ensure the programming is done correctly and troubleshoot any issues.

In conclusion, reprogramming a Lake Arlington Gates & Garage Doors opener involves clearing existing codes and then programming new remote controls and accessories. The process varies slightly based on the model and brand of the opener, so always refer to the manufacturer’s manual for accurate instructions. Reprogramming allows you to manage and control access to your garage, enhance security, and address any issues related to remote functionality.

Lake Arlington Gates & Garage Doors

4101 W Green Oaks Blvd #305-318, Arlington, TX 76016, United States

1-817-993-6623

How Tall Is An RV Garage Door – Arlington Overhead & Garage Doors

An RV Arlington Overhead & Garage Doors is designed to accommodate the height of recreational vehicles, motorhomes, campers, and other large vehicles. The height of an RV garage door can vary depending on the size of the vehicles it needs to accommodate and the specific dimensions of the garage.

In this guide, we’ll discuss the typical heights of RV garage doors, factors that influence the height, and considerations for choosing the right size for your RV storage needs.

1. Standard RV Garage Door Heights:

  • RV garage doors are commonly available in heights ranging from 12 feet to 16 feet. However, these heights can vary based on the manufacturer, region, and individual garage design.

2. Factors That Influence RV Garage Door Height:

  • RV Size: The height of your RV garage door will largely depend on the size of your RV. Measure your RV from the ground to the highest point, which is usually the roof or the top of any roof-mounted accessories.
  • Roof-Mounted Accessories: If your RV has roof-mounted accessories like air conditioning units or satellite dishes, make sure to include their height when determining the required door height.
  • Garage Design: The garage’s overall design, including the ceiling height and structure, will influence the maximum height of the garage door. A higher ceiling allows for taller garage doors.

3. Choosing the Right RV Garage Door Height:

  • Measure Your RV: Begin by accurately measuring the height of your RV, including any roof-mounted accessories. Measure from the highest point of the RV to the ground.
  • Add Clearance: To ensure your RV fits comfortably and to allow for any variations, add some extra clearance to the measured height. A general rule of thumb is to add 1 to 2 feet of additional clearance.
  • Account for Door Tracks: Remember that the garage door tracks and opener mechanism will also take up some vertical space, so account for that in your calculations.
  • Check Local Codes and Regulations: Some areas have building codes and regulations that dictate the maximum height of structures, including garage doors. Check with your local authorities to ensure compliance.

4. Considerations for Choosing RV Garage Door Height:

  • Future RV Upgrades: If you plan on upgrading to a larger RV in the future, it’s a good idea to choose a garage door that accommodates the larger size to avoid needing a new door later.
  • Storage Options: If your RV has slide-outs or awnings, make sure the garage door height allows for these features to remain extended while parked inside.
  • Customization: Some manufacturers offer custom garage door sizes to meet specific height requirements. Custom doors can be a great option if you have unique needs.

5. Professional Advice:

  • Consulting with a professional garage door installer or contractor is highly recommended when choosing an RV garage door height. They can assess your RV’s size, the available garage space, and any local regulations to recommend the most appropriate door height.

Conclusion:

The height of an RV Arlington Overhead & Garage Doors varies depending on the size of the vehicles it needs to accommodate and the design of the garage. To determine the right height for your RV garage door, accurately measure the height of your RV, add clearance for comfort, and consider any roof-mounted accessories. It’s essential to choose a garage door height that provides ample space for your RV and meets local regulations. Seeking advice from professionals can help ensure you make the right decision for your specific RV storage needs.

Arlington Overhead & Garage Doors

700 Secretary Dr, Arlington, TX 76015, United States

1-817-646-2532

The Importance of Regular Garage Door Maintenance in US Homes – Arlington Overhead & Garage Doors

As a homeowner living in the United States, I’ve come to realize the significance of regular garage door maintenance for the overall functionality and security of my property. My garage door isn’t just an ordinary entrance; it’s a crucial element that provides access, protection, and even adds to the aesthetic appeal of my home. Over time, I’ve learned that neglecting the maintenance of this essential part of my house can lead to a host of problems.

By following Garage Door Repair Arlington TX, I’ll delve into why regular garage door maintenance is of utmost importance for homeowners like me, exploring the numerous benefits it offers in terms of safety, durability, convenience, and peace of mind.

1. Smooth Operation for Daily Convenience

Every time I press that button to open or close my garage door, I’m reminded of the intricate system at play. The rollers, tracks, springs, and cables work in harmony to ensure smooth and efficient movement. However, like any mechanical system, wear and tear are inevitable over time. Regular maintenance ensures that these components are well-lubricated, properly aligned, and free from debris.

By investing in regular garage door maintenance, I’m guaranteeing that my daily routine isn’t disrupted by unexpected malfunctions. I can rely on my garage door to open and close smoothly, saving me time and frustration.

2. Preventing Costly Repairs

One of the most compelling reasons for me to prioritize regular garage door maintenance is the financial aspect. It’s easy to overlook minor issues, assuming they’re inconsequential. However, these seemingly small problems can escalate into major repair needs if left unaddressed.

By having professionals inspect and service my garage door on a regular basis, I’m catching potential problems early. This proactive approach not only saves me money in the long run but also spares me from the stress and inconvenience of dealing with sudden breakdowns.

3. Ensuring Home Security

My garage door serves as a crucial line of defense for my home. A malfunctioning garage door can compromise the security of my property, making it vulnerable to unauthorized access. Regular maintenance involves checking the safety features of the garage door, such as sensors and auto-reverse mechanisms. Ensuring that these safety features are in perfect working condition gives me peace of mind, knowing that my home is protected.

As a homeowner, there’s nothing more reassuring than the knowledge that my garage door is functioning properly and contributing to the security of my loved ones and my possessions.

4. Extending the Lifespan

Every component of my home has a finite lifespan, and my garage door is no exception. However, with regular maintenance, I’m effectively extending the life of this vital feature. The preventive measures taken during maintenance appointments, such as tightening loose bolts, adjusting springs, and addressing minor issues, contribute to the overall durability of the garage door.

By investing in its maintenance, I’m making a wise long-term decision that helps me get the most out of my garage door before even considering a replacement.

5. Energy Efficiency and Sustainability

In an era where energy efficiency and environmental consciousness are paramount, my garage door plays a role in this narrative as well. A well-maintained garage door with proper insulation and seals contributes to a more energy-efficient home. It prevents cold drafts in the winter and hot air infiltration in the summer, ultimately reducing my energy consumption and lowering utility bills.

By maintaining an energy-efficient garage door, I’m not only creating a comfortable environment within my garage but also making a small yet meaningful contribution to a more sustainable way of living.

6. Preserving Curb Appeal and Property Value

My home’s curb appeal is a reflection of my pride in homeownership. An aging and deteriorating garage door can detract from the overall aesthetics of my property. Regular maintenance involves addressing cosmetic concerns such as repainting, replacing damaged panels, and ensuring that the door operates silently.

Maintaining a visually appealing garage door enhances the curb appeal of my home and contributes to its market value. It sends a positive message to visitors and potential buyers, highlighting the care and attention I invest in maintaining my property.

7. Responsible Homeownership

Owning a home comes with a sense of responsibility, and regular garage door maintenance is an integral part of that commitment. It’s a practice that demonstrates my dedication to ensuring that every aspect of my property is in optimal condition.

Incorporating regular maintenance into my routine aligns with my values of being a responsible homeowner. It’s a practical way to take care of my investment, ensure the safety of my family, and contribute to the overall well-being of my household.

Conclusion: The Foundation of a Well-Functioning Home

Regular garage door maintenance is not just a task; it’s a vital aspect of responsible homeownership. By prioritizing this practice, I’m ensuring that my garage door operates smoothly, efficiently, and safely. From preventing costly repairs to extending the lifespan of the door, maintaining home security, and enhancing energy efficiency, the benefits of regular maintenance are numerous.

As a homeowner, based from Garage Door Repair Arlington TX, I take pride in maintaining a well-functioning home, and my garage door is no exception. By investing in its regular maintenance, I’m investing in the comfort, security, and value of my property. With each maintenance appointment, I’m not just servicing a mechanical system; I’m nurturing an essential component of my home that contributes to the overall harmony and functionality of my living space.

Arlington Overhead & Garage Doors

700 Secretary Dr, Arlington, TX 76015, United States

817-646-2532

How do You Program a Clicker Garage Door Opener-Garage Door Experts of North Arlington

Programming a Clicker Garage Door Repair Arlington TX opener involves several steps.

Below, I’ll provide a detailed guide with instructions on how to program a Clicker garage door opener. Please note that the specific steps may vary depending on the model of your Clicker garage door opener. It’s always recommended to refer to the user manual provided by the manufacturer for precise instructions.

Step 1: Determine Compatibility Before programming your Clicker garage door opener, ensure that it’s compatible with your garage door opener system. Check the Clicker opener’s user manual or packaging to confirm compatibility with your garage door opener model.

Step 2: Clear the Opener’s Memory If you have previously programmed your Clicker garage door opener or if it was used with another garage door opener system, you’ll need to clear its memory before proceeding with programming. To do this, locate the “Learn” or “Smart” button on the opener, typically found on the back or side. Press and hold the button until the LED light on the opener blinks or turns off, indicating that the memory has been cleared.

Step 3: Prepare the Clicker Garage Door Opener On your Clicker garage door opener, locate the “Learn” or “Smart” button. This button is used to initiate the programming process. The location of this button can vary depending on the model, so consult the user manual or manufacturer’s instructions to locate it.

Step 4: Determine Opener Type Identify the type of garage door opener you have: DIP switch or rolling code. This information is crucial to ensure the programming process is done correctly.

  • DIP Switch Opener: If your garage door opener uses DIP switches, follow these sub-steps: a) Open the Clicker remote’s battery compartment and locate the DIP switches. b) Note the positions of the switches. They can be either up or down. c) On the Clicker remote, set the DIP switches to match the positions of the switches on your garage door opener system.
  • Rolling Code Opener: If your garage door opener uses a rolling code system, follow these sub-steps: a) Locate the “Learn” or “Smart” button on the Clicker remote. b) Press and release the “Learn” button on the garage door opener. The LED light on the opener should light up or blink, indicating it is in programming mode. c) Within 30 seconds, press and hold the “Learn” button on the Clicker remote. The LED light on the opener should flash, confirming the successful programming of the remote.

Step 5: Test the Programming To ensure that the programming was successful, test the Clicker garage door opener by pressing the programmed button on the remote. The garage door should respond by opening or closing accordingly. If the door doesn’t respond, repeat the programming process from Step 3 onwards, making sure to follow the instructions accurately.

Step 6: Program Additional Buttons (if applicable) If your Clicker garage door opener supports multiple buttons, you can program additional buttons to control other garage doors or devices. Repeat Steps 3 to 5 for each additional button you want to program, following the same process.

Step 7: Finalize the Programming Once you have programmed all the desired buttons, close the battery compartment on the Clicker remote. Test each programmed button again to ensure they all function correctly. If any issues arise, refer to the troubleshooting section of the user manual or contact the manufacturer’s customer support for assistance.

In summary, programming a Clicker Garage Door Repair Arlington TX opener involves determining compatibility, clearing the opener’s memory, preparing the Clicker remote, identifying the opener type (DIP switch or rolling code), setting the appropriate switches or using the “Learn” button, testing the programming, and programming additional buttons if required. Following these steps will help you successfully program your Clicker garage door opener and enjoy the convenience of remote operation.

Garage Door Experts of North Arlington

711 Trinity Cir, Arlington, TX 76006, United States

817-383-2114

Page 1 of 2

Powered by WordPress & Theme by Anders Norén