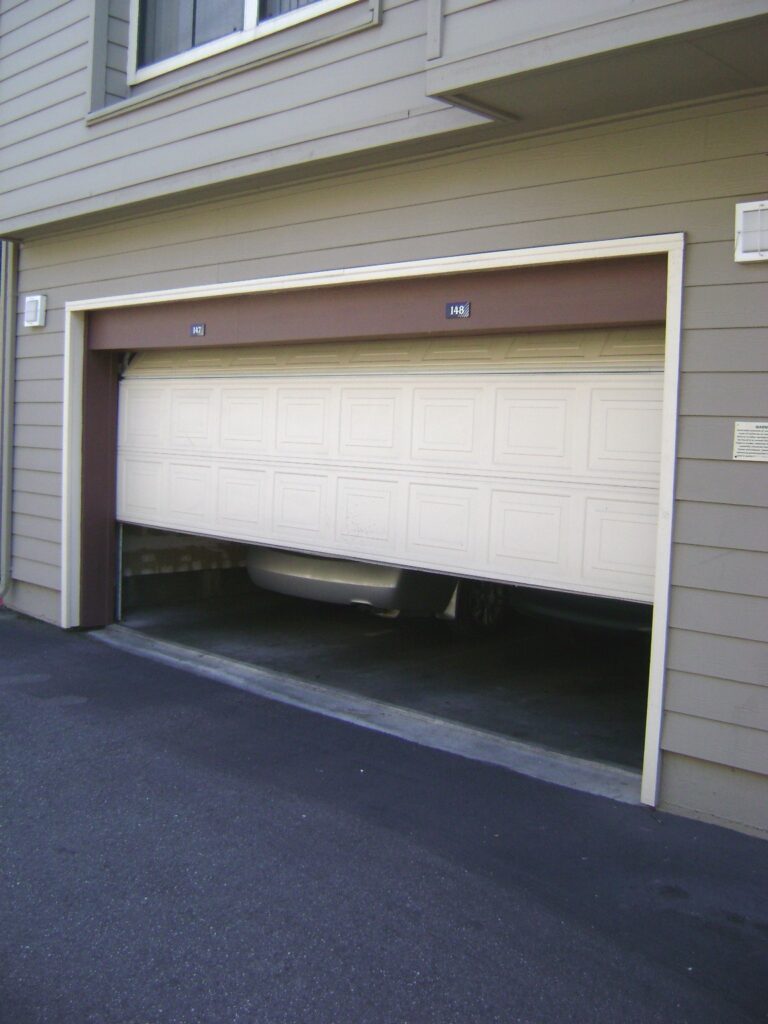
While the Garage Door Repair Richmond TX itself provides the motorized mechanism for raising and lowering the door, the springs are essential components that counterbalance the weight of the door, making it easier for the opener to operate and ensuring smooth and efficient movement.
Here’s why springs are necessary for a garage door opener:
Counterbalancing the Weight: Garage doors are heavy, especially those made of materials like steel or wood. Without springs, the opener would have to bear the full weight of the door every time it opens or closes, placing excessive strain on the motor and other components. The springs offset a significant portion of the door’s weight, reducing the workload on the opener and extending its lifespan.
Facilitating Smooth Operation: Springs play a crucial role in ensuring that the garage door opens and closes smoothly and evenly. By counterbalancing the weight of the door, the springs help distribute the force exerted by the opener, preventing jerky or uneven movement. This results in quieter operation and reduces wear and tear on the opener and other hardware.
Minimizing Strain on the Opener: Garage door openers are designed to handle a specific weight capacity, and exceeding this capacity can lead to premature failure or damage. By using springs to offset the weight of the door, the opener operates within its intended limits, reducing the risk of mechanical issues and prolonging its lifespan.
Emergency Manual Operation: In the event of a power outage or malfunction, the springs allow for manual operation of the garage door. By disengaging the opener and relying on the tension provided by the springs, homeowners can still open and close the door manually, ensuring access to the garage even when the opener is not functional.
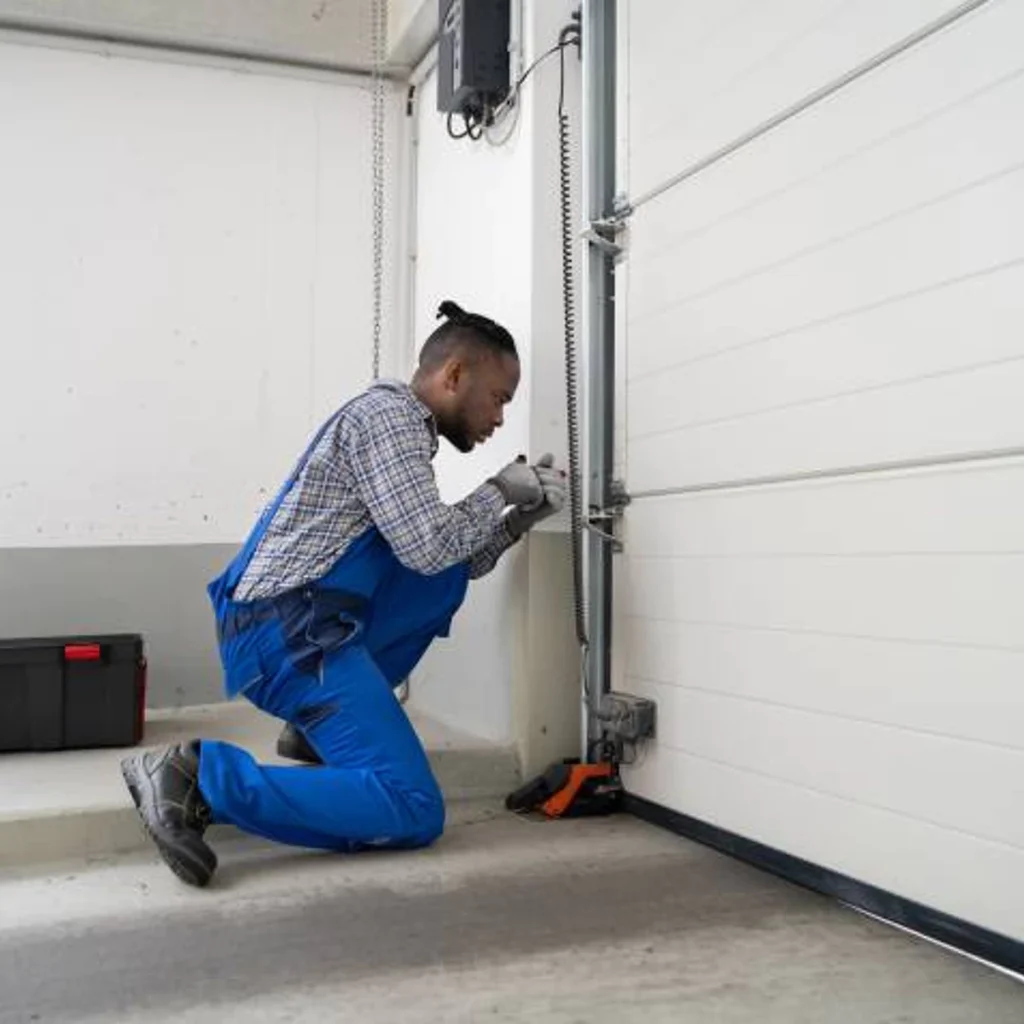
There are two main types of springs used in garage door systems: torsion springs and extension springs. Torsion springs are mounted horizontally above the door and wind up to store energy, while extension springs are typically mounted on either side of the door and stretch to provide tension. Both types of springs serve the same purpose of counterbalancing the weight of the door, allowing for smooth and efficient operation of the opener.
Garage Door Repair El Paso TX It’s essential to follow proper procedures and safety precautions when replacing these springs.
In this comprehensive guide, we’ll walk you through the step-by-step process of replacing torsion springs on a garage door:
Materials You’ll Need:
Replacement torsion springs (matched to the specifications of your garage door)
Winding bars or rods (two)
Adjustable wrench
Socket wrench set
Vice grips or locking pliers
Ladder or step stool
Safety glasses
Gloves
Helper (optional but recommended)
Step-by-Step Guide:
Step 1: Gather Safety Gear and Tools:
Before you begin, ensure you have all the necessary safety gear and tools listed above. Wear safety glasses to protect your eyes from any flying debris and gloves to protect your hands.
Step 2: Release Tension on Existing Springs:
If the garage door has existing torsion springs, you must release the tension on them before removing them. Use winding bars or rods inserted into the winding cones on each side of the spring to unwind it. Turn the bars slowly and evenly to release tension until the spring is fully unwound.
Step 3: Disconnect Cables and Remove Old Springs:
Once the tension is released, use an adjustable wrench to loosen the set screws on the winding cones. Slide the cables off the pulleys, and then slide the springs off the torsion tube. Be cautious as the springs may still have some tension.
Step 4: Install New Springs:
Carefully slide the new torsion springs onto the torsion tube, ensuring they are oriented correctly with the winding cones facing towards the center of the garage door. Reattach the cables to the pulleys.
Step 5: Wind the Springs:
Using winding bars or rods, slowly and evenly wind the new torsion springs. Follow the manufacturer’s instructions for the number of turns required based on the weight of your garage door. Be extremely cautious during this step, as the springs will be under tension.
Step 6: Secure Set Screws:
Once the springs are wound to the appropriate tension, tighten the set screws on the winding cones securely using an adjustable wrench. Make sure the set screws are tightened evenly on both sides.
Step 7: Test the Door:
With the springs installed and tensioned, manually lift and lower the garage door to ensure it operates smoothly and evenly. If the door feels balanced and operates correctly, you have successfully replaced the torsion springs.
Step 8: Safety Inspection:
Perform a thorough safety inspection of the garage door system, checking for any loose or damaged components. Make sure all bolts, nuts, and screws are tightened securely, and that cables are properly aligned and not frayed.
Step 9: Final Adjustments (if necessary):
If the garage door does not operate smoothly or feels unbalanced, you may need to make further adjustments to the spring tension or other components. Refer to the manufacturer’s instructions or consult a professional garage door technician for assistance.
Step 10: Dispose of Old Springs Safely:
Dispose of the old torsion springs safely and responsibly, taking care to avoid any injuries or accidents.
Safety Precautions:
Always wear safety glasses and gloves when working with garage door springs.
Use caution and follow proper procedures to release tension on existing springs.
Never attempt to unwind or adjust torsion springs without the proper tools and knowledge.
Consider seeking professional assistance if you are unsure or uncomfortable with any aspect of the spring replacement process.
Garage Door Repair El Paso TX If you’re unsure about any aspect of the process, don’t hesitate to seek professional assistance.
El Paso Garage Door Repair
11394 James Watt Dr #603, El Paso, TX 79936, United States
In this comprehensive guide, I’ll walk you through the process of installing a Garage Door Repair Knoxville TN opener in covering each step in detail to help you determine if it’s a task you feel comfortable tackling:
Assess Your Skills and Tools:
Before starting the installation, consider your level of DIY experience and the tools you have available. While installing a garage door opener is relatively straightforward, it does require some mechanical skills and familiarity with basic hand tools. Make sure you have the following tools on hand:
Power drill with various drill bits
Screwdrivers (Phillips and flat-head)
Adjustable wrench
Pliers
Tape measure
Level
Stepladder
Choose the Right Opener:
Selecting the right garage door opener is essential for a successful installation. Consider factors such as the type and weight of your garage door, the size of your garage, and any additional features you may want, such as Wi-Fi connectivity or battery backup. Choose a reputable brand and model that meets your needs and budget.
Prepare the Garage Door:
Before installing the opener, ensure that your garage door is in good working condition and properly balanced. Inspect the door and its hardware for any signs of damage or wear, such as frayed cables or worn rollers. Make any necessary repairs or adjustments before proceeding with the opener installation.
Gather the Necessary Materials:
Before starting the installation, gather all the components and materials included with your garage door opener kit. This typically includes the opener unit, rail assembly, mounting hardware, safety sensors, remote controls, and wall control panel. Check the manufacturer’s instructions to ensure you have everything you need.
Follow the Manufacturer’s Instructions:
Each garage door opener model comes with specific installation instructions provided by the manufacturer. Carefully read through the installation manual before starting, familiarizing yourself with each step and the required tools and hardware. Following the manufacturer’s instructions is crucial for a safe and successful installation.
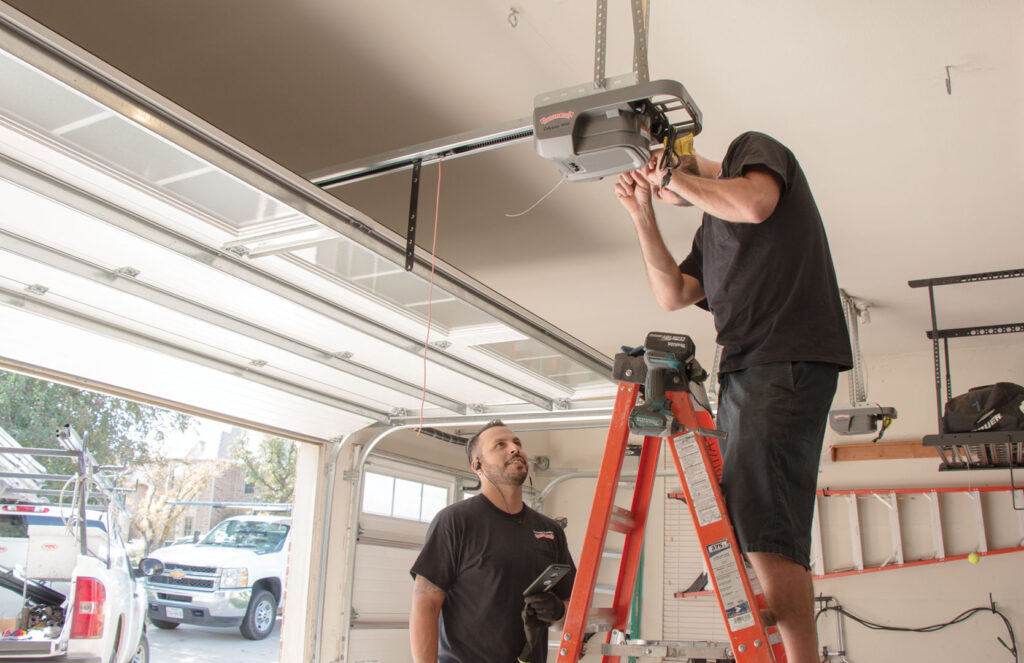
Install the Opener Unit:
Begin by installing the opener unit itself. This typically involves mounting the motor unit to the ceiling of your garage using sturdy brackets and securing it in place with bolts or screws. Make sure the opener is centered and level to ensure smooth operation.
Install the Rail Assembly:
Next, assemble and install the rail assembly that connects the opener unit to the garage door. Follow the manufacturer’s instructions to properly align and secure the rail sections, ensuring they are level and straight. Use a tape measure and level to verify the alignment.
Attach the Trolley and Drive System:
Attach the trolley to the rail assembly and connect it to the drive system of the opener unit. This component is responsible for moving the garage door along the rail when opening and closing. Follow the manufacturer’s instructions to properly install and adjust the trolley for smooth operation.
Install Safety Sensors:
Safety sensors are a crucial component of any garage door opener system, preventing the door from closing if an obstruction is detected in its path. Mount the sensors on each side of the garage door opening, aligning them according to the manufacturer’s instructions. Test the sensors to ensure they are functioning correctly.
Connect the Controls:
Connect the wall control panel and any remote controls included with your garage door opener kit. Follow the manufacturer’s instructions to properly wire and program the controls, ensuring they operate the door smoothly and reliably. Test each control to verify functionality.
Test the Opener:
Before using your new garage door opener, perform a thorough test of the entire system. Open and close the door several times using both the wall control panel and remote controls, checking for smooth operation and proper alignment. Make any necessary adjustments as needed.
Conclusion:
With proper installation and maintenance, your new Garage Door Repair Knoxville TN will provide years of reliable service for you and your family.
Resetting a Garage Door Repair Volo IL opener is a relatively simple process that can be done in just a few steps. Whether you need to clear out old programming or troubleshoot issues with your opener, resetting it can often resolve the problem.
Here’s a detailed guide on how to reset your garage door opener in 1000 words:
Locate the Learn Button: The first step in resetting your LiftMaster garage door opener is to locate the “Learn” button on the motor unit. This button is typically found on the back or side of the opener, near the antenna wire. It may be colored red, yellow, or purple, depending on the model of your opener.
Determine the Type of Opener: LiftMaster garage door openers come in different models and variations, each with its own method for resetting. Before proceeding, identify whether your opener uses a “Learn” button or a different method for programming and resetting. Refer to the owner’s manual or manufacturer’s instructions for your specific model if you’re unsure.
Press and Hold the Learn Button: If your LiftMaster opener features a “Learn” button, the next step is to press and hold this button for approximately 6-10 seconds. The exact duration may vary depending on the model, so refer to the manufacturer’s instructions for specific guidance. As you press and hold the button, you may hear a clicking sound or see a light indicator to confirm that the reset process has begun.
Release the Learn Button: After holding the “Learn” button for the specified duration, release it and wait for a few moments. During this time, the opener will reset itself to its factory settings, clearing out any existing programming or codes. You may hear a beep or see a different light indicator to signal that the reset is complete.
Power Cycle the Opener (If Necessary): In some cases, power cycling the opener can help ensure that the reset process is successful. To power cycle the opener, unplug it from the electrical outlet or disconnect it from the power source. Wait for approximately 30 seconds before plugging it back in or reconnecting it to the power source. This allows the opener to reset and restart properly.
Test the Opener: Once the reset process is complete, it’s essential to test the opener to ensure that it’s functioning correctly. Use the wall control or remote transmitter to activate the opener and open/close the garage door. Pay attention to any unusual sounds or behaviors that may indicate an issue with the opener.
Reprogram Remote Transmitters (If Necessary): After resetting the opener, you may need to reprogram any remote transmitters or keypads that were previously linked to the opener. Follow the programming instructions provided in the owner’s manual or manufacturer’s instructions for your specific opener model. This typically involves pressing a button on the opener and then pressing the desired button on the remote transmitter to sync them together.
Resetting Additional Features (If Necessary): Depending on your opener model, you may have additional features or settings that need to be reset after performing a factory reset. These may include settings for travel limits, force adjustments, and safety sensors. Refer to the owner’s manual or manufacturer’s instructions for guidance on resetting these features.
Perform Regular Maintenance: To keep your LiftMaster garage door opener running smoothly, it’s essential to perform regular maintenance checks and inspections. This includes lubricating moving parts, inspecting the drive belt or chain, and testing the safety sensors. Regular maintenance helps prevent issues and prolongs the lifespan of your opener.
Seek Professional Assistance (If Needed): If you encounter any difficulties or issues while resetting your LiftMaster garage door opener, don’t hesitate to seek assistance from a professional garage door technician. They have the expertise and experience to troubleshoot problems and ensure that your opener is functioning correctly and safely.
With a properly reset opener, you can enjoy reliable and convenient operation of your Garage Door Repair Volo IL for years to come.
EDM Garage Doors, LLC
596 Richard Brown Blvd, Volo, IL 60073, United States
Bryan, Texas, offers a range of exciting and captivating tourist spots that showcase the city’s rich history, natural beauty, and cultural attractions. Whether you’re a history enthusiast, nature lover, or simply looking for fun-filled activities, Bryan has something for everyone. In this article, we will explore some of the top tourist spots in Bryan that are worth a visit.
Bryan, located in Brazos County, Texas, is a city brimming with attractions and activities that cater to tourists of all interests. From exploring the historic downtown area to enjoying outdoor adventures and immersing yourself in cultural experiences, Bryan has an abundance of options to offer.
Historic Downtown Bryan A stroll through Historic Downtown Bryan takes you back in time with its beautifully preserved historic buildings, quaint shops, and charming atmosphere. The streets are lined with unique boutiques, art galleries, antique stores, and delightful cafes. The area also hosts various events and festivals throughout the year, providing a vibrant and lively experience.
Brazos Valley Museum of Natural History For a fascinating glimpse into the natural and cultural history of the region, a visit to the Brazos Valley Museum of Natural History is a must. The museum features exhibits on paleontology, archaeology, geology, and local wildlife. Visitors can explore interactive displays, view artifacts, and learn about the rich natural heritage of the area.
Messina Hof Winery and Resort Wine enthusiasts and those seeking a relaxing getaway will appreciate a visit to Messina Hof Winery and Resort. This award-winning winery offers tours, tastings, and a chance to explore the beautiful vineyards. Guests can also indulge in gourmet dining experiences and stay at the resort for a truly memorable wine country retreat.
Lake Bryan Nature lovers and outdoor enthusiasts will find solace at Lake Bryan, a picturesque reservoir located just outside the city. The lake offers a range of recreational activities, including fishing, boating, swimming, and camping. With its scenic surroundings and serene atmosphere, it’s the perfect spot to unwind and enjoy the beauty of nature.
George Bush Presidential Library and Museum Located on the nearby Texas A&M University campus, the George Bush Presidential Library and Museum provides a fascinating insight into the life and presidency of the 41st President of the United States, George H.W. Bush. The museum showcases exhibits highlighting key events, including the Cold War, Desert Storm, and the reunification of Germany.
Santa’s Wonderland During the holiday season, Santa’s Wonderland transforms into a magical Christmas village, attracting visitors from near and far. This enchanting attraction offers a host of festive activities, including horse-drawn carriage rides, a petting zoo, ice skating, and millions of sparkling lights. It’s a wonderful place to create cherished holiday memories.
Bonfire Memorial A poignant and significant site on the Texas A&M University campus is the Bonfire Memorial. It commemorates the Aggie Bonfire tragedy of 1999, honoring the lives lost. The memorial features a striking sculpture and serves as a place for reflection, remembrance, and a symbol of the enduring spirit of the university community.
The Queen Theatre For a dose of entertainment and cultural experiences, The Queen Theatre is a must-visit. This historic theater, renovated to its former glory, hosts a variety of live performances, including plays, concerts, and movie screenings. The intimate setting and unique ambiance create a memorable experience for theater enthusiasts.
Sue Haswell Memorial Park Sue Haswell Memorial Park is a serene and well-maintained green space that offers a peaceful retreat within the city. With its walking trails, picnic areas, and playgrounds, it’s a perfect spot for families, nature walks, and outdoor relaxation. The park’s beautiful landscapes and lush greenery make it a favorite among locals and visitors alike.
Lake Walk Town Center Lake Walk Town Center is a vibrant and pedestrian-friendly community space that features shops, restaurants, and public art installations. The center hosts various events, such as live music performances, farmers’ markets, and outdoor movie screenings. Visitors can enjoy a leisurely walk, dine at local eateries, and immerse themselves in the lively ambiance.
Grand Stafford Theater Music lovers should not miss the Grand Stafford Theater, a historic venue that showcases live performances by local and touring artists. From concerts and comedy shows to open mic nights, the theater offers a diverse range of entertainment options. The intimate setting ensures an immersive experience for music enthusiasts.
Brazos Valley African American Museum The Brazos Valley African American Museum celebrates the rich heritage and contributions of African Americans in the region. The museum features exhibits, artifacts, and educational programs that highlight the history, culture, and achievements of the African American community. It provides a valuable opportunity to learn and appreciate the diversity of Bryan’s history.
Royalty Pecan Farms For a unique agritourism experience, a visit to Royalty Pecan Farms is a treat. This family-owned farm allows visitors to explore the pecan orchards, sample delicious pecan products, and learn about the pecan farming process. The farm also features a gift shop where visitors can purchase fresh pecans and other local products.
Wixon Valley Disc Golf Course Disc golf enthusiasts can enjoy a round of this popular sport at the Wixon Valley Disc Golf Course. The course offers a challenging and scenic layout, with various holes set amidst beautiful landscapes. It’s a fantastic recreational activity for both beginners and experienced players.
Bryan, TX, is a treasure trove of tourist spots that offer a mix of history, nature, culture, and entertainment. Whether you’re interested in exploring the historic downtown area, immersing yourself in natural beauty, or indulging in cultural experiences, Bryan has something to suit every traveler’s taste. Plan a visit to this charming city and discover the hidden gems that make it a memorable destination.
Resetting a Liftmaster Garage Door Repair Opener is a relatively straightforward process that can be completed by following a few simple steps.
Here’s a step-by-step guide on how to reset your Liftmaster Garage Door Opener:
Locate the “Learn” button: Start by finding the “Learn” button on your Liftmaster Garage Door Opener. The button is typically located on the back or side of the motor unit. It may be labeled as “Learn,” “Program,” or have a small LED light next to it.
Clear the memory: Press and hold down the “Learn” button for approximately six seconds or until the indicator light next to it turns off. This action clears the memory of the opener and prepares it for reprogramming.
Choose a new PIN: Decide on a new personal identification number (PIN) for your garage door opener. This PIN will be used to operate the door.
Enter programming mode: Once the memory is cleared, you’ll need to enter the programming mode. To do this, quickly press the “Learn” button again, release it, and then immediately press and hold it once more. The indicator light should come on and remain lit.
Program the remote control: With the opener in programming mode, take the remote control you want to use with the opener and hold it within a few inches of the motor unit. Press the button on the remote control that you wish to program to the opener. The indicator light on the motor unit should flash or blink, indicating that the remote control has been successfully programmed.
Test the remote control: Once the remote control is programmed, test it by pressing the programmed button. The garage door should move accordingly. If it doesn’t, repeat the programming steps or consult the owner’s manual for troubleshooting advice.
Program additional devices: If you have additional remote controls or keypads that you want to program to the opener, follow the same procedure as in Step 5 for each device.
Exit programming mode: After programming all the devices, you can exit the programming mode. To do this, press the “Learn” button on the motor unit once again. The indicator light should turn off, indicating that the programming mode has been exited.
Test all devices: It’s crucial to test all the programmed devices, including remote controls and keypads, to ensure they are functioning correctly. Open and close the garage door multiple times using each device to verify their operation.
Adjust settings if needed: If you need to adjust any settings on your Liftmaster Garage Door Opener, consult the owner’s manual for specific instructions. Common adjustments include the travel limits, force settings, and other features that customize the opener’s operation to suit your preferences.
By following these steps, you should be able to successfully reset your Liftmaster Garage Door Repair Opener and program it to work with your desired remote controls and keypads. Remember to consult the owner’s manual for your specific model, as some steps and features may vary slightly.
Garage Door Repair opening randomly can be a frustrating and puzzling experience for homeowners.
Several factors can contribute to this issue, and understanding them can help diagnose and resolve the problem.
Electrical Interference: One common cause of random garage door openings is electrical interference. This interference can come from various sources, such as nearby power lines, radio signals, or even neighboring garage door openers operating on the same frequency. When the electrical signals interfere with the garage door opener’s receiver, it can trigger the door to open unexpectedly.
Faulty Wiring: Another potential cause is faulty wiring. If the wiring connecting the garage door opener and the wall switch is damaged or incorrectly installed, it can cause the door to open randomly. Loose connections or frayed wires can send unintended signals to the opener, resulting in sporadic door movements.
Remote Control Issues: Malfunctioning remote controls can also be responsible for random garage door openings. If the remote’s buttons are stuck, worn out, or the remote itself is faulty, it can send unintended signals to the garage door opener, causing it to open unexpectedly. Additionally, if the remote control frequency is easily triggered by other devices, it can lead to interference and unwanted door openings.
Faulty Sensors: Modern garage door openers feature safety sensors near the floor that detect objects in the door’s path. These sensors ensure that the door does not close if there is an obstruction. However, if the sensors are misaligned, dirty, or malfunctioning, they can mistakenly detect an obstacle and cause the door to reverse or open randomly.
Keypad Malfunction: If your garage door opener has a keypad for code entry, a malfunctioning keypad could be the culprit behind random openings. Moisture damage, worn-out buttons, or a faulty keypad circuit can result in unintended signals being sent to the opener, causing it to open unexpectedly.
Power Surges: Power surges in the electrical system can affect garage door openers, leading to unpredictable behavior. Sudden voltage spikes can disrupt the programming or damage the internal circuitry of the opener, causing the door to open at random times.
Neighbor’s Remote Control: In some cases, the random garage door openings may be triggered by a neighbor’s remote control. If their opener operates on the same frequency as yours, their commands can unintentionally activate your garage door. This situation is more likely to occur in close-knit residential areas or apartment complexes with overlapping frequencies.
Malfunctioning Circuit Board: The circuit board in the garage door opener controls its operation. If the circuit board is defective or damaged, it can send erratic signals, leading to random door openings. Issues with the circuit board can be caused by age, wear and tear, power surges, or other electrical problems.
Home Automation Systems: If you have a home automation system that controls various devices, including the garage door opener, a malfunction in the automation system could cause the door to open randomly. This can occur due to software glitches, compatibility issues, or programming errors within the automation system.
Hacking or Tampering: Although rare, unauthorized access attempts or hacking of garage door openers can result in random door openings. Some older models use less secure or easily hackable codes or lack encryption features, making them susceptible to unauthorized control.
If you are experiencing random Garage Door Repair openings, it is recommended to consult a professional garage door technician. They can inspect and troubleshoot the opener, wiring, sensors, and remote controls to identify the root cause and provide appropriate repairs or replacements.
Having a functional Garage Door Repair opener is essential for the smooth operation and security of your garage.
If you’re experiencing issues with your garage door opener, don’t worry! This comprehensive guide will walk you through the steps to fix common problems and get your garage door opener working again. Please note that this guide assumes you have basic knowledge of tools and electrical systems. Let’s get started!
Step 1: Identify the Problem The first step in fixing your garage door opener is to identify the underlying issue. Here are some common problems you may encounter:
No response from the opener when you press the remote control button.
The garage door doesn’t open or close fully.
Unusual noises or vibrations during operation.
The opener’s motor runs but the door doesn’t move.
The safety sensors are misaligned or not working correctly.
Step 2: Check the Power Source Before diving into complex troubleshooting, ensure that the opener is receiving power. Check if the outlet is functional by plugging in another device. If there’s no power, check the circuit breaker and reset if necessary. Replace any blown fuses or tripped breakers.
Step 3: Inspect the Remote Control and Batteries If the opener doesn’t respond to the remote control, check the batteries. Replace them with fresh ones and ensure they’re correctly inserted. If the problem persists, try reprogramming the remote control according to the manufacturer’s instructions.
Step 4: Lubricate Moving Parts If your garage door opener makes unusual noises or vibrations, lubrication may be the solution. Apply a silicone-based lubricant to the hinges, rollers, tracks, and springs. Avoid using grease or oil, as they attract dust and can cause further issues.
Step 5: Adjust the Limit Switches If your garage door doesn’t open or close fully, the limit switches might need adjustment. These switches control the door’s travel distance. Refer to your opener’s manual to locate the limit switch adjustment screws. Make small adjustments to these screws until the door opens and closes completely.
Step 6: Check the Safety Sensors The safety sensors are located near the bottom of the garage door tracks. Ensure they are clean and aligned properly. If the sensors are misaligned, adjust them until the indicator lights on both sensors are solid. Clean any dirt or debris obstructing the sensor’s path.
Step 7: Inspect the Drive Belt/Chain or Screw Drive If the opener’s motor runs but the door doesn’t move, the drive belt/chain or screw drive might be damaged or worn out. Visually inspect these components for any signs of wear or breakage. If you notice any issues, consult your opener’s manual for instructions on replacing the drive belt/chain or screw drive.
Step 8: Reset the Opener If you’ve tried all the previous steps and the opener still isn’t functioning correctly, try resetting it. Refer to your opener’s manual for specific reset instructions, as the process may vary depending on the model. Resetting the opener can often resolve minor glitches and restore normal operation.
Conclusion: Fixing your Garage Door Repair opener can be a rewarding DIY project, saving you time and money. By following the steps outlined in this guide, you should be able to troubleshoot and resolve common issues with your garage door opener. However, if you encounter complex problems or don’t feel comfortable performing the repairs yourself, it’s best to seek professional assistance from a qualified technician. Remember to prioritize safety at all times and refer to your opener’s manual for specific instructions tailored to your model. With patience and diligence, your garage door opener will be back to working flawlessly in no time.
Opening a Garage Door Repair Services manually can be a useful skill to have, especially in situations where the power is out or the automatic opener is malfunctioning.
In this guide, I will explain step-by-step how to manually open a garage door. Please note that the following instructions may vary depending on the type of garage door you have, so it’s always a good idea to consult your specific manufacturer’s instructions if available. Now, let’s get started:
Step 1: Ensure safety Before attempting to manually open the garage door, it’s crucial to take some safety precautions. Make sure there are no obstructions in the path of the door, both inside and outside the garage. Check for any loose or damaged parts, such as springs or cables, and refrain from attempting to open the door if you notice any issues. Safety should always be a priority.
Step 2: Release the emergency release cord Locate the emergency release cord or handle. This is usually a red cord with a handle hanging from the opener mechanism or attached to the door’s trolley. Pulling this cord disengages the garage door from the automatic opener, allowing you to manually open it.
Step 3: Disengage the door from the opener Once you have located the emergency release cord, pull it down firmly. This action will release the door’s attachment to the automatic opener carriage. You should feel some resistance and hear a clicking sound when the door is disengaged.
Step 4: Unlock the door, if applicable Some garage doors have an additional manual lock mechanism. If your door has a lock, unlock it using the appropriate key or method. This step is necessary to ensure the door is not secured by a lock before attempting to open it manually.
Step 5: Lift the door Stand facing the garage door and grab it firmly with both hands. Lift the door slowly and steadily, using your legs and body strength rather than relying solely on your arms. Be cautious of the door’s weight, as it can be quite heavy.
Step 6: Secure the door in the open position Once you have lifted the door to your desired height, prop it open by placing a solid object, such as a wooden block or a c-clamp, under the door. This step is important to prevent the door from closing unexpectedly while you are underneath it.
Step 7: Test the door Gently nudge the door to ensure it is securely held in the open position. Check for any unusual resistance or movement. If the door feels unstable or shows signs of malfunction, lower it immediately and seek professional assistance to avoid any accidents.
Step 8: Reconnect the door to the opener When you’re ready to re-engage the garage door with the automatic opener, pull the emergency release cord in the opposite direction, away from the door. This action should reattach the door to the opener carriage.
Step 9: Lock the door, if applicable If your garage door has a manual lock, now is the time to re-engage it. Follow the manufacturer’s instructions to secure the door with the lock, ensuring it is properly engaged.
Congratulations! You have successfully learned how to manually open a Garage Door Repair Services. Remember to exercise caution and prioritize safety at all times. If you encounter any difficulties or have concerns about your garage door’s functionality, it’s best to consult a professional garage door technician for assistance.
The Homelink Garage Door Repair opener is a convenient device that allows you to control your garage door with a single button press from inside your vehicle. Programming the Homelink system is a straightforward process that can be completed in a few simple steps.
In this guide, we will walk you through the process of programming your Homelink garage door opener, ensuring smooth and effortless access to your garage.
Step 1: Preparation Before you begin programming your Homelink system, make sure you have the following items ready:
Your vehicle’s owner’s manual: This will provide specific instructions for programming Homelink in your particular vehicle.
A ladder: You may need a ladder to access the garage door opener motor unit.
A clean cloth and rubbing alcohol: These will be used to clean the buttons on the Homelink system.
Step 2: Clearing Homelink Memory (if necessary) If you have previously programmed Homelink for another garage door, it is important to clear its memory before starting the programming process. To clear the memory, press and hold the first and third buttons on the Homelink system simultaneously until the indicator light starts flashing rapidly. This process may take about 20 seconds.
Step 3: Locate the Garage Door Opener Motor Unit In your garage, find the motor unit of your garage door opener. It is typically attached to the ceiling near the center of the garage. Once you locate the motor unit, you should find a “Learn” or “Training” button on it. This button is usually colored and may be labeled differently depending on the manufacturer.
Step 4: Programming the Homelink System Now, it’s time to program your Homelink system. Follow these steps:
4.1. Vehicle-Specific Instructions: Refer to your vehicle’s owner’s manual to find the specific instructions for programming Homelink in your vehicle. The steps may slightly vary depending on the make and model of your vehicle.
4.2. Homelink Buttons: In general, Homelink systems have three buttons. Press and hold the button you wish to program. The indicator light should begin to flash slowly.
4.3. Press and Release the “Learn” Button: Within 30 seconds of pressing the Homelink button, climb up the ladder and press the “Learn” or “Training” button on the garage door opener motor unit. You should do this within a reasonable distance of the motor unit, usually 1-3 feet.
4.4. Indicator Light Behavior: The indicator light on the Homelink system will change its behavior to indicate the progress of the programming process. It may flash slowly, rapidly, or remain solid, depending on the stage of programming.
4.5. Test the Connection: After the programming process, exit your vehicle and press the programmed Homelink button. The garage door should begin to operate. If it does not, repeat the programming steps.
Step 5: Additional Programming (if needed) If you have multiple garage doors or other devices you want to control with Homelink, repeat Step 4 for each button and corresponding device. Remember to follow the vehicle-specific instructions for each programming sequence.
Conclusion: Programming your Homelink Garage Door Repair opener is a relatively simple process that can be accomplished with a few steps. By following the instructions in your vehicle’s owner’s manual and the guidelines provided in this guide, you can enjoy the convenience of opening and closing your garage door with ease from the comfort of your vehicle. Always consult the specific instructions for your vehicle and garage door opener to ensure successful programming.