Tag: garage door repair volo il

How To Fix A Garage Door Opener – EDM Garage Doors, LLC

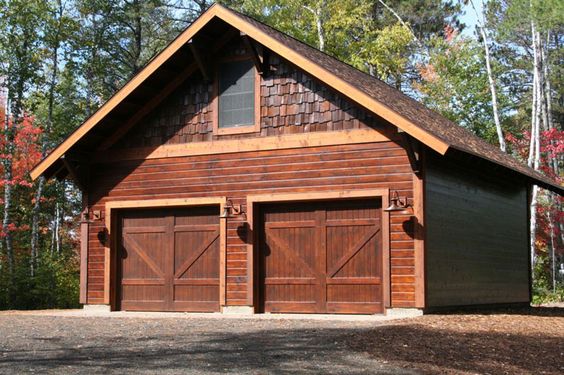
Fixing a malfunctioning Garage Door Repair Volo IL can often be done with some basic troubleshooting and maintenance steps. However, it’s essential to approach the task with caution and follow safety procedures to prevent accidents or further damage to the opener.

Here’s a comprehensive guide on how to fix a garage door opener:

1. Identify the Problem:

Before attempting any repairs, it’s crucial to identify the specific issue with your garage door opener. Common problems include:

  • The door not opening or closing properly.
  • Unusual noises or vibrations during operation.
  • The opener not responding to remote or wall-mounted controls.
  • Visible damage to the opener components.

2. Perform Visual Inspection:

  • Inspect the garage door opener and its components for any signs of wear, damage, or misalignment. Pay attention to the motor unit, drive mechanism, cables, springs, and sensors.
  • Look for loose or disconnected wires, damaged gears or belts, bent or misaligned tracks, and debris or obstructions in the door’s path.

3. Check Power Supply:

  • Ensure that the garage door opener is receiving power from the electrical outlet. Check the power cord for any damage or loose connections.
  • If the opener has a built-in power switch, make sure it’s turned on. Reset any tripped circuit breakers or replace blown fuses if necessary.

4. Test Remote Controls:

  • Check the batteries in the remote control and wall-mounted control panel. Replace the batteries if they’re low or depleted.
  • Test the remote controls and wall-mounted control panel to verify that they’re sending signals to the opener. If not, replace or reprogram the remote controls as needed.

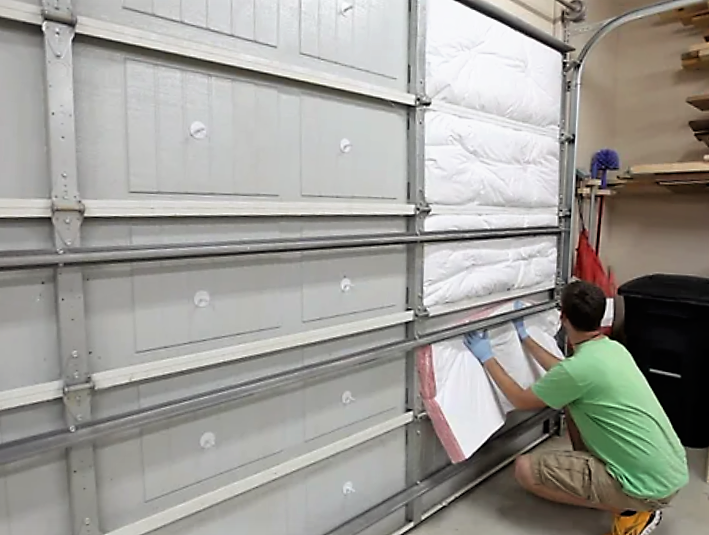
5. Lubricate Moving Parts:

  • Apply lubricant to the moving parts of the garage door opener, including the drive chain or belt, rollers, hinges, and springs. Lubrication helps reduce friction and prolongs the lifespan of the opener components.

6. Adjust Sensitivity Settings:

  • Adjust the sensitivity and force settings on the opener to ensure smooth operation and prevent excessive strain on the door. Follow the manufacturer’s instructions for adjusting these settings based on the weight and size of your garage door.

7. Align Safety Sensors:

  • Check the alignment of the safety sensors located near the bottom of the garage door tracks. Make sure the sensors are facing each other and are free from obstructions.
  • Clean the sensor lenses with a soft, dry cloth to remove any dirt or debris that may be blocking the signal.

8. Tighten Hardware:

  • Inspect the hardware, including screws, bolts, and brackets, and tighten any loose or missing fasteners. Properly securing the hardware helps prevent vibrations and ensures smooth operation of the opener.

9. Test Door Operation:

  • Test the garage door opener by opening and closing the door manually or using the remote controls. Observe the operation carefully for any signs of improvement or remaining issues.
  • If the problem persists, consider consulting the owner’s manual or contacting the manufacturer’s customer support for further troubleshooting assistance.

Important Safety Precautions:

  • Always disconnect power to the garage door opener before performing any repairs or maintenance to prevent electrical shock or injury.
  • Use caution when working with moving parts and heavy machinery. Avoid placing hands or fingers near the door tracks, springs, or cables to prevent accidents.
  • If you’re unsure or uncomfortable with fixing the garage door opener yourself, it’s best to seek assistance from a qualified technician or garage door repair professional.

Conclusion:

Fixing a Garage Door Repair Volo IL often involves basic troubleshooting steps such as inspecting components, checking power supply, testing remote controls, lubricating moving parts, adjusting settings, and tightening hardware. By following these steps and exercising caution, you can address common issues with your garage door opener and restore its functionality. Regular maintenance and timely repairs help ensure smooth and reliable operation of your garage door system for years to come. If you encounter any difficulties or need further assistance, don’t hesitate to seek professional help.

EDM Garage Doors, LLC

596 Richard Brown Blvd, Volo, IL 60073, United States

1-847-416-3036

How To Reset My Liftmaster Garage Door Opener – EDM Garage Doors, LLC


Resetting a Garage Door Repair Volo IL opener is a relatively simple process that can be done in just a few steps. Whether you need to clear out old programming or troubleshoot issues with your opener, resetting it can often resolve the problem.

Here’s a detailed guide on how to reset your garage door opener in 1000 words:

  1. Locate the Learn Button: The first step in resetting your LiftMaster garage door opener is to locate the “Learn” button on the motor unit. This button is typically found on the back or side of the opener, near the antenna wire. It may be colored red, yellow, or purple, depending on the model of your opener.
  2. Determine the Type of Opener: LiftMaster garage door openers come in different models and variations, each with its own method for resetting. Before proceeding, identify whether your opener uses a “Learn” button or a different method for programming and resetting. Refer to the owner’s manual or manufacturer’s instructions for your specific model if you’re unsure.
  3. Press and Hold the Learn Button: If your LiftMaster opener features a “Learn” button, the next step is to press and hold this button for approximately 6-10 seconds. The exact duration may vary depending on the model, so refer to the manufacturer’s instructions for specific guidance. As you press and hold the button, you may hear a clicking sound or see a light indicator to confirm that the reset process has begun.
  4. Release the Learn Button: After holding the “Learn” button for the specified duration, release it and wait for a few moments. During this time, the opener will reset itself to its factory settings, clearing out any existing programming or codes. You may hear a beep or see a different light indicator to signal that the reset is complete.
  5. Power Cycle the Opener (If Necessary): In some cases, power cycling the opener can help ensure that the reset process is successful. To power cycle the opener, unplug it from the electrical outlet or disconnect it from the power source. Wait for approximately 30 seconds before plugging it back in or reconnecting it to the power source. This allows the opener to reset and restart properly.
  6. Test the Opener: Once the reset process is complete, it’s essential to test the opener to ensure that it’s functioning correctly. Use the wall control or remote transmitter to activate the opener and open/close the garage door. Pay attention to any unusual sounds or behaviors that may indicate an issue with the opener.
  7. Reprogram Remote Transmitters (If Necessary): After resetting the opener, you may need to reprogram any remote transmitters or keypads that were previously linked to the opener. Follow the programming instructions provided in the owner’s manual or manufacturer’s instructions for your specific opener model. This typically involves pressing a button on the opener and then pressing the desired button on the remote transmitter to sync them together.
  8. Resetting Additional Features (If Necessary): Depending on your opener model, you may have additional features or settings that need to be reset after performing a factory reset. These may include settings for travel limits, force adjustments, and safety sensors. Refer to the owner’s manual or manufacturer’s instructions for guidance on resetting these features.
  9. Perform Regular Maintenance: To keep your LiftMaster garage door opener running smoothly, it’s essential to perform regular maintenance checks and inspections. This includes lubricating moving parts, inspecting the drive belt or chain, and testing the safety sensors. Regular maintenance helps prevent issues and prolongs the lifespan of your opener.
  10. Seek Professional Assistance (If Needed): If you encounter any difficulties or issues while resetting your LiftMaster garage door opener, don’t hesitate to seek assistance from a professional garage door technician. They have the expertise and experience to troubleshoot problems and ensure that your opener is functioning correctly and safely.

With a properly reset opener, you can enjoy reliable and convenient operation of your Garage Door Repair Volo IL for years to come.

EDM Garage Doors, LLC

596 Richard Brown Blvd, Volo, IL 60073, United States

1-847-416-3036

How To Open Garage Door With Broken Spring And Cable – EDM Garage Doors, LLC

Encountering a Garage Door Repair Volo IL can be a challenging situation, as these components play a crucial role in the door’s balanced and controlled movement.

Opening a garage door under these circumstances requires careful steps to ensure safety and prevent further damage. In this comprehensive guide, we will explore the steps to manually open a garage door with a broken spring and cable.

1. Assess the Situation: Before attempting to open the garage door, carefully assess the extent of the damage. If both the spring and cable are broken, the door may be unbalanced and challenging to lift. In such cases, it’s crucial to prioritize safety and consider seeking professional assistance.

2. Gather Safety Equipment: a. Protective Gear: Wear safety goggles and gloves to protect yourself from any debris or sharp edges.

b. Assistance: Enlist the help of a friend or family member. Opening a garage door with a broken spring and cable can be physically demanding, and having an extra set of hands enhances safety.

3. Disconnect the Garage Door Opener: If your garage door is equipped with an automatic opener, disconnect it to prevent any attempts to operate the door electrically. This is crucial for safety, as the opener might strain if it tries to lift the unbalanced door.

a. Locate the Emergency Release Cord: Find the emergency release cord hanging from the garage door opener. This cord is usually red and hangs from the trolley.

b. Pull the Emergency Release Cord: Gently pull the emergency release cord down and away from the garage door opener motor. This action disconnects the door from the automatic opener, allowing for manual operation.

4. Secure the Door: a. Use C-Clamps (Optional): If available, use C-clamps to secure the garage door tracks just above the bottom rollers. This prevents the door from accidentally falling during the manual operation.

5. Identify the Broken Spring and Cable: a. Locate the Broken Spring: Torsion springs are typically located above the garage door, while extension springs are positioned on the sides. Identify the broken spring.

b. Identify the Broken Cable: The cables are attached to the bottom brackets on either side of the door. If a cable is broken, it may be hanging loose or visibly damaged.

6. Lift the Door Manually: a. Position Yourself: Stand facing the garage door, with one person on each side if possible.

b. Grasp the Door: With a firm grip, lift the door manually. Be prepared for resistance, as the absence of a functional spring can make the door heavy.

c. Use Your Legs: Lift with your legs, not your back, to avoid strain. The assistance of another person can make this process smoother and safer.

7. Open the Door Gradually: a. Lift Gradually: Lift the door gradually and with control. Avoid sudden movements to prevent any imbalance or further damage.

b. Check for Obstructions: As you lift the door, carefully inspect the tracks for any obstructions. Clear away debris or objects that may impede the door’s movement.

8. Secure the Door in the Open Position: a. Use a Prop or Support: Once the door is open, use a sturdy prop or support, such as a 2×4 piece of wood, to keep it securely in the open position. Place the prop under the door, resting against the horizontal track.

9. Seek Professional Assistance: a. Inspect the Damage: After safely opening the garage door, inspect the extent of the damage to the spring and cable. If both components are broken, it’s crucial to seek professional assistance for repairs.

b. Avoid DIY Spring Repairs: Repairing or replacing garage door springs is a specialized task that should be performed by trained professionals. Attempting to repair or replace springs without the necessary expertise can lead to serious injuries.

10. Preventive Measures: a. Regular Maintenance: Implement a routine maintenance schedule for your garage door. Regular inspections, lubrication of moving parts, and addressing issues promptly can prevent unexpected failures.

b. Consider Upgrading Springs: If your garage door has experienced multiple spring failures, consider upgrading to high-cycle springs. These springs are designed to withstand more cycles, providing increased durability.

Conclusion:

Opening a Garage Door Repair Volo IL requires careful consideration of safety measures and a step-by-step approach. While manual operation is possible, seeking professional assistance for spring and cable repairs is strongly recommended to ensure the safety and proper functionality of your garage door. Regular maintenance and potential upgrades to your garage door components contribute to its overall longevity and reliability.

EDM Garage Doors, LLC

596 Richard Brown Blvd, Volo, IL 60073, United States

1-847-416-3036

Signs of a Failing Garage Door Opener – EDM Garage Doors, LLC

As a homeowner deeply invested in the seamless functioning of my living space, the garage door opener stands as a silent hero, facilitating daily entries and exits with a simple push of a button. However, as time passed, I started noticing subtle signs that hinted at the wear and tear of this unassuming yet essential device.

By following Garage Door Repair, I share my journey of recognizing the early indicators of a failing garage door opener and the steps I took to address them, offering insights to fellow homeowners navigating similar concerns.

Introduction: The Unseen Sentinel’s Deterioration

The garage door opener, often taken for granted in its unassuming corner, silently carries the weight of daily operations. It wasn’t until I began experiencing peculiar behaviors that I realized my trusty opener might be showing signs of distress. This realization prompted me to delve into the world of garage door opener diagnostics, seeking answers and solutions to ensure the continued reliability of this crucial home component.

1. Unusual Noises: The Overture of Dysfunction

Insights:

One of the earliest signs of a failing garage door opener is the emergence of unusual noises during its operation. From grinding sounds to unexpected clicks and groans, these auditory signals indicate that all might not be well within the mechanical heart of the opener.

Practical Tips:

Encourage homeowners to pay keen attention to the sounds their garage door opener produces. Unusual noises can be indicative of worn-out gears, misalignments, or issues with the motor. Seeking professional help at the onset can prevent further damage.

2. Sluggish Response to Commands: The Lagging Symphony

Insights:

A garage door opener should respond promptly and smoothly to commands. If you notice a delay or sluggishness in the door’s response to remote control or keypad commands, it could be a sign of deteriorating functionality.

Practical Tips:

Guide homeowners to observe the response time of their garage door opener. A delayed reaction might stem from issues with the remote control, the opener’s motor, or even the wiring. Troubleshooting and, if necessary, seeking professional assistance can rectify this issue.

3. Inconsistent Operation: The Unpredictable Choreography

Insights:

An opener that operates inconsistently, reversing unexpectedly or failing to complete its cycle, suggests underlying issues that warrant attention. Inconsistencies can manifest as an erratic dance of the garage door, deviating from its expected choreography.

Practical Tips:

Highlight the importance of observing the consistent operation of the garage door opener. If the door hesitates, reverses unexpectedly, or stops mid-cycle, it might be signaling problems with the sensors, the opener’s motor, or even the remote control. Professional inspection is advised.

4. Lack of Response to Remote Control: The Silent Rebellion

Insights:

A garage door opener that refuses to respond to remote control commands is a clear indicator of potential dysfunction. This silent rebellion can stem from issues with the remote itself, the opener’s receiver, or the communication between the two.

Practical Tips:

Empower homeowners to troubleshoot remote control issues by checking the batteries, ensuring proper programming, and testing the remote’s range. If the problem persists, inspecting the opener’s receiver and seeking professional assistance becomes imperative.

5. Vibration and Shaking: The Unsettling Tremors

Insights:

A normally quiet garage door opener should operate smoothly without causing vibrations or shaking. The emergence of these physical symptoms suggests internal imbalances, misalignments, or worn-out components.

Practical Tips:

Guide homeowners to visually inspect the garage door opener during its operation. Vibrations and shaking can be indicative of loose hardware, misaligned components, or even issues with the motor. Tightening loose parts and seeking professional inspection can address this concern.

6. Visual Signs of Wear and Tear: The Aging Aesthetic

Insights:

Examine the physical appearance of the garage door opener for visible signs of wear and tear. Rust, corrosion, or frayed wires are visual cues that the opener might be approaching the end of its service life.

Practical Tips:

Encourage regular visual inspections of the garage door opener. The presence of rust, corrosion, or exposed wires can compromise its functionality. While addressing minor issues through cleaning and maintenance is possible, recognizing the need for a replacement is crucial for long-term reliability.

Conclusion: Nurturing the Guardian of Our Entrances

Recognizing the signs of a failing garage door opener is a proactive approach to ensuring the continued functionality of this often-overlooked home component. As a homeowner who navigated through the subtle indicators of wear and tear, I discovered that addressing issues in their early stages can prevent inconvenient breakdowns and extend the lifespan of the opener.

Based from Garage Door Repair and in the landscape of 2023, where homeowners seek not only functionality but also a deeper understanding of the systems that govern their living spaces, the garage door opener takes center stage. By paying attention to the auditory, visual, and operational cues it provides, we can nurture the guardian of our entrances, ensuring that our comings and goings are accompanied by the smooth symphony of a well-maintained garage door opener.

EDM Garage Doors, LLC

596 Richard Brown Blvd, Volo, IL 60073, United States

847-416-3036

How To Reset Range Rover Garage Door Opener – EDM Garage Doors, LLC

Resetting the Garage Door Repair Volo IL involves a process of programming the HomeLink system, a universal transmitter often integrated into the rearview mirror.

This system allows you to synchronize your vehicle with your garage door, gate, or other home automation devices. Here’s a comprehensive guide on how to reset the garage door opener in your Range Rover:

Understanding HomeLink:

HomeLink is a wireless control system that replaces traditional garage door remotes. It is integrated into your Range Rover’s interior, typically located on the rearview mirror. HomeLink can be programmed to operate garage doors, gates, lights, and other compatible devices.

Identifying HomeLink Buttons:

In your Range Rover, the HomeLink buttons are usually located on the rearview mirror. There are three buttons, each representing a different channel. These buttons will be used to program and operate your garage door opener.

Determining Compatibility:

Before proceeding with the reset process, ensure that your garage door opener is compatible with the HomeLink system. Check your garage door opener’s user manual for information on HomeLink compatibility or visit the HomeLink website for a compatibility guide.

Preparing Your Garage Door Opener Remote:

  1. Locate Your Garage Door Opener Remote:
    • Have your existing garage door opener remote ready for the programming process.
  2. Identify the Learn or Program Button:
    • Find the “Learn” or “Program” button on your garage door opener motor unit. This button is usually located near the antenna wire.

Resetting HomeLink in Your Range Rover:

Now that you have identified the HomeLink buttons and located the “Learn” or “Program” button on your garage door opener, follow these steps:

  1. Clear Existing HomeLink Programming:
    • Press and hold the two outer HomeLink buttons on your rearview mirror until the indicator light begins to flash rapidly. This indicates that the existing programming has been cleared.
  2. Position Your Garage Door Opener Remote:
    • Hold your garage door opener remote close to the HomeLink buttons. Ensure that you can access the “Learn” or “Program” button on your garage door opener.
  3. Program the HomeLink Buttons:
    • Press and hold the button on your garage door opener remote and one of the HomeLink buttons simultaneously. Hold both buttons until the HomeLink indicator light starts flashing slowly.
  4. Release Buttons and Test:
    • Release both buttons. Press the programmed HomeLink button in your Range Rover and hold it. If the garage door moves, programming is successful. If not, proceed to the next step.
  5. Training Mode on Garage Door Opener:
    • On your garage door opener motor unit, press the “Learn” or “Program” button. You usually have about 30 seconds to return to your Range Rover and complete the programming.
  6. Test the HomeLink System:
    • Press the programmed HomeLink button briefly to test if it opens or closes your garage door. Repeat this step for each HomeLink button you want to program.
  7. Repeat for Additional Devices:
    • If you have other devices to program (e.g., a gate or additional garage doors), repeat the process using a different HomeLink button.

Troubleshooting Tips:

  • Interference Issues:
    • If you encounter interference or the programming is not successful, park your Range Rover outside the garage and repeat the process.
  • Garage Door Opener Compatibility:
    • Ensure that your garage door opener is compatible with the HomeLink system. Refer to the user manual or contact the manufacturer for information.
  • Garage Door Opener Remote Batteries:
    • Ensure that the batteries in your garage door opener remote are in good condition. Weak batteries may affect the programming process.

Consulting the Range Rover Manual:

For model-specific instructions or if you encounter difficulties, refer to your Range Rover owner’s manual. The manual provides detailed information on programming HomeLink for your specific vehicle model.

Professional Assistance:

If you are unable to reset the garage door opener using the HomeLink system or encounter technical difficulties, consider seeking professional assistance from your Range Rover dealership or a certified technician.

Conclusion:

Resetting the Garage Door Repair Volo IL using the HomeLink system is a straightforward process that enhances convenience and accessibility. By following these step-by-step instructions and troubleshooting tips, you can successfully program your Range Rover’s HomeLink system to operate your garage door or other compatible devices. Always prioritize safety and follow the specific guidelines provided by your vehicle’s manufacturer.

EDM Garage Doors, LLC

596 Richard Brown Blvd, Volo, IL 60073, United States

1-847-416-3036

How Long Do Garage Door Openers Last? – EDM Garage Doors, LLC

When it comes to the lifespan of garage door openers, there are several factors to consider. On average, a well-maintained garage door opener can last anywhere from 10 to 15 years. However, this is just a general estimate, and the actual lifespan can vary depending on various factors.

According to Garage Door Repair, one of the key factors that determine how long a garage door opener will last is the quality of the opener itself. Investing in a high-quality opener from a reputable brand can increase its longevity. These openers are typically built with durable materials and components, designed to withstand daily usage and provide reliable performance over an extended period.

The frequency of use is another crucial factor. If you have a busy household with multiple cars going in and out of the garage frequently, your garage door opener will be subjected to more cycles, resulting in additional wear and tear. In such cases, the opener may not last as long as in a household with less frequent door operation.

Regular maintenance is essential for ensuring the longevity of your garage door opener. Performing routine tasks like lubricating the moving parts, checking for loose screws or bolts, and keeping the tracks clean can help prevent premature wear and keep the opener operating smoothly. It’s also a good idea to follow the manufacturer’s recommended maintenance guidelines and schedule professional inspections to identify any potential issues early on.

Environmental factors can also impact the lifespan of a garage door opener. Extreme temperatures, high humidity, and exposure to harsh weather conditions can accelerate wear on the opener’s components. If you live in an area with challenging climate conditions, it’s advisable to choose an opener specifically designed to withstand those conditions.

Technological advancements in garage door openers can also influence their lifespan. As newer models are introduced with advanced features and improved efficiency, you may choose to upgrade your opener to take advantage of these benefits. While your existing opener may still function properly, upgrading to a newer model can enhance security, provide smart home integration options, and improve energy efficiency.

If you notice any signs of malfunction in your garage door opener, such as slow operation, unusual noises, or inconsistent opening and closing, it may be an indication that the opener is reaching the end of its lifespan. In such cases, it’s best to consult a professional garage door technician who can assess the situation and provide guidance on whether repair or replacement is the most appropriate course of action.

In conclusion, based from Garage Door Repair, the average lifespan of a garage door opener is around 10 to 15 years, but several factors can influence its longevity. Factors such as the quality of the opener, frequency of use, regular maintenance, environmental conditions, and technological advancements all play a role in determining how long a garage door opener will last. By taking care of your opener and considering these factors, you can maximize its lifespan and enjoy reliable and convenient garage door operation for years to come.

EDM Garage Doors, LLC

596 Richard Brown Blvd, Volo, IL 60073, United States

847-416-3036

Powered by WordPress & Theme by Anders Norén