Tag: Garage Door Repair North Richland Hills TX

Garage Door Installation: Why It’s Best Left to Professionals – NRH’s Gates & Garage Doors

As a dedicated homeowner who enjoys taking on DIY projects around the house, I’ve found that there are certain tasks where the line between DIY and professional help becomes quite clear. One such task that I recently faced was garage door installation.

I’ll share my personal experience, the challenges I encountered, and provide expert insights on why garage door installation is best left to the professionals by following Garage Door Repair North Richland Hills TX.

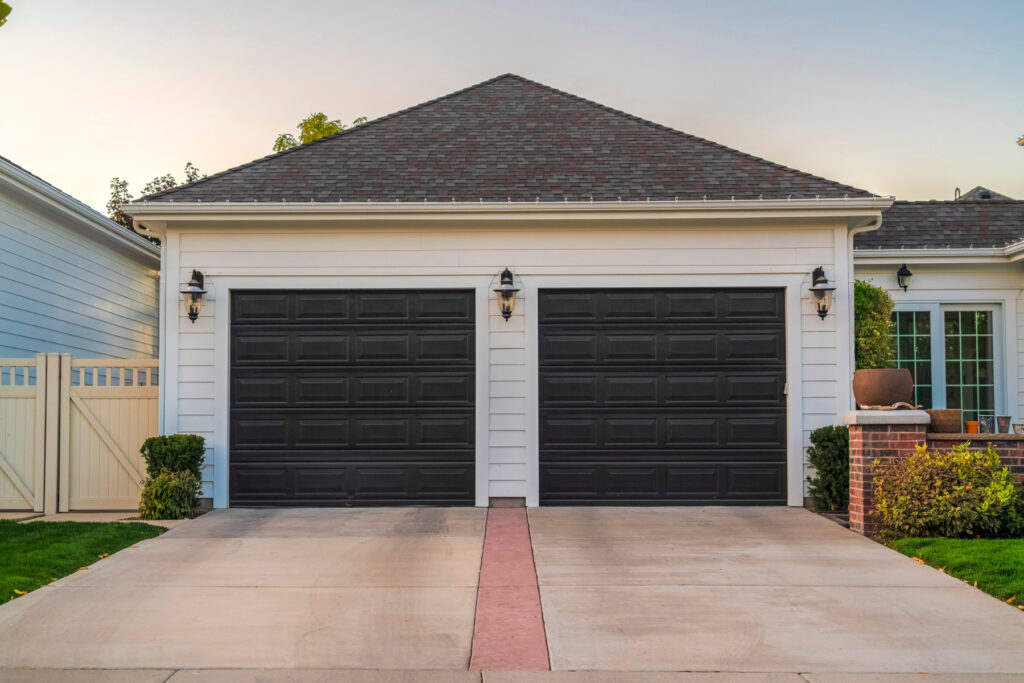
The Significance of a Properly Installed Garage Door

Our garage doors are more than just entryways to our homes. They play a crucial role in our daily lives and offer various advantages:

  1. Security: A professionally installed garage door provides essential security for your home and belongings stored in the garage.
  2. Convenience: A well-functioning garage door allows for effortless access to your garage, saving time in your daily routine.
  3. Weather Protection: A tightly sealed garage door shields your vehicle and other items from the elements, such as rain, snow, and extreme temperatures.
  4. Energy Efficiency: A correctly installed garage door contributes to energy efficiency by helping to regulate the temperature in your garage, impacting your home’s overall energy use.

Challenges Faced During DIY Garage Door Installation

When I decided to replace my garage door, I initially believed that I could handle the installation myself. Armed with a detailed manual and a handful of tools, I embarked on the project with optimism. However, I soon encountered several challenges that made me realize why professional installation is the preferred choice:

  1. Complex Assembly: Modern garage doors come with a multitude of components, and understanding their assembly and installation can be a complex process.
  2. Balancing Act: Correctly balancing the garage door, especially if it’s a sectional or rolling door, is crucial for smooth operation. Achieving this balance can be a tricky task without the right tools and expertise.
  3. Safety Concerns: Garage door installation involves heavy components and high-tension springs. Mishandling these elements can lead to accidents and injuries, which was a significant concern for me.
  4. Precision Matters: Garage doors must be perfectly aligned and level to operate correctly. Achieving this level of precision can be challenging without professional training and experience.

My Experience with Professional Installation

After realizing the challenges and potential safety risks involved in DIY garage door installation, I decided to hire a professional garage door installation service. The technician arrived with the necessary tools, equipment, and expertise to handle the task.

They meticulously assembled and installed the new garage door, ensuring that it was perfectly balanced and aligned. Safety was a top priority, and they handled the heavy components with precision and care. The entire installation process was efficient, and the end result was a garage door that operated flawlessly.

The technician also emphasized the importance of proper installation in the door’s longevity and performance. Their experience and training made it evident that garage door installation is a job best left to professionals.

Expert Insights on Professional Garage Door Installation

To provide a deeper understanding of the benefits of professional garage door installation, I consulted an expert in the field. Here are some key insights they shared:

1. Safety First: “Safety should always be a top concern when dealing with garage doors. The high-tension springs and heavy components can pose significant risks if mishandled. Professionals are trained to handle these situations safely.”

2. Precision and Alignment: “Garage doors require precise assembly and alignment for smooth and efficient operation. Professionals have the experience and tools to achieve this level of precision.”

3. Efficiency and Quality: “Professional installation ensures that the garage door is assembled correctly and functions as intended. This contributes to the door’s longevity and reduces the likelihood of issues arising in the future.”

4. Warranty Protection: “Many garage door manufacturers provide warranties on their products, but these warranties often require professional installation. DIY installation may void these warranties, leaving you without manufacturer support in case of issues.”

5. Customization: “Professionals can tailor the installation to your specific requirements, ensuring that the garage door meets your needs and operates as expected.”

Conclusion

My experience with garage door installation taught me the importance of recognizing the limits of DIY projects. Garage doors are intricate systems that demand precision, safety, and expertise during installation. The expert insights shared in this article emphasize that safety should always come first, and professionals are trained to handle the high-tension springs and heavy components involved.

Professional installation ensures not only the safety of your home and family but also the efficient operation of your garage door. It contributes to the door’s longevity and performance, reducing the likelihood of issues in the future. Additionally, it often protects your investment by preserving manufacturer warranties.

In summary, based from Garage Door Repair North Richland Hills TX, when it comes to garage door installation, the decision to seek professional help is a wise one. The peace of mind that comes with knowing your garage door has been installed correctly, safely, and efficiently is invaluable. So, whether you’re installing a new garage door or replacing an existing one, consider the expertise and professionalism that professionals bring to the table.

NRH’s Gates & Garage Doors

7048 Ridge Crest Dr, North Richland Hills, TX 76182, United States

817-533-4913

How To Install Garage Door Slide Lock – NRH’s Gates & Garage Doors

Installing a Garage Door Repair North Richland Hills TX is a relatively straightforward process, but it requires careful attention to detail to ensure the lock functions properly and enhances the security of your garage.

In this guide, I’ll walk you through the steps to install a garage door slide lock. This guide will be broken down into several sections, including gathering materials, preparing the door, installing the lock, and testing its functionality. Please follow these instructions carefully, and if you’re unsure at any point, consult a professional for assistance.

Materials You Will Need:

  1. Garage door slide lock kit (includes lock, bolts, and screws)
  2. Pencil or marker
  3. Tape measure
  4. Drill
  5. Drill bits (various sizes)
  6. Screwdriver
  7. Level
  8. Safety glasses
  9. Stud finder (optional)

: Prepare the Area

Before you begin installing the slide lock, make sure the area around the garage door is clear of obstructions. This will give you easy access to the door and workspace. Ensure that the door is fully closed.

: Locate a Suitable Placement

Determine where you want to install the slide lock. Typically, this is done on the inside of the garage door, near the center or slightly above. You should position the slide lock in a way that it can slide into a hole or slot on the garage door track. Make sure it doesn’t interfere with any moving parts of the door.

Use a pencil or marker to mark the position where you want to install the lock.

: Measure and Mark

Measure the distance between the top of the garage door and the mark you made for the lock placement. This measurement will help ensure the lock is installed at the correct height. Use a level to make sure the lock will be installed perfectly horizontally.

: Attach the Lock Bracket

Attach the lock bracket to the garage door using the provided screws. Ensure that it is level and securely fastened. If you’re concerned about the strength of the attachment, you may want to use a stud finder to locate and screw the bracket into a wall stud for added stability.

: Install the Slide Bolt

Slide the lock bolt into the lock bracket. The bolt should have a handle on one end and a hole or slot on the other end. Ensure it slides smoothly within the bracket.

: Drill a Hole or Slot on the Track

Position the door so that the bolt lines up with the garage door track when the door is closed. Mark the spot on the track where the bolt will engage it. This is where you’ll need to create a hole or slot in the track to accommodate the bolt.

Using a drill and an appropriately sized drill bit, carefully create a hole or slot in the track. Be cautious not to damage the track or door during this process. It’s essential to make a hole or slot that is both secure and allows for smooth sliding of the bolt.

: Test the Lock

Close the garage door and engage the slide bolt into the hole or slot you created in the track. Test the lock to ensure it holds the door securely in place. It should prevent the door from being opened manually from the outside.

: Final Check

Once you’re satisfied with the lock’s functionality, double-check that it is securely installed and level. Make any necessary adjustments to ensure proper alignment and operation.

Congratulations! You’ve successfully installed a Garage Door Repair North Richland Hills TX, enhancing the security of your garage. Keep the key or handle in a safe place and ensure that everyone in your household knows how to operate the lock in case of emergency. Regularly inspect the lock to ensure it remains in good working condition. If you encounter any issues, address them promptly to maintain the security of your garage.

NRH’s Gates & Garage Doors

7048 Ridge Crest Dr, North Richland Hills, TX 76182, United States

1-817-533-4913

How To Connect Craftsman Garage Door Opener To Wifi – Tarrant County Door & Gate

Connecting your Craftsman Garage Door Repair North Richland Hills TX adds a new level of convenience and control to your home.

In this comprehensive guide, I’ll walk you through the step-by-step process, ensuring a smooth connection between your Craftsman opener and your home WiFi network.

: Confirm Compatibility: Before initiating the connection process, ensure that your Craftsman garage door opener is compatible with WiFi connectivity. Check the specifications in your opener’s manual or visit the manufacturer’s website for any specific requirements or recommendations.

: Gather Necessary Equipment: Collect the required equipment, including your Craftsman garage door opener, a smartphone or tablet, and access to your home WiFi network. Make sure your mobile device has the Craftsman app installed; you can typically find it on your device’s app store.

: Connect Craftsman Opener to Power: Ensure that your Craftsman garage door opener is connected to power. If it’s not already powered up, plug it into an electrical outlet or turn on the circuit breaker.

: Locate the Smart/Learn Button: Find the “Smart” or “Learn” button on your Craftsman garage door opener. This button is usually located near the antenna. Consult your opener’s manual for the exact location if needed.

: Press and Hold the Smart/Learn Button: Press and hold the “Smart” or “Learn” button on your garage door opener. This action activates the WiFi pairing mode, allowing the opener to connect to your home network. You may notice a blinking light or other indicator to signal that the opener is ready to pair.

: Access WiFi Settings on Your Mobile Device: On your smartphone or tablet, go to the WiFi settings in the device’s system preferences. Look for available networks and connect to the one named after your Craftsman garage door opener. This direct connection allows you to communicate with the opener during the setup process.

: Open Craftsman App and Follow On-Screen Instructions: Launch the Craftsman app on your mobile device. If you haven’t already, create an account or log in. Follow the on-screen instructions to add a new device. The app will likely prompt you to select your garage door opener model and enter your home WiFi network credentials.

: Wait for Confirmation: After entering the WiFi information, wait for the Craftsman app to confirm a successful connection between your garage door opener and your home WiFi network. This process may take a few moments as the devices establish communication.

: Test Remote Operation: Once the WiFi connection is confirmed, test the remote operation through the Craftsman app. Use your mobile device to open or close the garage door from a distance. This ensures that the connection is functional and that you can control the opener remotely.

: Secure the Craftsman App: Ensure that your Craftsman app is secured with a strong password or authentication method. This adds an extra layer of security to prevent unauthorized access to your garage door opener through the app.

: Troubleshooting and Additional Features: If you encounter any issues during the setup process, consult the troubleshooting section in the Craftsman app or the opener’s manual. Explore additional features in the app, such as scheduling, notifications, or integration with other smart home devices.

: Enjoy Smart Home Convenience: Congratulations! Your Craftsman garage door opener is now connected to your home WiFi network, providing you with smart home convenience. Enjoy the ability to monitor and control your garage door remotely, receive status notifications, and integrate your garage door into your broader smart home ecosystem.

By following these detailed steps, you’ve successfully connected your Craftsman Garage Door Repair North Richland Hills TX, enhancing the functionality and accessibility of your garage. If you encounter any challenges or have further questions, refer to the Craftsman app’s support resources or contact Craftsman customer support for assistance.

Tarrant County Door & Gate

Tarrant County Door & Gate 6408 Marlette Court, North Richland Hills, TX

1-817-456-2958

How Does A Garage Door Lock Work – Tarrant County Door & Gate

Garage Door Repair North Richland Hills TX play a crucial role in securing our vehicles and possessions. Among the various components that ensure the safety of a garage door, the lock stands out as an essential mechanism. A garage door lock is designed to prevent unauthorized access, protect the contents within the garage, and enhance the overall security of the property.

In this article, we will delve into the intricacies of how a garage door lock works, exploring different types of locks and their functionalities.

  1. Overview of Garage Door Locks

Garage door locks are available in several configurations, each with its unique set of features and benefits. The two primary categories of garage door locks are manual locks and automatic locks.

1.1 Manual Locks Manual garage door locks require physical engagement and disengagement by the user. Examples of manual locks include padlocks, deadbolts, and sliding bolt locks. These locks provide a basic level of security but are susceptible to vulnerabilities due to human error, such as forgetting to lock the door.

1.2 Automatic Locks Automatic garage door locks, on the other hand, are integrated into the garage door system and are automatically engaged when the door closes. They provide a higher level of security and convenience compared to manual locks. Some automatic locks work in conjunction with garage door openers, ensuring the door remains securely locked until the opener is activated.

  1. Components of a Garage Door Lock

Understanding how a garage door lock operates requires knowledge of its primary components. The main components of a typical garage door lock system are as follows:

2.1 Lock Body The lock body is the central part of the locking mechanism, containing the core components that facilitate the locking and unlocking process. It houses the cylinder or tumbler, which interacts with the key to control the locking mechanism.

2.2 Cylinder or Tumbler The cylinder, also known as the tumbler, is a cylindrical-shaped mechanism within the lock body. It contains multiple pins that align when the correct key is inserted, allowing the lock to be turned and operated. Incorrect keys will misalign the pins, preventing the lock from turning.

2.3 Key The key is the external component that interacts with the cylinder/tumbler, controlling the lock’s operation. When the key is inserted, its ridges align with the pins in the cylinder, allowing the lock to turn and engage or disengage.

2.4 Bolt or Latch The bolt, also known as the latch, is the part of the lock that extends into the door frame or strike plate when the door is locked. It is responsible for keeping the door securely closed and preventing it from being opened from the outside.

  1. How a Manual Garage Door Lock Works

Let’s take a closer look at the workings of a manual garage door lock:

3.1 Padlocks A padlock is one of the simplest and most common manual garage door locks. It consists of a U-shaped shackle and a body that houses the locking mechanism. When the shackle is closed, it prevents the door from opening. Padlocks may require a separate hasp or loop to secure the shackle to the door track or another fixed object.

3.2 Deadbolts Deadbolts are popular manual locks used in garage doors and residential entry doors. They feature a solid, single-cylinder design that requires a key to operate from the outside and a thumbturn on the inside. Turning the key or thumbturn extends the bolt into the strike plate, securing the door.

3.3 Sliding Bolt Locks Sliding bolt locks, also known as surface-mounted locks or barrel bolts, are often used as additional security measures for garage doors. These locks consist of a sliding bolt that extends into a strike plate or bracket mounted on the door frame, keeping the door securely shut.

  1. How an Automatic Garage Door Lock Works

Automatic garage door locks provide enhanced security and convenience. The main types of automatic locks include:

4.1 Manual Release Automatic Locks These automatic locks work in conjunction with the garage door opener. When the garage door closes, the lock automatically engages, providing an additional layer of security. The lock disengages when the opener is activated, allowing the door to open smoothly.

4.2 Integrated Automatic Locks Integrated automatic locks are built directly into the garage door mechanism. When the door closes, the lock activates, securing the door in place without requiring any action from the user. Some integrated locks have no external key access, making them pick-resistant and highly secure.

Conclusion:

In conclusion, Garage Door Repair North Richland Hills TX locks are crucial components that safeguard our belongings and ensure the security of our homes. Manual locks, such as padlocks, deadbolts, and sliding bolt locks, provide a basic level of security, but they require manual engagement. Automatic locks, whether integrated or working with garage door openers, offer enhanced convenience and higher security levels.

Regular maintenance and periodic inspections are essential to ensure that garage door locks function correctly and maintain their effectiveness over time. Whether manual or automatic, a well-maintained garage door lock serves as a fundamental deterrent against unauthorized access, contributing to the overall safety and protection of your property.

Tarrant County Door & Gate

6408 Marlette Ct, North Richland Hills, TX 76182, Estados Unidos

817-456-2958

How to Reset The Liftmaster Garage Door Opener-North Richland hills Best Garage & Overhead Doors

To reset a LiftMaster Garage Door Repair North Richland Hills TX opener, you can follow the steps outlined below.

These instructions are general guidelines, so please consult your specific model’s manual for accurate information.

  1. Identify the Type of Opener: Determine the type of garage door opener you have. LiftMaster offers various models, including belt drive, chain drive, and screw drive openers. The reset process may vary slightly depending on the model.
  2. Power Off the Opener: Locate the power source for your garage door opener. Typically, it is a power cord connected to an electrical outlet near the ceiling. Unplug the opener from the outlet to cut off power supply. In some cases, you may need to turn off the circuit breaker that controls the garage door opener.
  3. Locate the Learn Button: Find the “Learn” button on your LiftMaster opener. This button is usually located on the back panel or side of the motor unit. It may be square-shaped or round, and its color can vary depending on the model. Common colors include red, purple, yellow, or green.
  4. Prepare for the Reset: Before proceeding with the reset, ensure that the garage door is closed. Make sure there are no obstructions in the door’s path and that the area is clear of any potential hazards.
  5. Perform a Basic Reset: For many LiftMaster models, a basic reset involves pressing and holding the “Learn” button for about six seconds. During this time, an LED light near the button may start blinking. After six seconds, release the button. This action erases the opener’s memory, removing all remote controls and keypad codes.
  6. Re-Pair the Remote Controls: After resetting the opener, you’ll need to reprogram your remote controls. To do this, press the “Learn” button on the opener once. Within 30 seconds, press the desired button on your remote control. The opener’s lights should flash or the LED light near the “Learn” button should turn solid, indicating successful programming. Repeat this process for each remote control you want to pair.
  7. Re-Code the Keypad (if applicable): If you have a wireless keypad for your garage door opener, you’ll need to reprogram it as well. Start by locating the “Learn” button on the opener and pressing it twice. This action initiates the keypad’s programming mode. On the keypad, enter your desired PIN followed by the “Enter” button. The opener’s lights should flash or the LED light near the “Learn” button should turn solid, confirming successful programming.
  8. Test the Opener: Once you have reprogrammed the remote controls and keypad, plug the opener back into the power outlet or turn on the circuit breaker. Test the garage door opener by pressing the programmed buttons on the remotes and keypad. The door should operate smoothly without any issues.
  9. Adjust Additional Settings: Depending on your specific model, there may be additional settings you can adjust, such as the travel limits, force settings, or safety features. Consult your model’s manual for instructions on how to fine-tune these settings if needed.

Remember to consult your LiftMaster Garage Door Repair North Richland Hills TX opener’s manual for model-specific instructions and any additional steps or precautions. Following these steps should help you reset your LiftMaster garage door opener and get it functioning properly again.

North Richland hills Best Garage & Overhead Doors

North Richland Hills, TX 76182

817-533-4913

Powered by WordPress & Theme by Anders Norén