Tag: garage door repair Colleyville TX

How To Wire A Garage Door Opener Without Sensors – Colleyville Gates & Garage Doors

Embarking on the journey of wiring your Garage Door Repair Colleyville TX can be a rewarding experience.

In this guide, we’ll walk you through the process, ensuring a smooth installation from start to finish.

Understanding Garage Door Opener Wiring

Navigating the intricacies of garage door opener wiring requires a fundamental understanding. We’ll delve into the basics, demystifying the components involved and their functions.

Essential Tools and Materials

Before you dive into the wiring process, gather the necessary tools and materials. This section provides a comprehensive list, ensuring you have everything at your fingertips for a hassle-free installation.

Safety First: Precautions Before You Start

Safety is paramount. Learn about the essential precautions to take before embarking on your wiring adventure. From turning off power sources to using protective gear, we’ve got you covered.

Step-by-Step Wiring Process

Unravel the step-by-step guide on wiring your garage door opener without sensors. Each phase is meticulously explained, offering clarity and guidance as you navigate through the installation.

Common Mistakes to Avoid

Even the most seasoned DIYers can make mistakes. Learn about common pitfalls to sidestep during the wiring process, ensuring a flawless execution of your garage door opener installation.

How to Choose the Right Wire Gauge?

Selecting the appropriate wire gauge is crucial. Opt for a gauge that matches the power requirements of your garage door opener. Check the manufacturer’s recommendations for optimal performance.

Can I Install a Garage Door Opener Without Professional Help?

Absolutely. With the right guidance, installing a garage door opener is a manageable DIY project. Follow our comprehensive guide, and you’ll be on your way to a successfully wired opener.

What If I Encounter Wiring Issues During Installation?

Wiring hiccups are common. If you face issues, consult our troubleshooting section for expert tips on identifying and rectifying common wiring problems.

Is It Necessary to Turn Off Power Before Starting the Wiring Process?

Yes, turning off power is non-negotiable. Ensure your safety by cutting off the power supply before initiating any wiring work. This minimizes the risk of electrical accidents.

Are There Any Specific Brands of Garage Door Openers That Work Best Without Sensors?

While various brands excel, look for openers with user-friendly wiring systems. Check customer reviews for insights into the installation process and reliability without sensors.

How Long Does It Typically Take to Wire a Garage Door Opener Without Sensors?

The time varies based on your familiarity with electrical work. On average, it can take anywhere from 2 to 4 hours. Take your time, follow the steps diligently, and enjoy the process.

How to Troubleshoot Wiring Issues

Encountering issues during or after installation? This section provides troubleshooting tips to diagnose and resolve common wiring problems. Keep calm, and let’s get your garage door opener working seamlessly.

Conclusion:

You’ve successfully navigated the intricate process of wiring your Garage Door Repair Colleyville TX. With the right information and a dash of DIY spirit, you’ve empowered yourself to enhance your home.

Colleyville Gates & Garage Doors

6508 Colleyville Blvd Colleyville, TX, 76034

817-755-6231

How To Remove A Garage Door Lock From The Outside – Colleyville Gates & Garage Doors

Removing a Garage Door Repair Colleyville TX is a task that requires careful attention to detail and the right tools.

Before attempting this, ensure that you have the necessary permission and legal rights to work on the garage door. Here’s a step-by-step guide in around:

: Gather the Tools

Before you start, make sure you have all the required tools:

  1. Screwdriver set: A variety of screwdrivers will be needed, including flathead and Phillips.
  2. Adjustable wrench: For loosening nuts and bolts.
  3. Lock removal kit: This may include specific tools for removing locks.
  4. Hammer: For gentle tapping and loosening.
  5. Lubricant: To loosen any rusted or stuck parts.

: Identify the Lock Type

Garage door locks come in various types, including T-handle locks, deadbolts, and cylinder locks. Identify the type of lock you’re dealing with before proceeding. Different locks may require different removal techniques.

: Disconnect the Garage Door Opener

For safety reasons, disconnect the garage door opener from the power source. This ensures that no one accidentally opens or closes the door while you’re working on it.

: Remove the Cover Plate

Many garage door locks have a cover plate that conceals the mounting screws. Use a suitable screwdriver to remove these screws and take off the cover plate.

: Expose the Lock Mechanism

Once the cover plate is removed, you should see the lock mechanism. Take note of how it’s connected to the door, as this will be important when reassembling later.

: Remove Mounting Screws

Use the appropriate screwdriver to carefully remove the mounting screws that secure the lock to the door. Keep these screws in a safe place; you’ll need them when reinstalling the lock.

: Disconnect the Linkage

Depending on the lock type, there may be a linkage connecting the lock to the door mechanism. Use pliers or a wrench to disconnect this linkage. Take note of how it’s connected so that you can easily reattach it later.

: Loosen Any Stuck Parts

If any parts of the lock are stuck or rusted, use a lubricant to loosen them. This might include the lock cylinder or any moving parts. Gently tap on the stuck parts with a hammer to help the lubricant penetrate.

: Remove the Lock Cylinder

For cylinder locks, there’s usually a retaining screw that holds the cylinder in place. Use the appropriate screwdriver to remove this screw. Once the screw is out, you should be able to slide the lock cylinder out of its housing.

: Check for Additional Security Features

Some garage door locks may have additional security features, such as anti-drill plates or extra bolts. Remove these as needed, using the appropriate tools.

: Inspect and Clean

Take this opportunity to inspect the removed lock for any signs of damage or wear. Clean the components, removing any debris or old lubricant.

: Reassembly

If you’re replacing the lock, follow the manufacturer’s instructions for installing the new lock. If you’re reusing the same lock, reverse the steps you took for removal. Reattach any linkages, secure the mounting screws, and ensure everything is tightly connected.

: Test the Lock

Before declaring the job complete, test the lock to ensure it functions correctly. Insert the key and turn it to lock and unlock the door. If you removed a cylinder lock, ensure the key turns smoothly in the new or reinstalled cylinder.

: Reconnect the Garage Door Opener

Once you’re satisfied with the lock’s installation and functionality, reconnect the garage door opener to its power source.

: Dispose of Old Lock Properly

If you’re replacing the lock, dispose of the old lock following your local regulations. Some locks may contain materials that require special disposal methods.

Conclusion:

Removing a Garage Door Repair Colleyville TX requires patience and precision. It’s crucial to understand the type of lock you’re dealing with and follow the appropriate steps for removal. By using the right tools and taking your time, you can successfully remove a garage door lock and either replace it or address any issues that may have led to its removal.

Colleyville Gates & Garage Doors

817-755-6231

How Much Does A Garage Door Opener Cost – Colleyville Gates & Garage Doors


The cost of a Garage Door Repair Colleyville TX can vary significantly based on several factors, including the type of opener, brand, features, and installation fees.

In this exploration of garage door opener costs, we’ll delve into the different types of openers, their functionalities, and the associated price ranges.

1. Chain-Drive Garage Door Openers: Chain-drive openers are among the most common and cost-effective options. They use a metal chain to operate the garage door. These openers are sturdy and reliable, making them a popular choice for many homeowners. On average, a basic chain-drive garage door opener can range from $150 to $300.

2. Belt-Drive Garage Door Openers: Belt-drive openers operate similarly to chain-drive ones but use a reinforced belt instead of a chain. These are known for being quieter than chain-drive models. However, the increased quietness often comes with a higher price tag. Belt-drive garage door openers typically range from $200 to $500.

3. Screw-Drive Garage Door Openers: Screw-drive openers use a threaded steel rod to move the garage door. They are known for their minimal maintenance requirements and are suitable for various climates. The cost of a screw-drive garage door opener generally falls between $200 and $400.

4. Jackshaft Garage Door Openers: Jackshaft openers are mounted on the wall beside the garage door, freeing up ceiling space. These are a great option for garages with limited headroom. Jackshaft openers can range from $300 to $600, depending on the brand and features.

5. Smart Garage Door Openers: With the rise of smart home technology, there are now garage door openers equipped with smart features. These can be controlled via smartphone apps, allowing homeowners to monitor and operate their garage doors remotely. Smart garage door openers can cost between $200 and $600, depending on the level of connectivity and features.

6. Additional Features and Accessories: Certain features and accessories can add to the overall cost of a garage door opener. For example, battery backup systems, keyless entry pads, and advanced security features may contribute to a higher price. On average, expect to pay an additional $50 to $150 for such features.

7. Professional Installation Costs: While some homeowners may choose to install garage door openers themselves, professional installation is recommended for those unfamiliar with the process. Installation costs can vary based on geographic location and the complexity of the installation. On average, professional installation may add $100 to $300 to the overall cost.

Conclusion:

In summary, the cost of a Garage Door Repair Colleyville TX can range from $150 to $600, with additional features and professional installation contributing to the overall expense. Homeowners should consider their specific needs, budget, and preferences when choosing a garage door opener that best fits their requirements. It’s essential to strike a balance between cost and functionality to ensure a reliable and efficient garage door opener system.

Colleyville Gates & Garage Doors

817-755-6231

Choosing the Right Time for a Garage Door Replacement – Colleyville Gates & Garage Doors

When it comes to home maintenance and improvement projects, one area that’s often overlooked is the garage door. For years, I had taken my garage door for granted, not realizing the significant role it plays in the overall functionality and aesthetics of my home. However, as the years passed and my garage door began to show signs of wear and tear, I knew it was time to consider a replacement.

By following Garage Door Repair Colleyville TX, I’ll share my journey of choosing the right time for a garage door replacement and the factors I considered to make an informed decision.

The Importance of a Well-Functioning Garage Door

Before delving into the timing of garage door replacement, it’s crucial to understand why a well-functioning garage door is essential. The garage door is not just an entry and exit point for your vehicles; it’s a vital component of your home’s security, curb appeal, and energy efficiency.

1. Security:

A functioning garage door acts as a barrier between your home and potential intruders. A damaged or malfunctioning door can compromise your family’s safety and the security of your belongings.
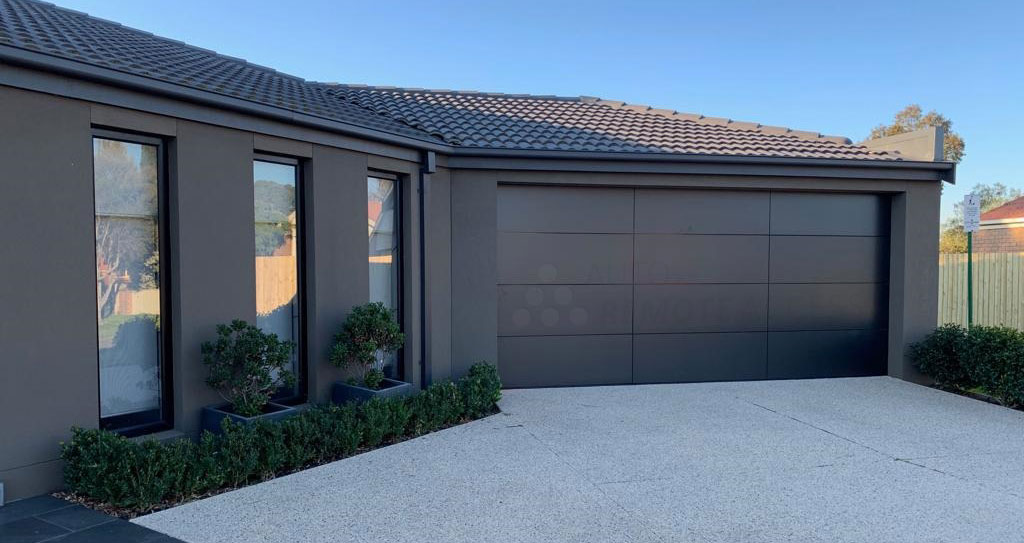
2. Curb Appeal:

Your garage door is one of the first things people notice about your home’s exterior. A faded or dented door can detract from your home’s overall appearance and curb appeal.

3. Energy Efficiency:

A properly insulated and sealed garage door can help regulate the temperature in your garage and prevent energy loss. This can translate to energy savings and improved comfort in your home.

Signs It’s Time for a Garage Door Replacement

Recognizing when it’s time to replace your garage door is essential to ensure you don’t compromise on these critical aspects. Here are some common signs that indicate your garage door might need replacement:

1. Visible Damage:

  • Cracks, dents, or warping on the door panels.
  • Rust or corrosion on metal components.
  • Fading or peeling paint that affects the door’s appearance.

2. Frequent Repairs:

  • If you find yourself constantly calling for garage door repairs, it might be more cost-effective to invest in a replacement.

3. Slow or Noisy Operation:

  • Sluggish or noisy garage door operation can indicate worn-out components, such as springs or rollers.

4. Lack of Safety Features:

  • Older garage doors may lack modern safety features like photoelectric sensors and auto-reverse mechanisms.

5. Energy Efficiency Issues:

  • If your garage door is not adequately insulated or sealed, it can contribute to energy loss in your home.

Factors to Consider When Choosing the Right Time

Once you’ve identified the signs that your garage door needs replacement, it’s essential to consider the following factors to determine the right time for the replacement:

1. Budget:

Your budget plays a significant role in deciding when to replace your garage door. It’s essential to assess your financial situation and determine whether you can comfortably afford a replacement at the moment. Remember that investing in a quality garage door can provide long-term value and energy savings.

2. Seasonal Considerations:

Consider the time of year when planning your garage door replacement. Many homeowners opt for replacements in the spring or summer when the weather is more predictable and installation can be carried out without weather-related interruptions.

3. Urgency:

Assess the urgency of the situation. If your garage door is severely damaged, malfunctioning, or poses a safety risk, it may be necessary to prioritize replacement immediately. Delaying replacement in such cases can lead to more extensive problems and expenses.

4. Home Improvement Goals:

Consider your overall home improvement goals. If you’re planning to sell your home in the near future, a new garage door can significantly boost curb appeal and potentially increase your home’s resale value.

5. Energy Efficiency:

If energy efficiency is a concern, replacing your garage door with an insulated and well-sealed model can be a wise decision. This can lead to energy savings and improved comfort throughout the year.

6. Aesthetics:

If your current garage door is detracting from your home’s appearance, a replacement can enhance your home’s curb appeal and create a more cohesive and attractive exterior.

7. Professional Assessment:

It’s highly advisable to consult with a reputable garage door professional or technician. They can assess the condition of your current door, provide expert recommendations, and offer guidance on the best time for replacement.

The Decision-Making Process

Choosing the right time for a garage door replacement is a decision that requires careful consideration. To guide you through the process, here are some steps I followed when making my decision:

1. Assess the Condition:

I thoroughly inspected my existing garage door to assess its condition. I looked for visible damage, such as dents, rust, and fading, and noted any issues with its operation.

2. Set a Budget:

I determined a budget for the replacement project, taking into account the cost of the new garage door, installation fees, and any additional features or insulation I wanted to include.

3. Prioritize Safety:

If my garage door posed safety risks due to malfunctioning components, I would have prioritized immediate replacement to ensure the safety of my family and property.

4. Evaluate Energy Efficiency:

I considered the impact of energy efficiency on my home’s comfort and utility bills. If my current garage door lacked insulation or proper sealing, this would have been a significant factor in my decision.

5. Seek Professional Advice:

I consulted with a reputable garage door professional who conducted a thorough assessment of my current door. They provided insights into the urgency of the replacement and recommendations for suitable replacement options.

6. Consider Seasonal Timing:

I factored in the time of year and weather conditions. Since I live in an area with harsh winters, I aimed to schedule the replacement during the milder months to avoid weather-related delays.

7. Plan for Aesthetics:

Enhancing my home’s curb appeal was a priority for me, so I considered how the new garage door would complement the overall look of my home.

8. Align with Home Improvement Goals:

I considered my long-term home improvement goals and how a new garage door would fit into those plans.

Conclusion: The Right Time for a Garage Door Replacement

Choosing the right time for a garage door replacement is a decision that requires a thoughtful assessment of your current situation, goals, and priorities. While budget and aesthetics play a significant role, safety, energy efficiency, and the overall condition of your existing garage door should also be considered.

For me, the decision to replace my garage door was not just about aesthetics but also about ensuring the security, energy efficiency, and functionality of my home. Ultimately, I found the right time to be when the signs of wear and tear became apparent, and my budget allowed for a quality replacement that met my needs.

Overall, as stated from Garage Door Repair Colleyville TX, if you find yourself in a similar situation, I encourage you to conduct a thorough evaluation, seek professional advice, and align your decision with your home improvement goals. A well-timed garage door replacement can enhance your home’s value, security, and overall appeal, making it a worthwhile investment in the long run.

Colleyville Gates & Garage Doors

6508 Colleyville Blvd, Colleyville, TX 76034, United States

817-755-6231

How to Reset Travel on Chamberlain Garage Door Opener – Colleyville Gates & Garage Doors

Resetting the travel limits on a Chamberlain garage door opener is an essential maintenance task that ensures your garage door opens and closes properly. These limits determine how far the door travels in both the open and closed positions. If they’re not set correctly, your Garage Door Repair Colleyville TX may not operate safely or efficiently. Before you begin, make sure you have the owner’s manual for your specific Chamberlain model, as the procedure may vary slightly depending on the model.

Below are detailed steps to reset the travel limits on a Chamberlain garage door opener:

Before You Begin

  1. Safety First: Always prioritize safety when working with garage doors. Disconnect the power to the garage door opener to prevent any accidental activation during the process.
  2. Gather Your Tools: You may need a ladder, a tape measure, a flathead screwdriver, and a partner to assist with some steps.
  3. Read the Manual: Familiarize yourself with your specific Chamberlain garage door opener’s manual. While this guide offers general instructions, your model may have unique features or requirements.

Step 1: Open the Garage Door

To reset the travel limits, start with your garage door fully open. If your door is stuck or malfunctioning, resolve any issues before attempting to reset the limits.

Step 2: Locate the Adjustment Screws

Chamberlain garage door openers typically have two adjustment screws for setting the travel limits. These screws are usually labeled “Up Limit” and “Down Limit.” You can find them on the main unit, which is often located near the motor or the front of the opener.

Step 3: Reset the Down Limit

  1. Adjust Down Limit Screw: Use a flathead screwdriver to turn the “Down Limit” screw counterclockwise. This will increase the travel distance of the door in the downward direction.
  2. Set the New Limit: With the help of a partner, lower the garage door manually until it’s about 2 inches from the floor. Measure this distance with a tape measure.
  3. Adjust Down Limit Screw (Continued): Turn the “Down Limit” screw clockwise to set the door to the measured distance. Be gradual and cautious, making small adjustments at a time.
  4. Test: Activate the garage door opener and observe the door’s movement. It should stop and reverse when it touches the floor. If it doesn’t, you may need to make further adjustments.

Step 4: Reset the Up Limit

  1. Adjust Up Limit Screw: Use a flathead screwdriver to turn the “Up Limit” screw clockwise. This will increase the travel distance of the door in the upward direction.
  2. Set the New Limit: With the door fully open, measure the distance from the bottom of the door to the header or ceiling.
  3. Adjust Up Limit Screw (Continued): Turn the “Up Limit” screw counterclockwise to set the door to the measured distance. As before, make small adjustments and test the door’s movement.
  4. Test: Activate the garage door opener and observe the door’s movement. It should stop when fully open. If it doesn’t, adjust the “Up Limit” screw accordingly.

Step 5: Fine-Tune the Limits

After performing the initial adjustments, it’s important to fine-tune the travel limits to ensure the door operates smoothly and safely.

  1. Test Both Directions: Open and close the garage door several times using the remote or wall button. Pay close attention to any unusual noises, jerky movements, or obstructions.
  2. Adjust as Needed: If you notice any issues during the testing, make small adjustments to the respective limit screws until the door operates smoothly and without problems.
  3. Safety Reversal Test: Perform a safety reversal test by placing an object (such as a block of wood) in the path of the closing door. The door should immediately reverse when it comes into contact with the object. If it doesn’t, consult your manual for troubleshooting or contact a professional.

Step 6: Secure the Adjustment Screws

Once you’re satisfied with the travel limits and the door’s performance, tighten the adjustment screws securely to prevent them from shifting.

Step 7: Reconnect Power

Reconnect the power to the garage door opener.

Step 8: Test Again

Test the garage door opener a few more times to ensure it operates as expected.

Step 9: Maintenance and Regular Checks

To maintain the proper operation of your garage door opener, periodically check the travel limits, lubricate moving parts, and inspect the safety features. Follow the manufacturer’s recommendations for maintenance intervals.

In conclusion, resetting the travel limits on your Chamberlain Garage Door Repair Colleyville TX opener is a crucial task to ensure the safe and efficient operation of your garage door. Always follow the specific instructions provided in your owner’s manual, and if you encounter any issues or difficulties, consider seeking professional assistance to avoid any safety hazards. Regular maintenance and testing will help keep your garage door opener in excellent working condition.

Colleyville Gates & Garage Doors

6508 Colleyville Blvd, Colleyville, TX 76034, United States

1-817-755-6231

How To Flash A Garage Door Opening – Colleyville Gates & Garage Doors

Flashing a Garage Door Repair Colleyville TX opening is a crucial step in ensuring that your garage remains well-sealed and protected against the elements. Flashing prevents water from entering the space between the garage door frame and the surrounding wall, which can lead to moisture damage, mold growth, and other issues.

Here’s a comprehensive guide on how to properly flash a garage door opening:

Step 1: Gather Your Materials and Tools
Before you start, make sure you have all the necessary materials and tools on hand:

Materials:

  • Self-adhesive flashing membrane (preferably rubberized asphalt)
  • Flashing tape (for additional protection)
  • Roofing nails
  • Caulk or sealant
  • Drip edge (optional, for added water protection)
  • Hammer
  • Utility knife
  • Tape measure

Step 2: Clean and Prep the Area
Ensure that the garage door opening is clean and free from debris, dirt, and dust. Clean any existing caulking or sealant from the opening’s surface to ensure a smooth and even application of the flashing membrane.

Step 3: Install Drip Edge (Optional)
If you want an added layer of water protection, you can install a drip edge along the top of the garage door opening. This metal piece helps direct water away from the opening and prevents it from seeping behind the siding or wall.

Step 4: Measure and Cut the Flashing Membrane
Measure the width and height of the garage door opening. Add a few extra inches to each dimension to ensure you have enough flashing material to properly seal the opening. Use a utility knife to cut the flashing membrane to the appropriate size.

Step 5: Apply the Flashing Membrane
Start by applying the self-adhesive flashing membrane to the sides of the garage door opening. Peel off the backing and carefully press the membrane onto the surface, ensuring it’s aligned with the edges of the opening. Smooth out any air bubbles or wrinkles as you go.

Step 6: Secure the Flashing Membrane
Use roofing nails to secure the flashing membrane in place. Place the nails along the top edge and sides of the flashing, leaving a few inches between each nail. Make sure the nails are evenly spaced and secure the flashing tightly to the opening.

Step 7: Overlap and Seal
When you reach the corners of the garage door opening, overlap the flashing membrane by a few inches. This helps create a watertight seal. Press down on the overlapping section to ensure a firm bond.

Step 8: Flash the Top of the Opening
Apply the flashing membrane along the top of the garage door opening in a similar manner. Overlap the side flashing membranes by a few inches to create a continuous barrier. Secure the top flashing membrane with roofing nails.

Step 9: Use Flashing Tape
For added protection, you can use flashing tape along the edges of the flashing membrane. This provides an extra layer of waterproofing and reinforces the seal. Apply the tape according to the manufacturer’s instructions.

Step 10: Apply Caulk or Sealant
Seal any gaps or joints in the flashing membrane using a high-quality caulk or sealant that’s compatible with the material of the flashing. Caulk around the edges, corners, and any areas that require extra protection.

Step 11: Inspect and Test
After you’ve applied the flashing and sealant, take a step back and inspect the entire garage door opening. Look for any gaps, wrinkles, or areas that need additional attention. You can also do a water test by spraying water on the flashing and observing if it properly directs water away from the opening.

Flashing a Garage Door Repair Colleyville TX opening is an essential step in maintaining the integrity of your garage and preventing water damage. By following these steps and using the right materials, you can effectively seal the opening and ensure that your garage remains dry and protected against the elements.

Colleyville Gates & Garage Doors

6508 Colleyville Blvd, Colleyville, TX 76034, United States

1-817-755-6231

Garage Door Repair Costs: Budgeting for Common Repairs and Replacements – Colleyville Gates & Garage Doors

As a diligent homeowner who understands the significance of proper maintenance, the prospect of garage door repairs and replacements is something I’ve taken seriously. To make informed financial decisions, I embarked on a mission to unravel the intricacies of garage door repair costs. Drawing from the wisdom of industry professionals, I’ve gained a thorough understanding of the expenses associated with common repairs and replacements.

By following Garage Door Repair Colleyville TX, here are my insights and experiences, shedding light on the budgeting considerations that empower homeowners like me to navigate the realm of garage door maintenance with confidence.

1. The Power of Financial Preparedness: Uncovering Garage Door Repair Costs

As I embraced the role of a responsible homeowner, I realized the importance of being financially prepared for potential garage door repairs and replacements. Seeking guidance from garage door professionals, I aimed to gain a deeper understanding of the costs that might arise.

2. Embracing Routine Care: The Value of Regular Maintenance

I quickly recognized that regular maintenance is key to cost-effective garage door care. Experts emphasized the significance of scheduling routine inspections, lubrication, and minor adjustments. These simple steps extend the lifespan of a garage door, minimizing the likelihood of major repairs and their associated expenses.

3. Mapping Out the Budget: Common Repairs and Their Costs

Through discussions with garage door professionals, I learned about common repairs and the corresponding costs. This insight provided me with a clear spectrum of potential budgetary considerations. From fixing misaligned tracks and replacing broken springs to addressing sensor malfunctions or damaged panels, I gained a comprehensive view of potential expenses.

4. Springing into Action: The Importance of Timely Spring Replacement

Understanding the critical role of springs in a garage door’s operation, I dived deeper into spring replacement. Experts stressed the urgency of promptly replacing worn-out springs, as a broken spring not only disrupts the door’s function but can also pose safety hazards. While costs may vary based on factors like spring type and door size, I realized that the investment is a prudent one for restoring functionality and ensuring safety.

5. A Fresh Start: Evaluating Garage Door Replacement Costs

The prospect of garage door replacement loomed large, presenting both financial and aesthetic considerations. Professionals highlighted the importance of assessing the door’s condition, performance, and appearance when contemplating a replacement. Although the cost of a new garage door varies based on factors such as material, design, and insulation, I understood that it’s an investment that can significantly enhance curb appeal and functionality.

6. Navigating Opener Expenses: Repairs and Replacements

Garage door openers emerged as another crucial element in need of occasional attention. When facing opener repairs or replacements, experts advised me on finding a balance between safety and economy. While repairing certain components might be cost-effective, outdated or malfunctioning openers could necessitate replacement to ensure optimal performance and security.

7. The Hidden Consequences: Delays and Their Costs

I learned firsthand that delaying necessary repairs can lead to unexpected consequences, both financially and in terms of safety. Experts warned against ignoring minor issues, as they have the potential to escalate into more significant and costly problems over time. Recognizing the value of prompt action, I realized that addressing small repairs now can save me from larger financial burdens later.

8. The True Value of Professional Services: Labor and Expertise

Garage door professionals emphasized the importance of seeking the assistance of licensed and reputable repair experts. While I might be tempted to cut costs by attempting DIY repairs, I’ve come to appreciate the value of skilled workmanship, safety, and the assurance of a job well done.

9. An Ounce of Prevention: The Significance of Proactive Measures

To mitigate repair costs, professionals introduced me to the concept of preventive measures. I understood that simple actions like regular cleaning, lubrication, and inspections play a significant role in extending the life of a garage door. By taking proactive steps, I’m investing in a longer-lasting door that requires fewer extensive repairs.

10. A Journey of Informed Decision-Making: The Power of Financial Planning

In conclusion, according to Garage Door Repair Colleyville TX, my exploration of garage door repair costs has been eye-opening and empowering. The insights I’ve gained from industry professionals have equipped me with a comprehensive perspective on budgeting for common repairs and replacements. From routine maintenance to addressing specific components and even considering full replacements, each step represents an investment in the longevity, functionality, and safety of my garage door. Armed with this newfound knowledge, I now approach garage door maintenance with the confidence of financial preparedness. I’m determined to ensure that the essential entrance to my home remains in optimal condition, aligning harmoniously with my budgetary considerations and enhancing the overall value and appeal of my beloved residence.

Colleyville Gates & Garage Doors

6508 Colleyville Blvd, Colleyville, TX 76034, United States

817-755-6231

Are Roll Up Garage Doors Insulated-Colleyville Garage Door and Gates

Garage Door Repair Colleyville TX are an essential component of any home or commercial building that has a garage. They not only serve as a secure barrier against unauthorized access but also add aesthetic value to the building’s exterior. Roll-up garage doors are an increasingly popular option due to their durability, ease of use, and space-saving design.

However, many people wonder if these types of doors are insulated or not.

The answer to this question depends on the type and brand of roll-up garage door you are considering. Some roll-up doors are insulated, while others are not.

Insulated roll-up garage doors are designed with an additional layer of insulation between the door panels. The insulation material is usually made of polyurethane or polystyrene, which is inserted into the door’s hollow cavities. This insulation layer helps to reduce the transfer of heat between the interior and exterior of the garage, making it easier to maintain a comfortable temperature inside the garage.

There are several benefits to having an insulated roll-up garage door. First, it can help reduce energy costs by keeping the garage at a consistent temperature. This is particularly important if you use your garage as a workspace or have a living space above it. An insulated garage door can also help reduce noise levels, making it a great choice for those who live in busy neighborhoods or near busy roads. Additionally, an insulated garage door can help protect your car, tools, and other items stored in the garage from extreme temperature fluctuations.

Non-insulated roll-up garage doors, on the other hand, do not have an additional layer of insulation. These doors are made up of a single layer of steel or aluminum and are typically thinner and lighter than insulated doors. While non-insulated doors are generally less expensive than their insulated counterparts, they do not offer the same level of energy efficiency or noise reduction.

It’s important to note that not all insulated roll-up garage doors are created equal. The level of insulation can vary depending on the manufacturer and the specific model of the door. Some doors may have a higher R-value (a measure of thermal resistance), which indicates a greater level of insulation. It’s also important to consider the quality of the insulation material used. Higher quality insulation materials are more effective at reducing heat transfer and providing sound insulation.

When shopping for a roll-up garage door, it’s essential to consider your specific needs and budget. If you live in a climate with extreme temperature fluctuations or use your garage as a workspace or living space, an insulated roll-up garage door may be worth the investment. However, if you’re on a tight budget and don’t require as much insulation or noise reduction, a non-insulated door may be a more practical choice.

In addition to insulation, there are other factors to consider when choosing a roll-up garage door. These include the material of the door, the size and style of the door, and the method of operation.

Roll-up garage doors are typically made of steel or aluminum, both of which are durable and require minimal maintenance. Steel doors are generally more expensive than aluminum doors but offer greater strength and security. Aluminum doors are lighter and less expensive than steel doors but may dent more easily.

The size and style of the door will depend on the dimensions of your garage and your personal preferences. Roll-up garage doors come in a range of sizes, from single-car doors to double-car doors, and can be customized to fit any garage opening. You can also choose from a variety of styles, including traditional raised panel, contemporary flush panel, or carriage house designs.

Finally, consider the method of operation for your roll-up garage door. Most roll-up doors are operated manually, using a chain or crank system to raise and lower the door. However, some doors come equipped with electric openers, which allow you to open and close the door with the push of a button. Electric openers are particularly useful for those with physical limitations or for those who want the convenience of remote operation.

When choosing an electric opener for your roll-up garage door, consider the horsepower of the motor, the type of drive system, and the safety features included. Higher horsepower motors are capable of lifting heavier doors and can provide faster operation. The drive system can be chain-driven, belt-driven, or screw-driven, each with its own advantages and disadvantages. Finally, look for safety features such as automatic reverse, which will cause the door to reverse direction if it encounters an obstacle while closing.

In conclusion, whether or not roll-up Garage Door Repair Colleyville TX are insulated depends on the specific model and manufacturer. Insulated doors offer several benefits, including improved energy efficiency, noise reduction, and protection of stored items. However, non-insulated doors are less expensive and may be more practical for those on a budget or with less demanding requirements. When choosing a roll-up garage door, consider factors such as the material, size and style, and method of operation in addition to insulation. With careful consideration, you can find the perfect roll-up garage door to meet your needs and budget.

Colleyville Garage Door and Gates

Colleyville Doors and Gates
102 Williamsburg Ct Suit 1C
Colleyville, TX 76034

817-904-4816

How to Re-Engage Garage Door – Colleyville Door and Gates

Re-engaging a Garage Door Repair Colleyville TX can be a challenging task if you don’t have the proper knowledge and tools. There can be many reasons why your garage door has disengaged, including a power outage, a malfunctioning opener, or a broken spring.

However, with some basic tools and a bit of know-how, you can re-engage your garage door and get it functioning again in no time.

Here are the steps to re-engage a garage door:

Step 1: Check the Power Source

Before you start troubleshooting the door, you should check the power source. Make sure that the opener is plugged in and that the circuit breaker hasn’t tripped. If the opener is hardwired, check the wiring to make sure that it is intact.

Step 2: Disengage the Emergency Release Cord

If the power is on and the door still won’t open, it’s time to check the emergency release cord. This cord is typically red and located near the trolley on the rail of the opener. Pull down on the cord to disengage the door from the opener. This will allow you to open the door manually.

Step 3: Open the Door Manually

Once the emergency release cord has been disengaged, you can open the garage door manually. To do this, locate the handle on the door and pull it down. This will release the door from the track, allowing you to open it by hand. Be careful when opening the door, as it can be heavy and difficult to lift.

Step 4: Check the Track and Rollers

Once the door is open, check the track and rollers for any obstructions or damage. Look for any debris, such as leaves or rocks, that may be blocking the track. Also, inspect the rollers to make sure that they are rolling smoothly and are not worn out.

Step 5: Re-engage the Door to the Opener

Once you have checked the track and rollers, it’s time to re-engage the door to the opener. To do this, lift the door until it is in line with the trolley on the opener rail. Push the door against the trolley until it clicks back into place.

Step 6: Test the Door

Once the door is re-engaged to the opener, test it to make sure that it is functioning properly. Use the wall switch or remote control to open and close the door. If the door opens and closes smoothly and without any issues, then you have successfully re-engaged the door.

Step 7: Lubricate the Moving Parts

To keep your garage door functioning properly, it’s important to lubricate the moving parts regularly. Use a silicone-based lubricant to lubricate the track, rollers, and hinges. This will help to prevent rust and corrosion and will keep the door operating smoothly.

Tips for Re-engaging a Garage Door

Here are some additional tips to keep in mind when re-engaging a garage door:

  1. Wear protective gear, such as gloves and safety glasses, to protect your hands and eyes while working on the door.
  2. Use caution when lifting the door manually, as it can be heavy and difficult to lift.
  3. If you are unsure about how to re-engage the door, consult the owner’s manual or contact a professional garage door repair company for assistance.
  4. Keep the area around the garage door clear of debris and obstructions to prevent damage to the door and track.
  5. Test the door regularly to make sure that it is functioning properly.

Conclusion:

Re-engaging a Garage Door Repair Colleyville TX can be a frustrating task, but with some basic knowledge and the right tools, you can get your door functioning properly again in no time.

Colleyville Door and Gates

817-904-4816

Powered by WordPress & Theme by Anders Norén