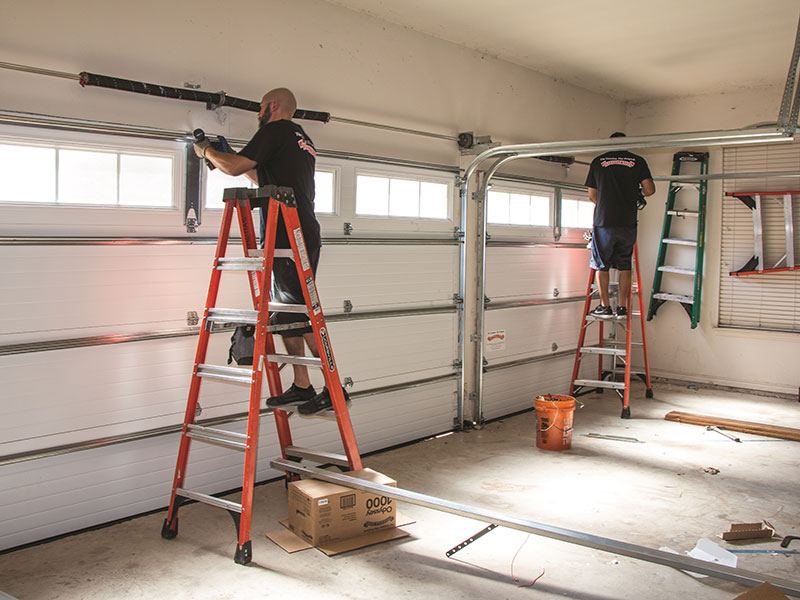
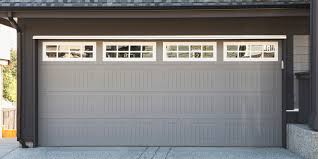
Garage Door Repair Suwanee GA A damaged or worn-out garage door seal can compromise the seal between the door and the garage floor, leading to water leakage, drafts, and energy loss. Fortunately, repairing a garage door seal is a relatively straightforward task that can be completed with basic tools and materials.
Here’s a detailed guide on how to repair a garage door seal:
Inspect the Garage Door Seal:Begin by inspecting the garage door seal to identify any areas of damage, wear, or deterioration. Look for signs of cracking, tearing, or gaps in the seal that may allow water, air, or pests to enter the garage.
Clean the Seal and Surrounding Area:Before repairing the garage door seal, clean the seal and the surrounding area thoroughly to remove any dirt, debris, or grease buildup. Use a mild detergent and water solution to clean the seal, and ensure the area is dry before proceeding with the repair.
Identify the Type of Garage Door Seal:Garage door seals come in various types, including bottom seals, weatherstripping, and threshold seals. Identify the type of seal used on your garage door to determine the appropriate repair method and materials.
Repairing Bottom Seals:If the bottom seal of your garage door is damaged or worn out, follow these steps to repair it:
Remove the damaged section of the bottom seal by cutting it with scissors or a utility knife.
Measure the length of the opening where the seal will be installed and cut a new section of seal to fit.
Insert the new seal into the bottom retainer of the garage door, ensuring it is snug and securely in place.
If necessary, use screws or adhesive to secure the seal to the bottom retainer.
Repairing Weatherstripping:If the weatherstripping around the sides and top of the garage door is damaged, follow these steps to repair it:
Remove the damaged weatherstripping by pulling it away from the door frame or track.
Clean the area where the weatherstripping was installed to remove any adhesive residue or debris.
Measure the length of the opening where the weatherstripping will be installed and cut a new section of weatherstripping to fit.
Install the new weatherstripping along the sides and top of the garage door, pressing it firmly into place to ensure a tight seal.
Repairing Threshold Seals:If your garage door has a threshold seal at the bottom of the opening, follow these steps to repair it:
Clean the threshold seal and the area where it will be installed to remove any dirt, debris, or grease buildup.
Apply adhesive or sealant to the underside of the threshold seal, following the manufacturer’s instructions for proper application.
Press the threshold seal firmly into place along the bottom of the garage door opening, ensuring it forms a tight seal with the floor.
Test the Seal:Once the repair is complete, test the garage door seal by closing the door and checking for any gaps or gaps where air, water, or pests could enter. Make any necessary adjustments or additional repairs to ensure a proper seal.
Perform Regular Maintenance:To prolong the life of your garage door seal and prevent future damage or wear, perform regular maintenance tasks such as cleaning, lubricating, and inspecting the seal for signs of deterioration. Replace the seal as needed to maintain an effective barrier against the elements.
Garage Door Repair Suwanee GA Taking the time to repair and maintain the seal will help protect your garage and its contents from damage and ensure a comfortable and functional space for years to come.
Southern Home Creations Garage Doors & Openers
4110 Tench Rd Suite D, Suwanee, GA 30024, United States
Understand the Purpose of the Emergency Release: The emergency release mechanism allows you to manually operate the garage door when the automatic opener is not functioning. It disengages the door from the opener, allowing you to lift or lower it manually.
Locate the Emergency Release Cord: The emergency release cord is typically located near the center of the garage door track, close to the automatic opener motor. It is usually red in color and has a handle or knob attached to it for easy identification.
Inspect the Cord and Mechanism: Before attempting to reconnect the emergency release, inspect the cord and the mechanism to ensure that they are not damaged or obstructed. Look for any signs of wear or fraying on the cord, and make sure that the mechanism moves freely without any obstructions.
Pull Down on the Cord: To reconnect the emergency release, simply pull down on the cord in the direction away from the garage door opener motor. This action will engage the mechanism and reattach the door to the opener.
Listen for Clicking or Snapping Sounds: As you pull down on the emergency release cord, listen for clicking or snapping sounds. These sounds indicate that the mechanism has reengaged and the door is now connected to the opener.
Test the Door: After reconnecting the emergency release, test the garage door to ensure that it operates smoothly and without any issues. Use the remote control or keypad access to open and close the door automatically. If the door responds as expected, the emergency release has been successfully reconnected.
Perform Regular Maintenance: It’s important to perform regular maintenance on the emergency release mechanism to ensure that it remains in good working condition. Periodically inspect the cord and mechanism for signs of wear or damage, and lubricate any moving parts as needed.
Practice Reconnecting the Release: To familiarize yourself with the process, practice reconnecting the emergency release when the door is in the closed position. This will help you feel more confident and prepared to handle the situation in case of an emergency.
Educate Other Household Members: Make sure that other members of your household are familiar with the location and operation of the emergency release mechanism. Instruct them on how to reconnect the release in case you are not available to do so yourself.
Seek Professional Help if Needed: If you encounter any difficulties reconnecting the emergency release or if you suspect that there may be underlying issues with the mechanism, don’t hesitate to seek help from a qualified professional. Attempting to work on garage door mechanisms without the necessary knowledge and experience can be dangerous.
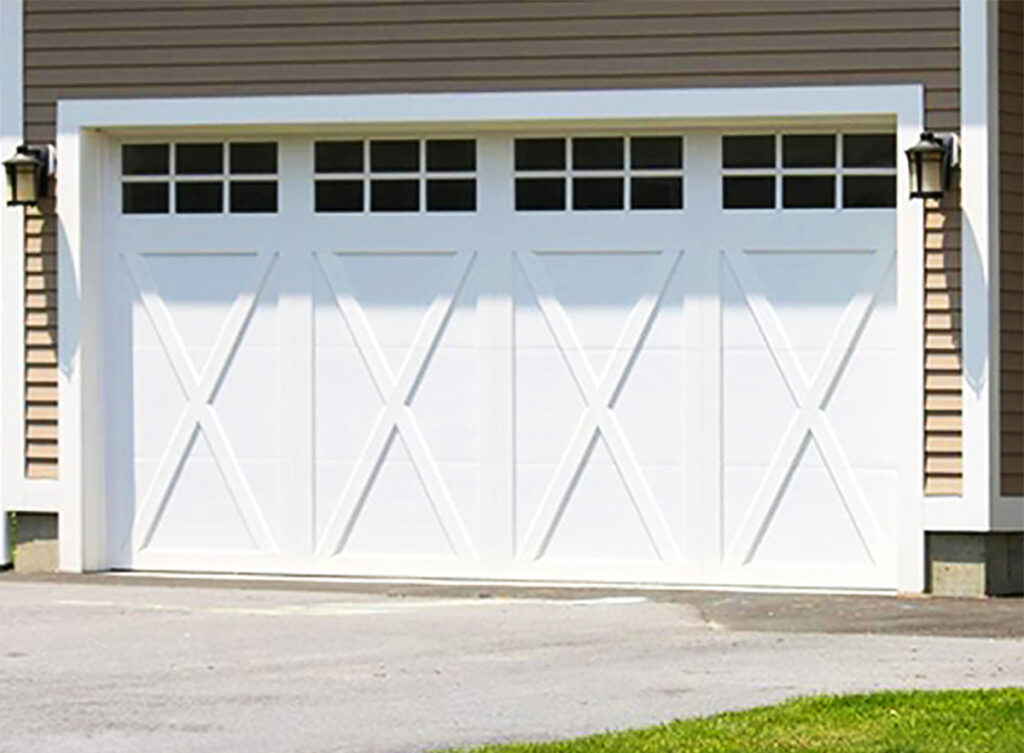
Garage Door Repair Oklahoma City OK Pella offers a range of garage doors in various styles and materials, so the specific installation process may vary depending on the door model and design.
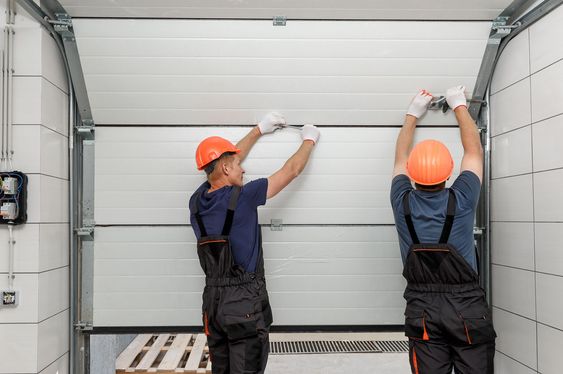
Workers are installing lifting gates of the garage.
However, here’s a general guide on how to install a Pella garage door:
1. Gather Materials and Tools: Before you begin, gather all the materials and tools you’ll need for the installation. This typically includes the Pella garage door kit (which includes the door panels, tracks, hardware, and installation instructions), a ladder, a tape measure, a level, a drill with screwdriver bits, wrenches, and safety goggles.
2. Prepare the Opening: Measure the width and height of the garage door opening to ensure that the Pella door will fit properly. If necessary, remove the existing garage door and tracks, and clean the opening to remove any dirt, debris, or obstructions.
3. Install the Tracks and Hardware: Begin by installing the vertical and horizontal tracks along the sides and top of the garage door opening, following the manufacturer’s instructions. Use a level to ensure that the tracks are plumb and aligned properly, and secure them to the walls using the provided hardware.
4. Assemble the Door Panels: Assemble the individual door panels according to the manufacturer’s instructions. Typically, this involves connecting the panels together using hinges and bolts, and installing any decorative hardware or windows as desired.
5. Attach the Door Panels to the Tracks: With the door panels assembled, carefully lift them into position and attach them to the vertical tracks using the provided hardware. Ensure that the panels are aligned properly and that the rollers fit securely into the track grooves.
6. Install the Torsion Springs (If Applicable): If your Pella garage door is equipped with torsion springs, follow the manufacturer’s instructions to install them according to the specific requirements for your door model. Be sure to exercise caution when working with torsion springs, as they are under high tension and can cause serious injury if mishandled.
7. Adjust the Spring Tension (If Applicable): Once the torsion springs are installed, adjust the spring tension according to the manufacturer’s instructions. This may involve winding or unwinding the springs using a winding bar or adjusting the tension screws to achieve the proper balance and tension for the door.
8. Install the Bottom Weatherstripping: Install the bottom weatherstripping along the bottom edge of the garage door to provide a tight seal and prevent drafts, moisture, and debris from entering the garage. Trim the weatherstripping to fit the width of the door opening, and secure it in place using the provided nails or adhesive.
9. Test the Door Operation: With the Pella garage door installed, test the operation of the door to ensure that it opens and closes smoothly and quietly. Use the manual or automatic opener to operate the door from inside the garage or from a distance within range of the opener, and observe the door as it moves along the tracks.
10. Make Adjustments as Needed: If the garage door does not operate correctly or if you encounter any issues during testing, make any necessary adjustments to the tracks, hardware, or spring tension to ensure proper fit and functionality. Refer to the manufacturer’s instructions for troubleshooting tips and solutions.
11. Perform Regular Maintenance: To keep your Pella garage door working smoothly and efficiently, perform regular maintenance tasks such as lubricating moving parts, inspecting for signs of wear or damage, and cleaning the door and tracks to remove dirt and debris. Follow the maintenance schedule recommended by the manufacturer to ensure optimal performance and longevity of your garage door.
Garage Door Repair Oklahoma City OK By following these steps and taking the necessary precautions, you can install your Pella garage door safely and effectively, enhancing the appearance, security, and functionality of your home. If you encounter any issues or need assistance during the installation process, consult the manufacturer’s instructions or contact a professional garage door technician for help.
CCM Overhead Doors
1000 NW 80th St, Oklahoma City, OK 73114, United States
Garage Door Repair Livonia MI When functioning correctly, the auto-reverse mechanism detects obstructions in the path of the closing door and automatically reverses its direction to prevent accidents or damage.
Workers are installing lifting gates of the garage.
If your garage door is not properly reversing when it encounters an obstruction, it’s essential to address the issue promptly. Here’s a detailed guide on how to fix the auto-reverse feature on a garage door:
1. Understand the Auto-Reverse Mechanism: Before attempting any repairs, it’s important to understand how the auto-reverse mechanism works. Typically, modern garage door openers are equipped with two main types of auto-reverse features:
Mechanical: This type of auto-reverse mechanism uses physical pressure sensors or resistance to detect obstructions in the door’s path. When the door encounters an obstruction, it applies resistance and automatically reverses direction.
Photoelectric: This type of auto-reverse mechanism uses infrared beams to detect objects in the door’s path. When the infrared beam is interrupted by an obstruction, it triggers the door to reverse direction.
2. Test the Auto-Reverse Function: Start by testing the auto-reverse function of your garage door to determine the nature of the problem. Place a sturdy object, such as a block of wood or a cardboard box, in the path of the closing door and activate the door to close. Observe whether the door detects the obstruction and reverses direction accordingly. If the door does not reverse, or if it reverses inconsistently, there may be an issue with the auto-reverse mechanism that needs to be addressed.
3. Check the Safety Sensors: The most common cause of auto-reverse failure is a misalignment or malfunction of the safety sensors. Locate the safety sensors mounted on either side of the garage door opening, near the floor. Ensure that the sensors are clean, aligned, and free from obstructions such as dirt, debris, or cobwebs. Use a soft cloth to clean the sensor lenses and adjust their alignment if necessary. Most sensors have indicator lights that illuminate when properly aligned.
4. Test the Sensor Alignment: After cleaning and aligning the safety sensors, test their functionality by activating the door to close. Wave your hand or a broomstick in front of one of the sensors to interrupt the infrared beam while the door is closing. Observe whether the sensor detects the obstruction and causes the door to reverse direction. Repeat this process for the other sensor to ensure both are functioning correctly. If the sensors are not working properly, there may be wiring issues or sensor malfunctions that require further inspection and repair.
5. Inspect and Adjust the Force Settings: If the safety sensors are functioning correctly but the door still fails to reverse, it may be due to improper force settings. Most garage door openers are equipped with adjustable force settings that control the amount of force exerted by the door when closing. Locate the force adjustment controls on the opener unit and consult the owner’s manual for instructions on adjusting the settings. Gradually increase the force settings until the door reliably reverses when encountering an obstruction.
6. Lubricate Moving Parts: Lack of lubrication can cause friction and resistance in the garage door mechanism, affecting the auto-reverse function. Inspect the rollers, tracks, hinges, and springs for signs of wear or corrosion. Apply a lubricating spray or garage door lubricant to these moving parts to reduce friction and ensure smooth operation. Be sure to wipe away any excess lubricant to prevent buildup and attract dirt and debris.
7. Test and Monitor: After completing the necessary adjustments and lubrication, test the auto-reverse function of the garage door again to ensure it is functioning correctly. Repeat the obstruction test with a sturdy object in the door’s path to verify that the door reliably reverses direction when needed. Monitor the door’s operation over time to ensure continued functionality and address any issues promptly.
8. Seek Professional Assistance: If you’re unable to fix the auto-reverse feature on your garage door or if you encounter persistent issues despite troubleshooting efforts, it may be necessary to seek professional assistance. A qualified garage door technician can inspect the door, identify the underlying cause of the problem, and perform any necessary repairs or adjustments to ensure the safety and functionality of the door.
Garage Door Repair Livonia MI By following these steps and addressing any issues promptly, you can restore the auto-reverse mechanism and enjoy peace of mind knowing that your garage door operates safely and reliably.
Brothers Garage Door Service
29522 Wentworth St, Livonia, MI 48154, United States
Garage Door Repair Rockwall TX This process typically involves integrating your car’s built-in garage door opener system with your garage door opener.
Here’s a comprehensive guide on how to connect your garage door with your car:
1. Understand the Technology: Most modern cars come equipped with built-in garage door opener systems, such as HomeLink or Car2U. These systems use radio frequency (RF) signals to communicate with your garage door opener.
2. Check Compatibility: Before proceeding, ensure that your garage door opener is compatible with your car’s garage door opener system. Most garage door openers manufactured in the last 20 years are compatible with popular built-in systems like HomeLink and Car2U.
3. Locate the Garage Door Opener Button in Your Car: The garage door opener button in your car is typically located on the overhead console, sun visor, or rearview mirror. It may be labeled with icons representing a garage door or the brand name of the system.
4. Prepare Your Garage Door Opener: Locate the “Learn” or “Program” button on your garage door opener motor unit. This button is usually found near the antenna wire hanging from the motor unit. Pressing this button puts the opener into programming mode, allowing it to receive signals from your car.
5. Put Your Garage Door Opener into Programming Mode: Press and release the “Learn” or “Program” button on your garage door opener motor unit. The indicator light on the motor unit will usually begin flashing, indicating that it’s ready to receive signals from your car.
6. Program Your Car’s Garage Door Opener System: Follow these steps to program your car’s built-in garage door opener system: a. Start by turning the ignition of your car to the accessory position (position 2). b. Press and hold the button on your car’s garage door opener system that you want to program. c. While holding the button, simultaneously press and release the “Learn” or “Program” button on your garage door opener motor unit. d. Release the button on your car’s garage door opener system. The indicator light on the motor unit should stop flashing and remain lit, indicating that the system has been successfully programmed.
7. Test the Connection: With the programming complete, it’s time to test the connection. Park your car within range of your garage door and press the button on your car’s garage door opener system that you programmed. The garage door should respond by opening or closing, depending on its current position.
8. Fine-Tuning (if necessary): If the garage door doesn’t respond correctly to your car’s garage door opener system, you may need to fine-tune the programming. Repeat the programming process, ensuring that you’re following the steps correctly and holding the buttons for the appropriate amount of time.
9. Additional Programming (if needed): If your car’s garage door opener system has multiple buttons and you want to control more than one garage door or gate, you can program additional buttons using the same process outlined above.
10. Security Considerations: Treat your car’s garage door opener system like any other access device to your home. Keep your car secure and avoid leaving it unattended with garage door opener buttons programmed, especially in public parking areas.
11. Troubleshooting: If you encounter any issues during the programming process or if the garage door doesn’t respond as expected, refer to the troubleshooting section of your car’s owner’s manual or contact the manufacturer for assistance.
A Chamberlain Garage Door Repair Anderson IN opener is a convenient device that simplifies your daily routine by allowing you to open and close your garage door with ease. However, like any electronic device, it relies on a power source, typically a battery, to function correctly. Over time, the battery in your Chamberlain garage door opener may need replacement.
In this comprehensive guide, we will walk you through the step-by-step process of changing the battery in your Chamberlain garage door opener, ensuring that your opener continues to work flawlessly.
I. Identifying Your Chamberlain Garage Door Opener Model: Before you embark on the battery replacement process, it’s crucial to identify your Chamberlain garage door opener’s model. This information can usually be found on the opener’s motor housing or in the owner’s manual. Knowing the model is essential because different models may have slightly different battery replacement procedures.
II. Gathering the Necessary Tools and Supplies : To change the battery in your Chamberlain garage door opener, you will need a few essential tools and supplies, including:
A replacement battery compatible with your model.
A Phillips-head screwdriver.
Safety gloves and eye protection.
A clean cloth for wiping down surfaces.
A stable ladder or step stool (if necessary).
III. Safety Precautions : Safety should always be your top priority when working on any electrical device. Before you begin, follow these safety precautions:
Disconnect the power: Ensure that the power to your garage door opener is disconnected to avoid electrical shock.
Wear protective gear: Put on safety gloves and eye protection to protect yourself from potential hazards.
Clear the area: Make sure the garage door opener area is free of clutter and obstacles that might hinder your work.
Follow instructions: Always follow the manufacturer’s instructions and guidelines provided in the owner’s manual.
IV. Locating and Accessing the Battery Compartment:
Most Chamberlain garage door openers have a battery compartment on the motor housing. To access it, you’ll likely need to remove a cover or panel. Use your Phillips-head screwdriver to carefully remove any screws securing the cover.
Once the cover is removed, you should see the battery compartment. In some models, the battery may be located on the side or bottom of the motor unit. Refer to your owner’s manual for specific instructions on locating the battery compartment for your model.
V. Removing the Old Battery :
With the battery compartment exposed, you can now remove the old battery. Typically, the battery is connected to a wire harness. Gently disconnect the wire harness from the battery terminals.
Carefully lift the old battery out of its compartment. Be cautious not to damage the wires or any surrounding components.
VI. Installing the New Battery :
Take your new, compatible battery and place it into the battery compartment in the same orientation as the old battery.
Reconnect the wire harness to the new battery’s terminals. Ensure a snug and secure connection.
Double-check that the battery is properly seated in its compartment, and there are no loose wires or connections.
VII. Reassembling and Testing :
Once the new battery is securely in place, reattach the cover or panel that you removed earlier. Tighten any screws to ensure it is properly secured.
Reconnect the power to your Chamberlain garage door opener.
Test the garage door opener to ensure it functions correctly. If the battery replacement was successful, the opener should operate without any issues.
If you encounter any problems, consult your owner’s manual or consider seeking professional assistance.
Conclusion :
Changing the battery in your Chamberlain Garage Door Repair Anderson IN opener is a straightforward process when you follow these step-by-step instructions. Regularly maintaining your garage door opener ensures its longevity and reliability. By identifying your model, taking safety precautions, and using the right tools and supplies, you can successfully replace the battery, allowing your Chamberlain garage door opener to continue serving you efficiently for years to come.
Anderson Gates & Garage Doors
2007 McKinley St, Anderson, IN 46016, United States
Insulating your Temple Garage Door & Gate Repairs is a cost-effective way to improve energy efficiency, regulate temperature, and create a more comfortable workspace. Whether you’re planning to convert your garage into a living space, use it as a workshop, or simply reduce heating and cooling costs, insulating your garage door is a worthwhile DIY project.
In this comprehensive guide, we will walk you through the step-by-step process of insulating your garage door, ensuring you can tackle this project with confidence.
Why Insulate Your Garage Door?
Before we dive into the installation process, let’s explore the benefits of insulating your garage door:
Energy Efficiency: Insulation helps to maintain a more stable temperature in your garage, reducing the need for heating in the winter and cooling in the summer. This translates into energy savings and lower utility bills.
Comfort: A well-insulated garage door creates a more comfortable environment for various activities, from DIY projects to working out.
Noise Reduction: Insulation can also dampen noise from both inside and outside the garage, providing a quieter space.
Protects Belongings: Insulating your garage door helps protect items stored in the garage from extreme temperatures, humidity, and fluctuations.
Tools and Materials You’ll Need
To get started with your garage door insulation project, gather the necessary tools and materials:
Tools:
Tape Measure: For accurate measurements.
Utility Knife: To cut insulation materials.
Straight Edge: To ensure clean, straight cuts.
Staple Gun: For attaching insulation to the garage door.
Safety Glasses and Gloves: Safety should always be a priority.
Ladder: Depending on your garage door’s height, you may need a ladder to reach certain areas.
Materials:
Garage Door Insulation Kit: These kits typically include insulation panels and fasteners designed for garage doors.
Foam Board Insulation: An alternative to kits, foam board insulation can be cut to size.
Reflective Foil Insulation: Ideal for garages in extreme climates, this type of insulation reflects heat away.
Double-Sided Tape: Used to secure insulation panels.
Foam or Rubber Weatherstripping: To seal gaps around the door edges.
Step 1: Safety First
Begin with safety precautions:
Put on your safety glasses and gloves.
Ensure the garage door is closed and secure.
Step 2: Measure Your Garage Door
Measure the dimensions of your garage door panels to determine the amount of insulation needed. Record the width and height of each panel accurately.
Step 3: Choose the Insulation Type
Select the type of insulation that best suits your needs and budget. Garage door insulation kits are convenient, but foam board or reflective foil insulation can be more cost-effective alternatives.
Step 4: Prepare the Garage Door
Before installing insulation, it’s essential to clean the garage door surface and address any damage or gaps. Remove any dirt, debris, or old adhesive from the door.
Step 5: Cut and Attach Insulation
Follow these steps to attach insulation to your garage door:
Cut the insulation panels to match the dimensions of your garage door panels. Use a utility knife and a straight edge to make clean, precise cuts.
Apply double-sided tape to the back of each insulation panel.
Carefully press the insulation panels onto the garage door panels, ensuring they are centered and adhere securely.
For foam board insulation, use a staple gun to attach the insulation to the door’s frame.
Repeat this process for each garage door panel, covering the entire door.
Step 6: Seal Edges with Weatherstripping
To further improve insulation and seal any gaps, install foam or rubber weatherstripping along the sides and top of the garage door. This helps prevent drafts and heat loss.
Step 7: Test the Garage Door
Manually open and close the garage door to ensure that the insulation does not interfere with its operation. Make any necessary adjustments if you encounter any issues.
Conclusion
By following these steps, you can successfully insulate your Temple Garage Door & Gate Repairs, making it a more energy-efficient and comfortable space. Enjoy the benefits of lower energy bills, improved temperature control, and reduced noise levels in your garage.
FAQs
1. Can I insulate my garage door without a kit?
Yes, you can use foam board or reflective foil insulation and cut it to fit your garage door panels. However, garage door insulation kits are convenient and include everything you need.
2. Will insulating my garage door affect its operation?
Properly installed insulation should not affect the garage door’s operation. However, it’s essential to test the door after installation to ensure it functions smoothly.
3. How much will insulating my garage door save on energy costs?
Energy savings vary depending on factors like climate, garage size, and insulation quality. On average, homeowners report savings of 10-20% on heating and cooling costs.
4. Can I use the garage as a living space after insulating the door?
Insulating the garage door is a step toward making the space more comfortable, but additional insulation and HVAC considerations may be necessary for extended use as a living space.
5. How often should I replace garage door insulation?
Garage door insulation can last for many years if properly maintained. Regularly inspect it for damage and replace any sections that are worn or deteriorated.
Volo, Illinois, a hidden gem nestled in the heart of the Prairie State. From its picturesque landscapes to its rich history, Volo offers an unforgettable experience for residents and visitors alike. With its serene charm and abundant natural beauty, Volo beckons you to explore and discover all that it has to offer.
Located just northwest of Chicago, Volo is a vibrant community that seamlessly blends small-town charm with modern amenities. As you wander through the streets, you’ll be captivated by the warmth of the locals and the sense of community that permeates every corner. Volo’s close-knit atmosphere makes it the perfect destination for families, nature enthusiasts, and history buffs alike.
Nature enthusiasts will find solace in Volo’s stunning natural landscapes. The area is home to a multitude of parks and preserves, offering endless opportunities for outdoor adventures. The Volo Bog State Natural Area stands out as a crown jewel, with its unique and rare natural ecosystem. As you stroll along the boardwalks, you’ll witness a breathtaking mosaic of plants, wildflowers, and aquatic life that thrive within the bog’s intricate ecosystem. The Volo Bog is not only a sight to behold but also a place of scientific importance, as it is one of the few remaining quaking bogs in the state. The rare orchids and carnivorous plants that call this area home are a testament to the diversity and resilience of nature.
For those seeking a more active experience, Volo offers an extensive network of hiking and biking trails that wind through lush forests, open meadows, and alongside sparkling lakes. The Volo Bog Nature Trail is a must-visit, providing an immersive journey through the bog’s enchanting landscapes. As you explore these trails, keep an eye out for the vibrant birdlife that calls Volo home. From majestic bald eagles to graceful herons, the avian diversity in this area is truly awe-inspiring.
For outdoor enthusiasts, Volo offers a range of recreational activities. The Chain O’Lakes State Park, just a short drive from Volo, is a haven for boating, fishing, and water sports. With its interconnected lakes and waterways, the park provides endless opportunities for adventure on the water. Spend a day cruising along the picturesque lakes, casting a line in search of trophy fish, or simply basking in the beauty of the surrounding nature.
If you’re a golf enthusiast, Volo boasts several pristine golf courses that cater to players of all skill levels. From well-manicured fairways to scenic views, these courses provide a challenging yet enjoyable experience for golfers. Grab your clubs and tee off amidst the tranquility and natural beauty that Volo has to offer.
Volo is also a shopper’s paradise, with its unique blend of antique shops, boutiques, and specialty stores. The Volo Antique Mall is a treasure trove for collectors and antique enthusiasts, featuring a vast collection of vintage furniture, retro decor, and nostalgic memorabilia. Explore the aisles and uncover hidden gems that reflect the rich history and craftsmanship of bygone eras.
In addition to its natural and cultural attractions, Volo hosts a variety of events and festivals throughout the year. The Volo Auto Flea Market is a popular annual event that draws car enthusiasts and collectors from far and wide. Explore the vast array of automotive treasures, from vintage parts and accessories to classic cars ready for restoration. The flea market is a true haven for automotive enthusiasts and a must-visit for anyone with a passion for all things automotive.
Volo also knows how to celebrate the holiday season in style. The Volo Christmas Tree Lighting ceremony is a beloved annual tradition that brings the community together in a festive atmosphere. Witness the lighting of the magnificent tree, enjoy live music, indulge in seasonal treats, and experience the magic of the holiday season.
For those seeking a taste of local flavor, Volo is home to several wineries and breweries. Take a tour of the vineyards, sample exquisite wines, and learn about the winemaking process. Alternatively, visit the local breweries and savor handcrafted beers that showcase the creativity and expertise of Volo’s brewers.
Volo’s central location offers easy access to nearby attractions. Take a short drive to Six Flags Great America, one of the premier amusement parks in the region, for a day of thrilling rides and family fun. Explore the charming towns and picturesque landscapes of Lake County, or venture into the bustling metropolis of Chicago, just a short distance away.
Beyond its natural wonders, Volo boasts a rich history that is waiting to be discovered. The Volo Auto Museum is a testament to the area’s automotive heritage, featuring an impressive collection of vintage and classic cars. Step back in time as you admire meticulously restored vehicles that span decades of automotive history. The museum’s exhibits also include famous movie cars, such as the iconic DeLorean from “Back to the Future,” adding a touch of Hollywood glamour to your visit.
History buffs will also appreciate the Volo Depot Museum, which showcases the town’s railway heritage. Housed in a beautifully restored train depot, the museum offers a glimpse into Volo’s past and the pivotal role that the railroad played in shaping the community. From vintage train cars to interactive exhibits, the Volo Depot Museum is a treasure trove of local history.
As you explore Volo, be sure to visit the Volo Village Hall and Heritage Museum, where you can delve deeper into the town’s roots. This charming museum features artifacts, photographs, and stories that highlight the lives and experiences of Volo’s early settlers. Gain a deeper appreciation for the town’s heritage as you immerse yourself in its past.
No visit to Volo is complete without experiencing its vibrant cultural scene. The town hosts various festivals and events throughout the year, celebrating everything from music and art to local cuisine. The Volo Art Museum is a hub of creativity, showcasing works by local and regional artists. Whether you’re an art enthusiast or simply appreciate creative expression, the museum offers a space to inspire and engage.
After a day of exploration, indulge in Volo’s culinary delights. The town is home to a range of dining options, from cozy cafés serving homemade pastries to family-friendly restaurants offering a taste of local flavors. Sample farm-fresh produce at the farmer’s market or savor a mouthwatering meal at one of Volo’s charming eateries. No matter your preference, Volo’s culinary scene is sure to leave you satisfied and yearning for more.
In Volo, Illinois, every visit is an opportunity to create lasting memories. Whether you’re immersing yourself in nature, uncovering the town’s rich history, enjoying cultural events, or simply savoring the local cuisine, Volo promises a truly remarkable experience. So, pack your bags, embrace the charm of this hidden gem, and let Volo, Illinois, captivate you with its natural beauty, warm hospitality, and endless possibilities.
Volo, Illinois, is a destination that encapsulates the beauty of nature, the richness of history, and the warmth of community. Whether you seek tranquility in the great outdoors or a journey through time, Volo has something to offer everyone. So, come and immerse yourself in the charms of Volo, and discover a place where nature, culture, and history unite to create an unforgettable experience.
Bryan, Texas, offers a range of exciting and captivating tourist spots that showcase the city’s rich history, natural beauty, and cultural attractions. Whether you’re a history enthusiast, nature lover, or simply looking for fun-filled activities, Bryan has something for everyone. In this article, we will explore some of the top tourist spots in Bryan that are worth a visit.
Bryan, located in Brazos County, Texas, is a city brimming with attractions and activities that cater to tourists of all interests. From exploring the historic downtown area to enjoying outdoor adventures and immersing yourself in cultural experiences, Bryan has an abundance of options to offer.
Historic Downtown Bryan A stroll through Historic Downtown Bryan takes you back in time with its beautifully preserved historic buildings, quaint shops, and charming atmosphere. The streets are lined with unique boutiques, art galleries, antique stores, and delightful cafes. The area also hosts various events and festivals throughout the year, providing a vibrant and lively experience.
Brazos Valley Museum of Natural History For a fascinating glimpse into the natural and cultural history of the region, a visit to the Brazos Valley Museum of Natural History is a must. The museum features exhibits on paleontology, archaeology, geology, and local wildlife. Visitors can explore interactive displays, view artifacts, and learn about the rich natural heritage of the area.
Messina Hof Winery and Resort Wine enthusiasts and those seeking a relaxing getaway will appreciate a visit to Messina Hof Winery and Resort. This award-winning winery offers tours, tastings, and a chance to explore the beautiful vineyards. Guests can also indulge in gourmet dining experiences and stay at the resort for a truly memorable wine country retreat.
Lake Bryan Nature lovers and outdoor enthusiasts will find solace at Lake Bryan, a picturesque reservoir located just outside the city. The lake offers a range of recreational activities, including fishing, boating, swimming, and camping. With its scenic surroundings and serene atmosphere, it’s the perfect spot to unwind and enjoy the beauty of nature.
George Bush Presidential Library and Museum Located on the nearby Texas A&M University campus, the George Bush Presidential Library and Museum provides a fascinating insight into the life and presidency of the 41st President of the United States, George H.W. Bush. The museum showcases exhibits highlighting key events, including the Cold War, Desert Storm, and the reunification of Germany.
Santa’s Wonderland During the holiday season, Santa’s Wonderland transforms into a magical Christmas village, attracting visitors from near and far. This enchanting attraction offers a host of festive activities, including horse-drawn carriage rides, a petting zoo, ice skating, and millions of sparkling lights. It’s a wonderful place to create cherished holiday memories.
Bonfire Memorial A poignant and significant site on the Texas A&M University campus is the Bonfire Memorial. It commemorates the Aggie Bonfire tragedy of 1999, honoring the lives lost. The memorial features a striking sculpture and serves as a place for reflection, remembrance, and a symbol of the enduring spirit of the university community.
The Queen Theatre For a dose of entertainment and cultural experiences, The Queen Theatre is a must-visit. This historic theater, renovated to its former glory, hosts a variety of live performances, including plays, concerts, and movie screenings. The intimate setting and unique ambiance create a memorable experience for theater enthusiasts.
Sue Haswell Memorial Park Sue Haswell Memorial Park is a serene and well-maintained green space that offers a peaceful retreat within the city. With its walking trails, picnic areas, and playgrounds, it’s a perfect spot for families, nature walks, and outdoor relaxation. The park’s beautiful landscapes and lush greenery make it a favorite among locals and visitors alike.
Lake Walk Town Center Lake Walk Town Center is a vibrant and pedestrian-friendly community space that features shops, restaurants, and public art installations. The center hosts various events, such as live music performances, farmers’ markets, and outdoor movie screenings. Visitors can enjoy a leisurely walk, dine at local eateries, and immerse themselves in the lively ambiance.
Grand Stafford Theater Music lovers should not miss the Grand Stafford Theater, a historic venue that showcases live performances by local and touring artists. From concerts and comedy shows to open mic nights, the theater offers a diverse range of entertainment options. The intimate setting ensures an immersive experience for music enthusiasts.
Brazos Valley African American Museum The Brazos Valley African American Museum celebrates the rich heritage and contributions of African Americans in the region. The museum features exhibits, artifacts, and educational programs that highlight the history, culture, and achievements of the African American community. It provides a valuable opportunity to learn and appreciate the diversity of Bryan’s history.
Royalty Pecan Farms For a unique agritourism experience, a visit to Royalty Pecan Farms is a treat. This family-owned farm allows visitors to explore the pecan orchards, sample delicious pecan products, and learn about the pecan farming process. The farm also features a gift shop where visitors can purchase fresh pecans and other local products.
Wixon Valley Disc Golf Course Disc golf enthusiasts can enjoy a round of this popular sport at the Wixon Valley Disc Golf Course. The course offers a challenging and scenic layout, with various holes set amidst beautiful landscapes. It’s a fantastic recreational activity for both beginners and experienced players.
Bryan, TX, is a treasure trove of tourist spots that offer a mix of history, nature, culture, and entertainment. Whether you’re interested in exploring the historic downtown area, immersing yourself in natural beauty, or indulging in cultural experiences, Bryan has something to suit every traveler’s taste. Plan a visit to this charming city and discover the hidden gems that make it a memorable destination.
Reprogramming a Garage Door Repair Salado TX opener is a straightforward process that involves resetting the device and configuring it with a new code or remote control. In this guide, I will provide detailed instructions on how to reprogram a typical garage door opener.
Before you begin, make sure you have the following items ready:
User manual: Locate the user manual for your garage door opener. This will provide specific instructions and information tailored to your device.
Stepladder: Depending on the height of your garage door opener, you may need a stepladder to access the necessary buttons and controls.
New remote control or code: If you’re reprogramming the opener to work with a new remote control, make sure you have the new remote handy. If you’re changing the access code, decide on a new code and have it ready.
Now, let’s proceed with the step-by-step process:
Clear Existing Codes: a. Start by locating the “Learn” or “Smart” button on your garage door opener unit. Typically, you can find it on the back or side of the motor unit, close to the antenna. b. Press and hold down the “Learn” or “Smart” button until the indicator light on the unit turns off. This usually takes about 6-10 seconds. By doing this, you’ll clear all existing codes from the opener’s memory.
Choose a New Code: a. Decide on a new code that you want to program into the opener. Depending on the type of opener you have, the code can be a combination of numbers or letters. b. Take a piece of paper and write down the new code for reference.
Program the Remote Control: a. Locate the “Learn” or “Smart” button on the garage door opener unit. Press and release it. The indicator light should come on. b. Within 30 seconds of pressing the button, press and hold the button on the remote control that you want to program. Keep holding it until the indicator light on the opener blinks or turns off. This indicates that the programming was successful. If you have multiple remotes, repeat this step for each one.
Test the Remote Control: a. Stand inside your garage and point the remote control toward the opener. b. Press the programmed button on the remote control to test if the garage door opens or closes as expected. Repeat the test a couple of times to ensure proper functioning.
Keypad Programming (if applicable): a. If your garage door opener has a keypad, you can program it to work with the new code as well. b. Locate the “Learn” or “Smart” button on the motor unit and press it. c. Within 30 seconds of pressing the button, enter the new code on the keypad and press the “Enter” or “Send” button. The opener’s indicator light should blink or turn off, indicating successful programming.
Test the Keypad: a. Stand outside your garage and enter the newly programmed code on the keypad. b. The garage door should open or close accordingly. Test it a few times to ensure it works reliably.
Remember, these instructions serve as a general guideline for reprogramming a garage door opener. Always refer to your specific garage door opener’s manual for accurate instructions tailored to your model. By following the provided steps and consulting your manual, you should be able to successfully reprogram your Garage Door Repair Salado TX.