
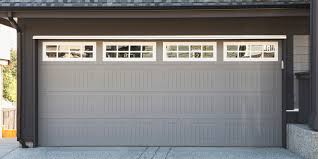
Insulating your Temple Garage Door & Gate Repairs is a cost-effective way to improve energy efficiency, regulate temperature, and create a more comfortable workspace. Whether you’re planning to convert your garage into a living space, use it as a workshop, or simply reduce heating and cooling costs, insulating your garage door is a worthwhile DIY project.
In this comprehensive guide, we will walk you through the step-by-step process of insulating your garage door, ensuring you can tackle this project with confidence.
Why Insulate Your Garage Door?
Before we dive into the installation process, let’s explore the benefits of insulating your garage door:
- Energy Efficiency: Insulation helps to maintain a more stable temperature in your garage, reducing the need for heating in the winter and cooling in the summer. This translates into energy savings and lower utility bills.
- Comfort: A well-insulated garage door creates a more comfortable environment for various activities, from DIY projects to working out.
- Noise Reduction: Insulation can also dampen noise from both inside and outside the garage, providing a quieter space.
- Protects Belongings: Insulating your garage door helps protect items stored in the garage from extreme temperatures, humidity, and fluctuations.
Tools and Materials You’ll Need
To get started with your garage door insulation project, gather the necessary tools and materials:
Tools:
- Tape Measure: For accurate measurements.
- Utility Knife: To cut insulation materials.
- Straight Edge: To ensure clean, straight cuts.
- Staple Gun: For attaching insulation to the garage door.
- Safety Glasses and Gloves: Safety should always be a priority.
- Ladder: Depending on your garage door’s height, you may need a ladder to reach certain areas.
Materials:
- Garage Door Insulation Kit: These kits typically include insulation panels and fasteners designed for garage doors.
- Foam Board Insulation: An alternative to kits, foam board insulation can be cut to size.
- Reflective Foil Insulation: Ideal for garages in extreme climates, this type of insulation reflects heat away.
- Double-Sided Tape: Used to secure insulation panels.
- Foam or Rubber Weatherstripping: To seal gaps around the door edges.
Step 1: Safety First
Begin with safety precautions:
- Put on your safety glasses and gloves.
- Ensure the garage door is closed and secure.
Step 2: Measure Your Garage Door
Measure the dimensions of your garage door panels to determine the amount of insulation needed. Record the width and height of each panel accurately.
Step 3: Choose the Insulation Type
Select the type of insulation that best suits your needs and budget. Garage door insulation kits are convenient, but foam board or reflective foil insulation can be more cost-effective alternatives.
Step 4: Prepare the Garage Door
Before installing insulation, it’s essential to clean the garage door surface and address any damage or gaps. Remove any dirt, debris, or old adhesive from the door.
Step 5: Cut and Attach Insulation
Follow these steps to attach insulation to your garage door:
- Cut the insulation panels to match the dimensions of your garage door panels. Use a utility knife and a straight edge to make clean, precise cuts.
- Apply double-sided tape to the back of each insulation panel.
- Carefully press the insulation panels onto the garage door panels, ensuring they are centered and adhere securely.
- For foam board insulation, use a staple gun to attach the insulation to the door’s frame.
- Repeat this process for each garage door panel, covering the entire door.
Step 6: Seal Edges with Weatherstripping
To further improve insulation and seal any gaps, install foam or rubber weatherstripping along the sides and top of the garage door. This helps prevent drafts and heat loss.
Step 7: Test the Garage Door
Manually open and close the garage door to ensure that the insulation does not interfere with its operation. Make any necessary adjustments if you encounter any issues.
Conclusion
By following these steps, you can successfully insulate your Temple Garage Door & Gate Repairs, making it a more energy-efficient and comfortable space. Enjoy the benefits of lower energy bills, improved temperature control, and reduced noise levels in your garage.
FAQs
1. Can I insulate my garage door without a kit?
Yes, you can use foam board or reflective foil insulation and cut it to fit your garage door panels. However, garage door insulation kits are convenient and include everything you need.
2. Will insulating my garage door affect its operation?
Properly installed insulation should not affect the garage door’s operation. However, it’s essential to test the door after installation to ensure it functions smoothly.
3. How much will insulating my garage door save on energy costs?
Energy savings vary depending on factors like climate, garage size, and insulation quality. On average, homeowners report savings of 10-20% on heating and cooling costs.
4. Can I use the garage as a living space after insulating the door?
Insulating the garage door is a step toward making the space more comfortable, but additional insulation and HVAC considerations may be necessary for extended use as a living space.
5. How often should I replace garage door insulation?
Garage door insulation can last for many years if properly maintained. Regularly inspect it for damage and replace any sections that are worn or deteriorated.
Temple Garage Door & Gate Repairs
2610 Skyline Dr, Temple, TX 76504, United States
1-817-670-4643