Tag: garage door repair livonia mi

How Much To Replace Weather Stripping On Garage Door – Brothers Garage Door Service

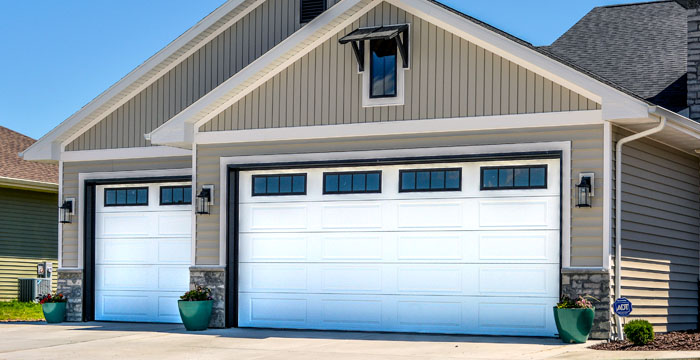
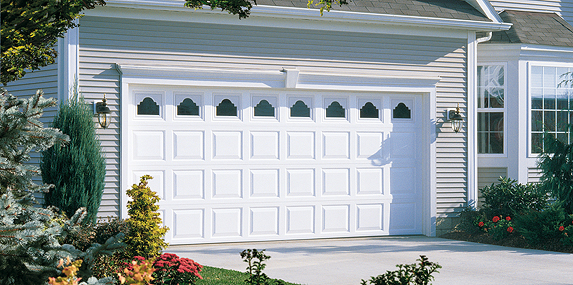
Garage Door Repair Livonia MI a crucial role in maintaining energy efficiency, protecting against drafts, and preventing moisture infiltration.

Over time, weather stripping can wear out or become damaged, compromising its effectiveness and necessitating replacement. In this detailed guide, we’ll delve into everything you need to know about the cost of replacing weather stripping on a garage door, including factors affecting the cost, types of weather stripping available, installation considerations, and tips for making informed decisions.

Factors Affecting the Cost

Several factors influence the cost of replacing weather stripping on a garage door:

  1. Type and Size of the Door: The size and design of your garage door determine the length and type of weather stripping required. Larger doors or those with unique designs may require more material, resulting in higher replacement costs.
  2. Type of Weather Stripping: Garage doors can utilize various types of weather stripping, including rubber, vinyl, foam, and felt. The type of weather stripping chosen impacts the cost, with higher-quality materials typically commanding a higher price.
  3. Quality of Material: The quality of the weather stripping material affects its durability and performance. Higher-quality materials may have a higher upfront cost but offer better insulation properties and longevity, potentially reducing long-term energy costs.
  4. Labor Costs: If you opt for professional installation, labor costs contribute to the overall expense. Labor rates vary depending on factors such as the complexity of the installation, local labor rates, and the technician’s expertise.

Cost Range of Replacing Weather Stripping on Garage Door

The cost of replacing weather stripping on a garage door varies depending on several factors. Here’s a breakdown of the cost range based on different scenarios:

  1. Rubber Weather Stripping Replacement: $50 to $100
  2. Vinyl Weather Stripping Replacement: $75 to $150
  3. Foam Weather Stripping Replacement: $50 to $100
  4. Felt Weather Stripping Replacement: $50 to $100

Additional Considerations and Costs

In addition to the weather stripping replacement cost, consider the following factors:

  1. Labor Costs: Professional installation typically incurs labor costs ranging from $50 to $150, depending on the complexity of the job and local labor rates.
  2. Additional Materials: Depending on the condition of your garage door, you may require additional materials such as adhesive or fasteners. These additional materials contribute to the overall replacement cost but are essential for proper installation.
  3. DIY vs. Professional Installation: While DIY installation can save money, it’s essential to consider your skill level and the complexity of the job. Improper installation can compromise the effectiveness of the weather stripping and lead to energy loss or water damage.
  4. Maintenance: Regular maintenance, such as cleaning and inspecting the weather stripping, can prolong its lifespan and ensure optimal performance. Incorporating weather stripping maintenance into your routine maintenance schedule can help avoid premature replacement costs.

Conclusion:

In summary, the cost of replacing weather stripping on a garage door depends on various factors, including the type of weather stripping, size of the door, quality of the material, and labor costs. By understanding these factors and weighing your options, you can make informed decisions to ensure a cost-effective and energy-efficient solution for your garage door.

Brothers Garage Door Service

29522 Wentworth St, Livonia, MI 48154, United States

1-734-292-0971

How Difficult Is It To Replace A Garage Door Opener – Brothers Garage Door Service

Garage Door Repair Livonia MI  may seem like a daunting task, especially for those who are not experienced in home improvement projects. However, with the right tools, knowledge, and a bit of patience, it is a task that can be accomplished by many homeowners.

In this comprehensive guide, we’ll explore the process of replacing a garage door opener, including the steps involved, common challenges, and tips for a successful installation.

Understanding Garage Door Openers

Before diving into the process of replacing a garage door opener, it’s essential to understand the role of this crucial component in your garage door system. The garage door opener is responsible for automating the opening and closing of your garage door, providing convenience and security for homeowners.

Types of Garage Door Openers

There are three main types of garage door openers: chain-drive, belt-drive, and screw-drive. Each type operates using a different mechanism, offering varying levels of noise, durability, and performance.

Factors to Consider Before Replacement

Before embarking on the replacement process, there are several factors to consider to ensure a smooth and successful installation.

Assessing the Condition of the Existing Opener

Evaluate the condition of your current garage door opener. Is it malfunctioning, outdated, or no longer meeting your needs? Identifying the reasons for replacement will help guide your decision-making process.

Choosing a New Garage Door Opener

Selecting the right replacement opener is crucial for optimal performance and longevity. Consider factors such as horsepower, noise level, safety features, and compatibility with your existing garage door system.

Steps to Replace a Garage Door Opener

While the specific steps may vary depending on the type and model of the garage door opener, the general process typically involves the following:

1. Preparation

Gather all necessary tools and equipment, including a ladder, wrenches, screwdrivers, and the new garage door opener kit. Ensure that the power to the garage door opener is turned off to prevent accidents.

2. Removal of the Old Opener

Disconnect the power source and release the tension on the garage door springs. Carefully detach the existing opener from the ceiling and remove any mounting brackets or hardware.

3. Installation of the New Opener

Follow the manufacturer’s instructions provided with the new garage door opener kit. Install the rail, motor unit, and other components according to the specified guidelines, ensuring proper alignment and secure attachment.

4. Wiring and Programming

Connect the wiring harness and safety sensors according to the wiring diagram included with the opener. Program the remote controls and keypad, testing the functionality of the opener to ensure smooth operation.

5. Final Adjustments and Testing

Make any necessary adjustments to the travel limits, force settings, and safety features of the garage door opener. Test the opener multiple times to verify proper operation and safety compliance.

Common Challenges and Tips for Success

While replacing a garage door opener is a manageable DIY project for many homeowners, there are some common challenges that may arise:

1. Electrical Wiring Issues

Ensure that the power is turned off before working on any electrical components to prevent shocks or damage to the opener. Follow the wiring diagram carefully and double-check all connections for accuracy.

2. Proper Alignment and Installation

Take your time during the installation process to ensure that all components are aligned correctly and securely fastened. Use a level to check for straightness and adjust as needed.

3. Compatibility and Integration

Verify that the new garage door opener is compatible with your existing garage door system, including the rails, springs, and accessories. Consult with a professional if you have any doubts or concerns about compatibility issues.

4. Safety Precautions

Prioritize safety throughout the replacement process, wearing protective gear and following all safety guidelines outlined in the manufacturer’s instructions. Be cautious when working with heavy components and moving parts.

Conclusion:

While replacing a garage door opener may seem like a challenging task, it is a manageable project that can be accomplished with the right tools, knowledge, and attention to detail. By following the steps outlined in this guide and taking necessary safety precautions, homeowners can successfully replace their garage door opener and enjoy the convenience and security of a fully functional garage door system.

Brothers Garage Door Service

29522 Wentworth St, Livonia, MI 48154, United States

1-734-292-0971

How to Measure Garage Door? – Brother’s Garage Door

When I decided to replace my garage door, I knew that measuring it accurately was crucial to ensure a proper fit. I wanted to avoid any installation issues and make sure I got the right size.

Here’s how I went about measuring my garage door according to Garage Door Repair Services:

First, I gathered the necessary tools—a tape measure, a step ladder, and a pen and paper. Having these tools handy ensured that I could take accurate measurements without any hassle.

I started by measuring the width of the garage door opening. I measured at three different points—the top, middle, and bottom of the opening. I noted down each measurement and then chose the smallest one among the three. This step is important because it accounts for any unevenness in the opening. For example, if the top width measured 9 feet, the middle measured 8 feet 11 inches, and the bottom measured 8 feet 10 inches, I noted down 8 feet 10 inches as the width measurement.

Next, I moved on to measuring the height of the garage door opening. Similar to measuring the width, I measured at three different points—the left side, middle, and right side of the opening. Again, I noted down each measurement and selected the smallest one. This ensures that the door will fit properly even if there are slight variations in the height of the opening. For instance, if the left side height measured 7 feet 2 inches, the middle measured 7 feet 1 inch, and the right side measured 7 feet, I noted down 7 feet as the height measurement.

After measuring the width and height, I proceeded to measure the headroom. The headroom is the space between the top of the garage door opening and the ceiling. I measured the distance from the top of the opening to the nearest obstruction in the ceiling, such as a beam or any other objects. This measurement is important because it helps determine the type of garage door track that will fit properly.

Then, I measured the sideroom, which is the space on each side of the garage door opening. I measured the distance from the side of the opening to the nearest wall or any obstructions. This measurement ensures that there is enough space for the vertical tracks and other hardware to be installed.

Lastly, I measured the backroom, which is the distance from the garage door opening to the back wall of the garage. This measurement helped determine the maximum door height and track configuration that could fit in my garage.

Throughout the process, I double-checked each measurement to ensure accuracy. It’s crucial to get the measurements right before ordering or purchasing a new garage door.

If you have any specific requirements or features you want in your garage door, such as windows or insulation, make sure to note them down as well. These additional features may impact the final measurement or the type of door you choose.

Overall, as stated in Garage Door Repair Services, measuring my garage door accurately was essential in ensuring a proper fit for the new door. By following these steps and taking accurate measurements, I was able to confidently select the right-sized garage door that fit my opening perfectly.

Brother’s Garage Door

29522 Wentworth St. Livonia, MI 48154

734-292-0971

Powered by WordPress & Theme by Anders Norén