Tag: garage door repair san diego ca

How To Repair Hole In Wood Garage Door – Garage Door Experts


Garage Door Repair San Diego CA Depending on the size and severity of the hole, you may need different techniques and materials. Here’s a detailed guide on how to repair a hole in a wood garage door effectively:

1. Gather Materials and Tools:

  • Wood filler or epoxy resin
  • Putty knife or spatula
  • Sandpaper (medium and fine grit)
  • Exterior-grade wood glue
  • Wooden dowels or plugs (if needed)
  • Hammer and chisel (for larger holes)
  • Paint or stain (to match the door’s finish)
  • Paintbrush or roller
  • Protective gear (gloves, goggles, mask)
  • Drop cloths or plastic sheeting

2. Assess the Damage:

  • Examine the hole in the wood garage door to determine its size, depth, and severity. If the hole is small and shallow, you may be able to fill it with wood filler directly. Larger or deeper holes may require additional steps, such as patching with wooden dowels or plugs.

3. Clean the Area:

  • Use a brush or vacuum cleaner to remove any dirt, debris, or loose wood particles from the area surrounding the hole. Ensure that the surface is clean and free of any contaminants that may affect the adhesion of the repair materials.

4. Fill Small Holes with Wood Filler:

  • If the hole is small (less than an inch in diameter) and shallow, fill it with wood filler or epoxy resin. Apply the filler to the hole using a putty knife or spatula, pressing it firmly into the hole and smoothing it out to create a level surface. Allow the filler to dry completely according to the manufacturer’s instructions.

5. Patch Larger Holes with Wooden Dowels:

  • For larger or deeper holes, you may need to patch the area with wooden dowels or plugs. Use a hammer and chisel to carefully remove any damaged or loose wood around the hole, creating a clean and even surface. Cut wooden dowels or plugs to fit the hole and apply exterior-grade wood glue to the surfaces of the hole and the dowels. Press the dowels into the hole, ensuring they are flush with the surrounding wood surface. Allow the glue to dry completely before proceeding.

6. Sand the Surface:

  • Once the filler or patching material has dried, use medium-grit sandpaper to smooth out the repaired area and blend it with the surrounding wood surface. Follow up with fine-grit sandpaper to achieve a smooth and uniform finish. Wipe away any dust or debris with a clean cloth.

7. Apply Paint or Stain:

  • If necessary, apply paint or stain to the repaired area to match the color and finish of the garage door. Use a paintbrush or roller to apply the paint or stain evenly, following the direction of the wood grain. Allow the paint or stain to dry completely according to the manufacturer’s instructions.

8. Seal the Repair:

  • To protect the repaired area from moisture and damage, apply a clear sealant or varnish over the paint or stain. This will help seal the wood surface and prolong the life of the repair. Follow the manufacturer’s instructions for application and drying times.

9. Monitor and Maintain:

  • Regularly inspect the repaired area for signs of damage or deterioration. Perform any necessary touch-ups or maintenance to ensure the longevity of the repair and the overall condition of the garage door.

Garage Door Repair San Diego CA Remember to take your time and work carefully to achieve the best results, and consult a professional if you encounter any difficulties or if the damage is extensive.

Garage Door Experts

3921 Fourth Ave, San Diego, CA 92103, United States

1-619-828-3886

Fire Safety: Garage Doors with Fire-Resistant Properties – Del Cerro Garage & Overhead Doors

As a conscientious homeowner committed to the safety and well-being of my family, I’ve always been vigilant about fire safety measures within my residence. However, one often overlooked aspect of home safety is the garage, an integral part of the house that, if not adequately protected, can pose significant risks in the event of a fire.

In my pursuit of a comprehensive fire safety plan, I delved into the realm of garage doors with fire-resistant properties. This exploration not only heightened my awareness of potential dangers but also shed light on the crucial role that fire-resistant garage doors play in safeguarding homes and families according to Garage Door Repair.

Understanding the Vulnerabilities: The Garage in the Fire Equation

Before delving into the specifics of fire-resistant garage doors, it’s essential to recognize the unique vulnerabilities posed by the garage in the context of a fire emergency. The garage often stores flammable materials such as gasoline, propane tanks, and various chemicals, turning it into a potential ignition source or accelerant during a fire. Additionally, the presence of vehicles with combustible fluids further amplifies the risk. Understanding these vulnerabilities underscores the need for robust fire safety measures, starting with the garage door.

The Crucial Role of Garage Doors: A Barrier Against Fire Spread

Garage doors serve as the primary entry point to the garage, and their construction and materials directly impact their ability to act as a barrier against fire spread. In my exploration of fire-resistant garage doors, I uncovered several key considerations that highlight their crucial role in mitigating the risks associated with garage fires:

1. Material Composition: The Foundation of Fire Resistance

The materials used in the construction of garage doors play a pivotal role in determining their fire resistance. Fire-resistant garage doors are crafted from materials designed to withstand high temperatures and resist flames. Common materials include steel, which offers durability and heat resistance, and composite materials engineered to provide effective fire barriers.

2. Fire Ratings: Assessing Performance Under Heat Exposure

Fire-resistant garage doors are subject to fire ratings that indicate their performance under heat exposure. These ratings are determined by rigorous testing that evaluates the door’s ability to withstand fire and prevent its spread. Understanding these ratings empowers homeowners to make informed decisions based on the specific fire risks associated with their geographical location and lifestyle.

3. Intumescent Seals: Expanding Safeguards in the Face of Heat

Intumescent seals are a critical component of fire-resistant garage doors. These seals are designed to expand when exposed to heat, creating a protective barrier that helps prevent the penetration of flames, smoke, and harmful gases. This dynamic response enhances the door’s ability to contain a fire and protect the interior space.

4. Proper Installation: Ensuring the Integrity of Fire Resistance

The effectiveness of a fire-resistant garage door hinges on proper installation. Homeowners should enlist the services of trained professionals to ensure that the door is fitted correctly, with attention to details such as sealing gaps and installing intumescent seals. A properly installed fire-resistant garage door maximizes its ability to act as a reliable barrier during a fire emergency.

Navigating Fire Ratings: A Guide to Understanding Safety Levels

Fire ratings serve as a guide to understanding the level of protection offered by fire-resistant garage doors. These ratings are expressed in terms of time, indicating the duration for which the door can withstand exposure to fire. Common fire ratings include 20 minutes, 45 minutes, 60 minutes, and 90 minutes. Each rating corresponds to the door’s ability to resist flames and heat for the specified duration, providing crucial time for occupants to evacuate and emergency responders to intervene.

1. 20-Minute Fire Rating: Basic Protection

A garage door with a 20-minute fire rating offers basic protection, providing a limited but essential timeframe for occupants to respond to a fire emergency. While this rating may not be sufficient for all scenarios, it serves as a baseline level of fire resistance, particularly in regions with lower fire risk.

2. 45-Minute Fire Rating: Enhanced Protection

A 45-minute fire rating represents an improvement in fire resistance, offering enhanced protection compared to a 20-minute rating. This duration allows for a more substantial window of time for evacuation and intervention. Homeowners in areas with moderate fire risks may find this level of protection reassuring.

3. 60-Minute Fire Rating: Elevated Safety Assurance

A garage door with a 60-minute fire rating provides elevated safety assurance, significantly extending the time available for occupants to evacuate and emergency responders to address the fire. This level of protection is particularly valuable for homeowners residing in areas with heightened fire risks.

4. 90-Minute Fire Rating: Optimal Protection

Garage doors with a 90-minute fire rating offer optimal protection, providing an extended timeframe for responding to a fire emergency. This high level of fire resistance is ideal for homeowners in regions prone to wildfires or those seeking the utmost safety measures for their residences.

Choosing the Right Material: Balancing Fire Resistance with Aesthetics

While prioritizing fire resistance is paramount for garage doors, homeowners also consider aesthetic preferences when selecting materials. Striking a balance between safety and design preferences ensures that the garage door not only enhances the overall curb appeal but also meets the essential criteria for effective fire resistance.

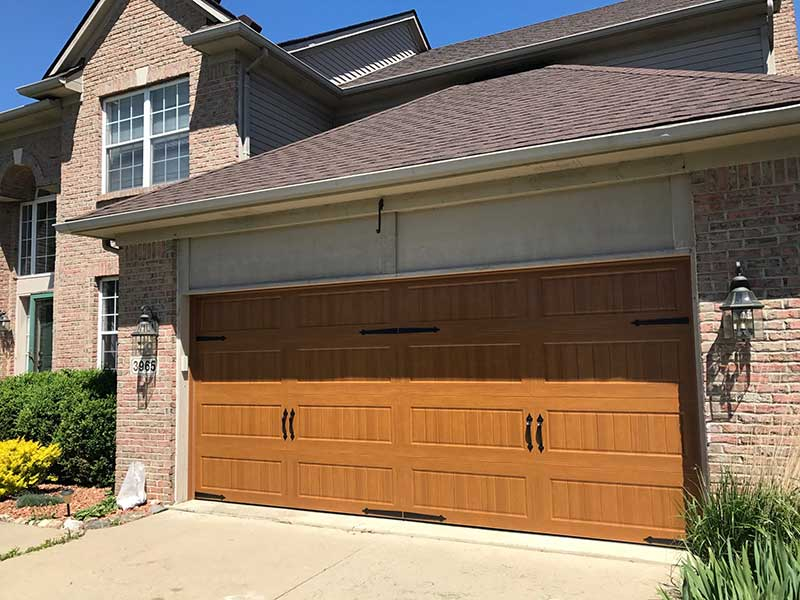
1. Steel: Durability and Fire Resistance

Steel is a popular material for fire-resistant garage doors due to its inherent durability and resistance to heat. Steel doors often come with fire ratings and intumescent seals, making them a robust choice for homeowners seeking a combination of strength and fire resistance. Additionally, steel doors offer design versatility, allowing for various styles and finishes.

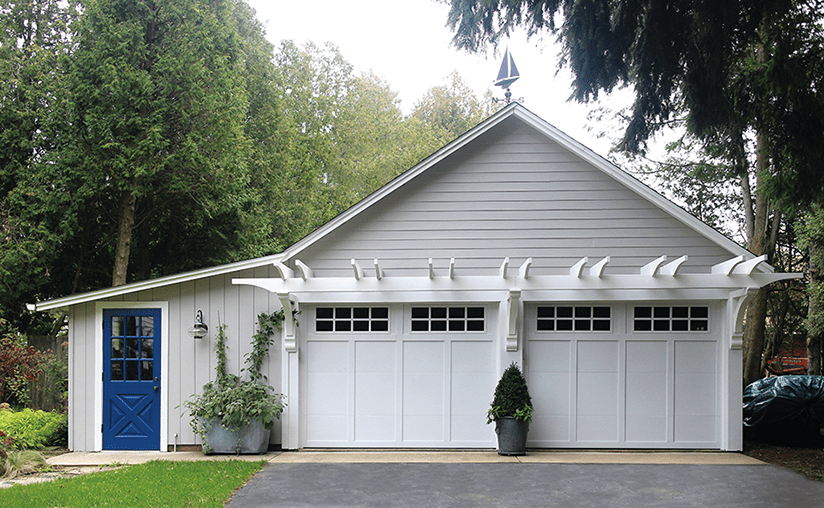
2. Composite Materials: Engineered for Safety and Style

Composite materials, such as fiberglass or wood composites, are engineered to offer both fire resistance and aesthetic appeal. These materials often undergo treatments to enhance their resistance to flames. Composite garage doors provide a wide range of design options, allowing homeowners to customize the appearance of their garage doors without compromising on safety.

3. Fire-Resistant Glass: Combining Visibility with Protection

For homeowners who prioritize visibility and natural light in the garage, fire-resistant glass panels can be incorporated into the door design. Fire-resistant glass maintains its integrity under heat exposure, contributing to the overall fire resistance of the door. This option is suitable for those seeking a modern and open aesthetic.

Installation Considerations: Ensuring Comprehensive Fire Safety

Beyond the choice of materials and fire ratings, the proper installation of fire-resistant garage doors is paramount. Homeowners can take specific measures to ensure comprehensive fire safety within the garage:

1. Professional Installation: Expertise Matters

Enlisting the services of professional installers with expertise in fire-resistant garage doors is crucial. Professionals ensure that the door is correctly fitted, with attention to details such as seals, gaps, and hardware. Proper installation maximizes the door’s effectiveness in containing a fire.

2. Regular Maintenance: Preserving Fire Resistance

Regular maintenance is essential to preserve the fire resistance of garage doors. Homeowners should inspect the door for any signs of wear, damage, or compromised seals. Lubricating moving parts and addressing issues promptly contribute to the longevity and effectiveness of the fire-resistant features.

3. Fire Safety Education: Empowering Occupants

Educating occupants about fire safety procedures and the role of the garage door in emergencies is a crucial aspect of overall preparedness. Ensuring that everyone in the household understands evacuation routes, fire extinguisher locations, and emergency contact information enhances the effectiveness of fire safety measures.

Conclusion: A Shield Against the Unpredictable

As I reflect on my journey into the realm of fire-resistant garage doors, I am struck by the realization that these doors serve as a shield against the unpredictable nature of fires. The garage, often filled with combustible materials, presents unique challenges in the event of a fire emergency. A fire-resistant garage door, meticulously designed and properly installed, stands as a formidable barrier that buys invaluable time for evacuation and intervention.

Based from Garage Door Repair, the importance of fire-resistant garage doors goes beyond the realm of individual safety—it contributes to the overall resilience of communities. By investing in fire-resistant measures, homeowners not only protect their families but also contribute to the collective effort to mitigate the impact of fires. As we navigate the complexities of modern living, embracing comprehensive fire safety, including fire-resistant garage doors, becomes a proactive step towards safeguarding what matters most: our homes, our loved ones, and our peace of mind.

Del Cerro Garage & Overhead Doors

6210 Lambda Dr, San Diego, CA 92120, United States

619-492-3915

How To Replace Battery In Overhead Garage Door Opener – Del Cerro Garage & Overhead Doors

Replacing the battery in an overhead Garage Door Repair San Diego CA is a crucial maintenance task to ensure the continued reliable operation of your garage door.

Here’s a detailed guide to take you through the process step by step:

: Identify the Battery Type Determine the type of battery used in your overhead garage door opener. Commonly, these openers use a 12-volt sealed lead-acid battery or a lithium-ion battery. Consult your garage door opener manual or check the existing battery to confirm the correct type.

: Gather Necessary Tools and Materials Collect the tools and materials needed for the battery replacement. Depending on your garage door opener model, you might need a screwdriver, socket wrench, or other tools. Ensure you have a new battery of the correct type and voltage.

: Locate the Battery Compartment Identify the battery compartment on your overhead garage door opener. The location can vary based on the model but is typically found near the motor unit or control panel. Consult your opener’s manual for specific instructions on locating the battery compartment.

: Disconnect Power Before attempting to replace the battery, disconnect power to the garage door opener. This is a critical safety step to prevent any accidental activation. You can unplug the opener or turn off the circuit breaker dedicated to the garage door.

: Open the Battery Compartment Use the appropriate tool, such as a screwdriver or socket wrench, to open the battery compartment. Some models may have screws securing the compartment, while others may have a latch or other fastening mechanism. Follow the manufacturer’s guidelines for opening the compartment.

: Remove the Old Battery Once the compartment is open, locate the old battery. If the battery is connected to terminals, use caution and disconnect the wires, ensuring you note the positive and negative terminals. If the battery is in a holder, release the holder to remove the old battery.

: Check Battery Voltage and Polarity Before installing the new battery, check its voltage to ensure it matches the old one. Additionally, pay attention to the polarity, ensuring that you correctly connect the positive and negative terminals. This information is usually marked on the battery or in the compartment.

: Install the New Battery Place the new battery into the compartment or holder, ensuring that it is oriented correctly with the positive and negative terminals matching the markings. If the battery is connected to wires, attach them to the corresponding terminals securely.

: Secure the Battery Compartment Close the battery compartment securely, whether by tightening screws, latching, or using any other fastening mechanism. Ensure that the compartment is sealed properly to protect the battery from environmental factors.

: Reconnect Power Once the new battery is installed, reconnect power to the garage door opener. Plug it in or turn on the circuit breaker dedicated to the garage door.

: Test the Garage Door Opener Test the garage door opener by using the remote control or wall-mounted button. Confirm that the opener operates smoothly without any issues. The new battery should provide the necessary power for the opener to function effectively.

: Program or Sync Remote Controls After a battery replacement, you may need to reprogram or sync your remote controls with the garage door opener. Follow the instructions in your opener’s manual for this process.

: Regular Maintenance Consider implementing a regular maintenance schedule for your garage door opener, including periodic battery checks and replacements. This ensures that the opener continues to function reliably.

: Dispose of Old Battery Responsibly Dispose of the old battery in accordance with local regulations. Many communities have designated recycling centers or programs for the proper disposal of batteries. Avoid throwing batteries in the trash.

: Final Checks Perform a final check of the garage door opener to ensure that the new battery is functioning correctly. Confirm that the remote controls operate the opener and that the door opens and closes smoothly.

By following these detailed steps, you should be able to successfully replace the battery in your overhead Garage Door Repair San Diego CA. If you encounter any difficulties or are unsure about any step, consult the manufacturer’s manual or consider seeking professional assistance. Remember to prioritize safety throughout the entire battery replacement process.

Del Cerro Garage & Overhead Doors

6210 Lambda Dr, San Diego, CA 92120, United States

1-619-492-3915

What Is A Dip Switch On A Garage Door Opener – Del Cerro Garage & Overhead Doors

A dip switch, also known as a DIP switch (Dual Inline Package switch), is a small manual switch used in various electronic devices, including Garage Door Repair San Diego CA openers, to configure settings and establish communication between devices. In the context of a garage door opener, dip switches are used to set the code that the remote control and the opener use to communicate and ensure secure access to your garage. Understanding how dip switches work and their importance can help you effectively configure and secure your garage door opener system.

Here’s a comprehensive guide to dip switches and their role in garage door openers:

1. Purpose of Dip Switches:
Dip switches are small, binary switches that can be either “on” (positioned up) or “off” (positioned down). They allow users to manually set a series of binary code combinations, which the device uses to recognize and authenticate communication signals. In the context of a garage door opener, dip switches help establish a unique and secure communication code between the remote control and the opener.

2. Importance of Security:
Dip switches play a crucial role in ensuring the security of your garage. By configuring the dip switches in both the remote control and the garage door opener to match a specific code combination, you prevent unauthorized devices from gaining access to your garage. This security measure helps protect your belongings and ensures that only authorized individuals can operate your garage door.

3. Manual Configuration:
Dip switches are manually configured by physically setting the position of each switch to either “on” or “off.” The specific combination of on/off positions for the switches determines the unique code that the remote control and the garage door opener use to communicate.

4. Setting Up Dip Switches:
To set up dip switches for your garage door opener, follow these steps:

  • Open the remote control: Open the remote control unit to access the internal circuit board.
  • Locate the dip switches: On the circuit board, you’ll find a series of dip switches. The number of switches might vary depending on the remote control model.
  • Set the code: Flip the dip switches to configure the desired code combination. Make note of the positions of the switches that are in the “on” (up) position.
  • Configure the opener: On the garage door opener unit, locate the corresponding set of dip switches. Open the cover to access the dip switches.
  • Match the code: Set the dip switches on the opener to match the code combination you configured on the remote control.
  • Test: Close the remote control and the opener covers. Test the remote control to ensure that the garage door responds to the correct code.

5. Security Enhancements:
While dip switches provided a basic level of security, they were vulnerable to unauthorized access because the code was static and could be easily intercepted or duplicated. Modern garage door openers have transitioned to more advanced security technologies, such as rolling codes and digital encryption, which significantly enhance the security of remote communication.

6. Consider Upgrading:
If your garage door opener still uses dip switches, consider upgrading to a newer model with rolling code technology or digital encryption. These technologies provide higher security levels and protect against code interception and unauthorized access.

7. Safety Precautions:
When working with dip switches and garage door opener components:

  • Turn off power to the opener before accessing its components.
  • Handle dip switches and electronic components with care to avoid damaging them.
  • Follow manufacturer guidelines for setting dip switches and configuring security settings.

Conclusion:
Dip switches are manual binary switches used to configure communication codes between devices, such as Garage Door Repair San Diego CA openers and remote controls. While they were once a common method of securing garage door access, more advanced security technologies like rolling codes and digital encryption have become prevalent due to their enhanced security features. If your garage door opener still uses dip switches, consider upgrading to a newer model that incorporates more secure and advanced communication methods to ensure the safety and security of your garage.

Del Cerro Garage & Overhead Doors

6210 Lambda Dr, San Diego, CA 92120, United States

1-619-492-3915

Garage Door Opener Motor Troubleshooting: Identifying Motor Issues – Del Cerro Garage & Overhead Doors

As a homeowner who has experienced a few issues with my garage door opener motor, I understand the importance of identifying and troubleshooting motor-related problems. The garage door opener motor is a vital component that keeps the door operating smoothly, so when it starts showing signs of trouble, it can be quite frustrating. Through my experiences, I’ve learned about common motor issues and their symptoms, as well as various troubleshooting techniques to address these problems effectively.

Based from Garage Door Repair San Diego CA, one of the first issues I encountered was when my garage door opener failed to respond when I pressed the remote or wall button. It was alarming to see the garage door not moving at all, and I wondered if there was a problem with the power supply or the motor itself. To troubleshoot, I started by checking the power supply, ensuring that the power cord was securely plugged into the electrical outlet. I also inspected the wiring connections to the motor and other components to make sure they were intact and undamaged. After tightening a few loose connections, the motor finally responded, and the garage door began to function normally again.

On another occasion, I noticed strange noises coming from the motor during the garage door’s operation. There were grinding and rattling sounds that worried me, as I knew these could indicate potential problems with the motor’s components. I decided to lubricate the moving parts of the motor, including gears and pulleys, using a high-quality garage door lubricant. Surprisingly, the noises gradually diminished, and the garage door opener started operating much quieter and smoother.

A different issue that I faced was with the garage door reversing direction unexpectedly while opening or closing. This problem was concerning, as it posed a safety risk for anyone or anything in the door’s path. I realized that this issue might be related to the safety sensors. I checked the sensors, and to my relief, I found that they were slightly misaligned. After repositioning them properly and clearing any obstructions, the garage door stopped reversing without reason.

One time, I noticed that the garage door was moving at an unusually slow speed. It took longer than usual for the door to open or close completely, and I suspected that there might be an issue with the motor’s performance. After doing some research, I learned that the motor capacitor could be the culprit. Using a multimeter, I tested the capacitor’s continuity and found that it was faulty. I replaced the capacitor, and the garage door opener’s performance significantly improved, opening and closing at the normal speed.

Another important aspect of troubleshooting the garage door opener motor was examining the motor gear and drive mechanism. I noticed wear and tear on some of the gear teeth, which could explain the grinding noises I heard earlier. I immediately replaced the worn-out gear to prevent further damage to the motor.

Additionally, I discovered that my garage door opener had an overload protector that shut off the motor when it became excessively hot. This was especially useful during hot summer days when the motor could overheat. When the motor shut down, I let it cool down before attempting to use the garage door again. This simple precaution helped prevent any potential damage to the motor due to overheating.

In conclusion, as stated in Garage Door Repair San Diego CA, my experiences with troubleshooting the garage door opener motor have taught me the significance of promptly identifying and addressing motor-related issues. By understanding common motor problems and their symptoms, I was able to perform the necessary checks and adjustments to ensure the smooth and reliable operation of my garage door. Checking the power supply, inspecting wiring, lubricating moving parts, clearing obstructions, adjusting safety sensors, testing the motor capacitor, examining the motor gear and drive mechanism, and addressing motor overload issues have all been essential steps in resolving motor-related problems. Through these efforts, I have been able to maintain the longevity and reliable performance of my garage door opener motor, providing me with convenience and peace of mind in accessing my garage space.

Del Cerro Garage & Overhead Doors

6210 Lambda Dr, San Diego, CA 92120, United States

619-492-3915

Powered by WordPress & Theme by Anders Norén