Category: Window Replacement

How Long Does It Typically Take To Replace Windows In A Home? – Arlington Siding & Window Replacement

Window Replacement Arlington TX is a significant undertaking that involves multiple steps and considerations.

The duration of the process can vary depending on various factors such as the number of windows being replaced, the type of windows being installed, the size of the windows, the condition of the existing window frames, and the experience level of the installation crew. Generally, the window replacement process can take anywhere from one day to several weeks to complete.

To understand the timeline involved in replacing windows in a home, it’s essential to break down the process into distinct phases:

  1. Assessment and Planning: Before any work begins, it’s crucial to assess the existing windows and determine the scope of the project. This includes measuring each window, inspecting the condition of the frames and sills, identifying any structural issues, and selecting the appropriate replacement windows. Depending on the complexity of the project, this phase can take a few hours to a few days.
  2. Ordering Materials: Once the assessment is complete and the homeowner has chosen the replacement windows, the next step is to order the materials. This may involve custom ordering windows to fit specific dimensions or selecting from available stock sizes. The time it takes to receive the windows can vary depending on factors such as manufacturer lead times and shipping logistics. Typically, it takes anywhere from a few days to a few weeks to receive the windows after placing the order.
  3. Preparation: Before the installation can begin, the work area needs to be prepared. This may involve clearing furniture and belongings away from the windows, protecting floors and walls with drop cloths or plastic sheeting, and ensuring that there is adequate access for the installation crew. Depending on the size of the project and the condition of the existing windows, this phase can take anywhere from a few hours to a full day.
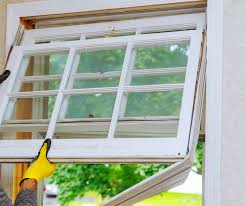
  4. Removal of Existing Windows: The next step is to remove the old windows. This process involves carefully extracting the existing window frames, sashes, and any hardware. Depending on the condition of the existing windows and the complexity of the removal process, this phase can take anywhere from a few hours to a full day.
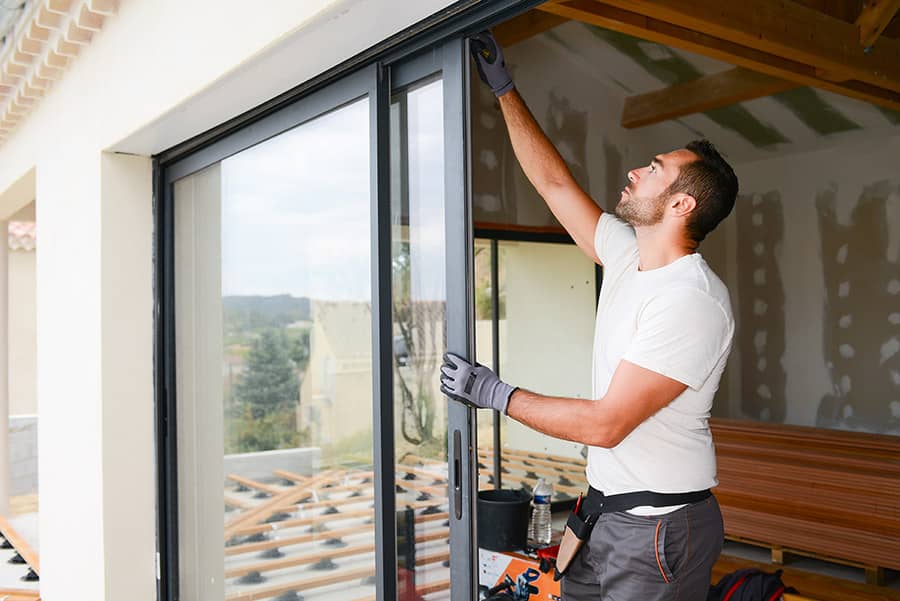
  5. Installation of New Windows: Once the old windows have been removed, the new windows can be installed. This involves fitting the replacement windows into the existing openings, securing them in place, and ensuring that they are properly sealed and insulated. The time it takes to install each window can vary depending on factors such as the type of window, the complexity of the installation, and the experience level of the installation crew. On average, it takes about 30 minutes to 2 hours to install each window.
  6. Finishing Touches: After the new windows have been installed, the installation crew will make any necessary adjustments and apply finishing touches. This may include caulking around the window frames, installing trim or molding, and ensuring that the windows operate smoothly. Depending on the size of the project and the complexity of the finishing touches, this phase can take anywhere from a few hours to a full day.
  7. Cleanup and Inspection: Once the installation is complete, the work area will be cleaned up, and any debris or waste will be removed. The installation crew will also perform a final inspection to ensure that the windows have been installed correctly and meet the homeowner’s satisfaction. This phase typically takes a few hours to complete.
  8. Final Inspection and Sign-Off: Before considering the project complete, the homeowner should conduct a final inspection of the newly installed windows to ensure that they meet their expectations. Any concerns or issues should be addressed with the installation crew at this time. Once the homeowner is satisfied with the work, they can sign off on the project, officially completing the window replacement process.

In conclusion, the timeline for Window Replacement Arlington TX can vary depending on various factors such as the number of windows being replaced, the type of windows being installed, and the complexity of the project. On average, the process can take anywhere from one day to several weeks to complete, from the initial assessment and planning phase to the final inspection and sign-off. By understanding the steps involved in the window replacement process and working with experienced professionals, homeowners can ensure a smooth and efficient installation that enhances the comfort, energy efficiency, and aesthetics of their home.

Arlington Siding & Window Replacement

1111 Honeysuckle Way, Arlington, TX 76011, United States

1-817-383-8681

Choosing the Right Siding Color: Enhancing My Home’s Curb Appeal – Grapevine Siding & Window Replacement

When it comes to transforming the look of my home’s exterior, few decisions are as significant as choosing the right siding color. It’s not just a matter of personal preference; it’s a choice that can dramatically enhance curb appeal and increase property value.

Here’s my journey of selecting the perfect siding color for my home, with tips and insights to help you do the same by following Siding and Window Replacement Grapevine TX.

Understanding the Impact of Siding Color

The color of your home’s siding holds immense power. It’s the first thing that catches your eye and sets the tone for the entire visual experience. A well-chosen siding color can make your home feel welcoming, elegant, and in harmony with its surroundings, while a poor choice can leave it looking out of place and unattractive.

Tips for Making the Right Choice

  1. Consider Your Home’s Style: My journey began by looking at the architectural style of my home. Different styles tend to favor particular colors that complement their design. I realized that embracing the style’s traditional color palette often yields excellent results.
  2. Take in Your Surroundings: I took a long look at my home’s surroundings, considering the natural environment, neighboring houses, and other notable features. My chosen siding color needed to blend harmoniously with these elements. For instance, if you live near the woods, earthy tones like greens or browns might be a great fit.
  3. Size and Proportions Matter: I learned that color can influence how we perceive the size of a home. Darker colors tend to make a house look smaller, while lighter colors can create an illusion of more space. I kept this in mind, especially since I wanted to emphasize certain architectural features.
  4. Climate Considerations: The climate in my area played a role in my decision-making process. I realized that certain colors might fade more quickly in harsh sunlight or show mold and mildew more prominently in rainy regions. Climate can affect the long-term aesthetics of your siding.
  5. Get Samples: Most siding manufacturers offer color samples that you can place on your home’s exterior. This was immensely helpful for me, as I could see how different colors would look against my home’s unique features and in various lighting conditions.
  6. Coordinate with Exterior Features: I also took into account the color of my roof, trim, and other exterior features. The siding color needed to complement these elements for a cohesive look. A harmonious color scheme ties everything together seamlessly.
  7. Check Neighborhood Rules: I made sure to review any neighborhood rules or homeowners’ association guidelines regarding exterior colors. Some communities have restrictions, so it’s essential to be aware of them before making a final decision.
  8. Visualize in Different Lighting: Siding colors can appear quite different in various lighting conditions. I tested my choices in both natural daylight and artificial lighting to ensure I liked how they looked at all times of the day.

Popular Siding Color Options

While the perfect siding color depends on your specific circumstances, here are some popular color options and the atmospheres they can create:

  1. Neutral Tones: Neutral shades like beige, gray, and off-white are timeless choices that convey sophistication. They work well with various architectural styles and create a clean, classic look.
  2. Bold and Vibrant Colors: Bold choices like red, deep blue, or forest green can make a statement and add personality to your home. These colors are often used on accents or as part of a more eclectic color scheme.
  3. Earth Tones: Earthy colors like brown, tan, and olive green blend seamlessly with natural surroundings. They are especially popular in rural or wooded areas.
  4. Cool Blues and Greens: Cool tones like shades of blue and green evoke a sense of calm and tranquility. They are often used near bodies of water or in coastal regions.
  5. Warm Yellows and Reds: Warm colors like sunny yellow or terra cotta red create a welcoming and vibrant atmosphere. They are often used in Mediterranean or Southwestern-style homes.
  6. Monochromatic Palettes: Staying within one color family but using different shades and tones can create a visually interesting monochromatic effect. This approach adds depth and complexity to your home’s appearance.

Testing and Visualizing Choices

Before making a final decision, it’s crucial to test and visualize your siding color choices. Here’s how I approached this:

  1. Digital Tools: I used websites and apps that allowed me to upload a photo of my home and virtually experiment with different siding colors. This helped me get an initial sense of how various colors might look.
  2. Order Samples: I ordered physical color samples from siding manufacturers. Placing these samples on my home’s exterior gave me a tangible sense of how the colors would appear in real life.
  3. Look at Real-Life Examples: I took drives around my neighborhood and nearby areas to find homes with siding colors I admired. Seeing these colors on actual homes provided a valuable reference.
  4. Consult Professionals: I considered seeking advice from a professional color consultant or a siding contractor. Their expertise can provide valuable insights and help make an informed decision.

In summary, based from Siding and Window Replacement Grapevine TX, choosing the right siding color for my home was a journey that required careful consideration and planning. By evaluating my home’s style, surroundings, and architectural features, I selected a color that not only enhanced curb appeal but also created a lasting visual impression. Your home’s siding color is a reflection of your style and taste, so take your time, test your choices, and create an exterior that you’ll be proud to call your own.

Grapevine Siding & Window Replacement

2140 Hall – Johnson Rd #102, Grapevine, TX 76051, United States

817-508-9754

Powered by WordPress & Theme by Anders Norén