How To Balance A Garage Door With A Torsion Spring – Best Roofing Solution – Santa Ana

Choosing the Roofing Contractor Santa Ana CA for your project is crucial to ensure a durable and well-installed roof that protects your property for years to come.

With numerous roofing companies vying for your business, it can be challenging to distinguish between reputable professionals and those who may fall short. In this guide, we’ll outline the essential qualifications to look for in a roofing expert to help you make an informed decision.

1. Licensing and Accreditation

One of the first qualifications to verify when hiring a roofing expert is their licensing and accreditation. A reputable roofing contractor should hold the necessary licenses and certifications required by state or local authorities. These credentials indicate that the contractor has met specific standards and possesses the expertise to perform roofing work safely and effectively.

2. Insurance Coverage

Roofing projects involve inherent risks, including property damage and personal injury. Therefore, it’s essential to ensure that your roofing expert carries adequate insurance coverage, including liability insurance and workers’ compensation insurance. This protects you from liability in the event of accidents or injuries that occur during the course of the project.

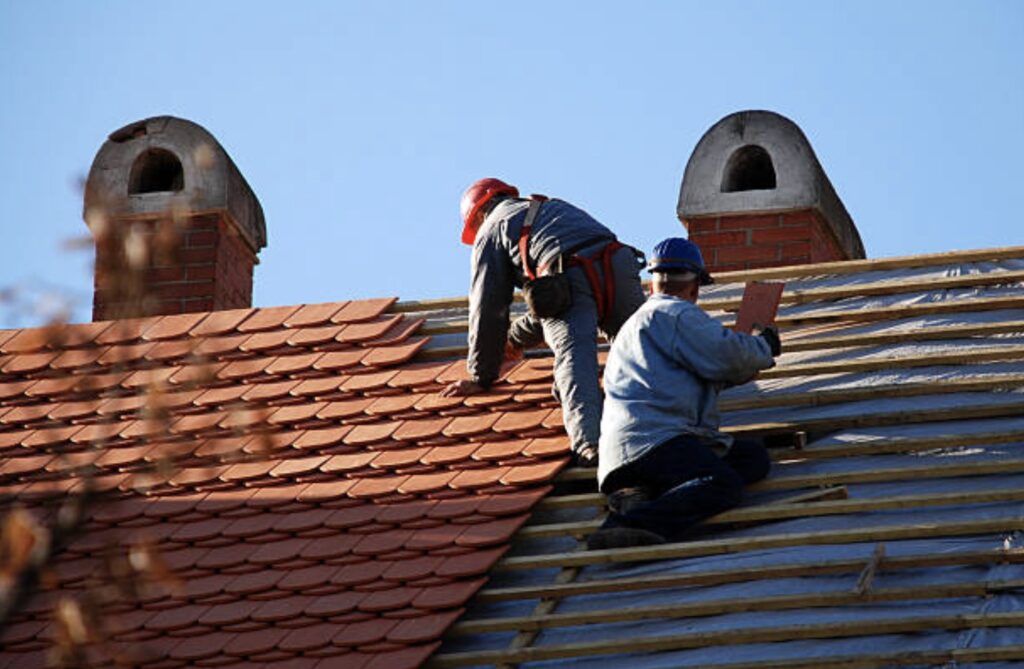
3. Experience and Expertise

Experience is a crucial factor when evaluating roofing experts. Look for contractors with a proven track record of successful projects and years of experience in the industry. An experienced roofer is familiar with a wide range of roofing materials, techniques, and challenges, allowing them to tackle your project with confidence and efficiency.

4. Reputation and Reviews

Before hiring a roofing expert, take the time to research their reputation and read reviews from past clients. Online review platforms, social media channels, and the Better Business Bureau are valuable resources for gathering feedback and assessing the quality of a contractor’s workmanship and customer service. A reputable roofing expert will have positive reviews and testimonials from satisfied customers.

5. Professionalism and Communication

Effective communication and professionalism are essential qualities to look for in a roofing expert. From the initial consultation to the completion of the project, your contractor should be responsive, attentive, and transparent in their communication. They should provide clear explanations of the scope of work, timelines, and costs, and address any concerns or questions you may have promptly.

6. Quality of Materials and Workmanship

A reliable roofing expert prioritizes the use of high-quality materials and skilled workmanship to ensure the longevity and durability of your roof. Inquire about the types of roofing materials they offer and their suitability for your specific project. Additionally, ask about their installation techniques and quality control measures to ensure a superior end result.

7. Warranty and After-Sales Support

A reputable roofing expert stands behind their work with comprehensive warranty coverage and reliable after-sales support. Inquire about the warranties offered for both materials and labor, and clarify the process for addressing any issues or concerns that may arise after the completion of the project. A contractor who offers strong warranties demonstrates confidence in their workmanship and commitment to customer satisfaction.

8. Local Knowledge and Experience

Choosing a roofing expert with local knowledge and experience can be advantageous, as they are familiar with the unique weather conditions, building codes, and regulations in your area. A local contractor understands the specific challenges posed by your climate and can recommend roofing solutions that are best suited to withstand local environmental factors.

Conclusion:

When selecting a roofing expert for your project, it’s essential to consider a range of qualifications, including licensing, insurance coverage, experience, reputation, professionalism, quality of materials and workmanship, warranty offerings, and local knowledge. By thoroughly vetting potential contractors and prioritizing these qualifications, you can ensure that your roofing project is completed to the highest standards of quality and craftsmanship.

Best Roofing Solution – Santa Ana

2429 W Elder Ave, Santa Ana, CA 92704, United States

1-714-451-4926

How To Align Sensors On Chamberlain Garage Door Opener – Roadrunner Garage Doors

Garage Door Repair Fort Worth TX are equipped with safety sensors that are typically installed near the bottom of the garage door tracks on either side of the door opening.

These sensors work by emitting an invisible beam of light between them, and if this beam is interrupted by an obstruction, it signals the door to stop or reverse its movement. Proper alignment of these sensors is crucial for ensuring that they can accurately detect obstacles and prevent accidents or damage. By following the instructions outlined in this guide, you can easily align the sensors on your Chamberlain garage door opener and maintain a safe and reliable door system.

Tools and Materials Needed

Before you begin aligning the sensors on your Chamberlain garage door opener, gather the following tools and materials:

  • Tape measure
  • Screwdriver
  • Level
  • Cleaning cloth
  • Marker or pen

Having these tools on hand will make the alignment process easier and more efficient.

Step-by-Step Alignment Guide

Follow these step-by-step instructions to align the sensors on your Chamberlain garage door opener effectively:

1. Identify Sensor Locations

Locate the safety sensors on both sides of the garage door opening. They are usually mounted on the vertical tracks, about 6 inches above the ground.

2. Check Sensor Alignment

Visually inspect the alignment of the sensors to determine if they are properly aligned with each other. Ensure that they are facing each other directly and that there are no obstructions blocking the sensor beams.

3. Clean Sensors

Use a cleaning cloth to wipe the lenses of the sensors clean. Dirt, dust, or debris on the lenses can interfere with the sensor’s operation, so it’s essential to keep them clean.

4. Measure Sensor Height

Use a tape measure to measure the height of each sensor from the ground. Make a note of the measurements for reference.

5. Adjust Sensor Alignment

If the sensors are misaligned, use a screwdriver to loosen the mounting brackets holding them in place. Carefully adjust the sensors horizontally and vertically until they are perfectly aligned with each other.

6. Use a Level

For added accuracy, use a level to ensure that the sensors are perfectly aligned both horizontally and vertically. Place the level across the sensors and adjust them until the bubble is centered.

7. Tighten Mounting Brackets

Once the sensors are properly aligned, use a screwdriver to tighten the mounting brackets securely in place. Ensure that the sensors remain aligned during this process.

8. Test Sensor Alignment

Test the alignment of the sensors by closing the garage door. If the sensors are aligned correctly, the door should close smoothly without any interruptions. If the door fails to close or reverses unexpectedly, the sensors may still be misaligned, and you will need to readjust them accordingly.

9. Final Adjustment

If necessary, make any final adjustments to the sensor alignment to ensure that they are working correctly. Pay close attention to any potential obstructions or interferences that may be affecting the sensor’s operation.

10. Secure Wiring

After confirming that the sensors are properly aligned and functioning correctly, secure any loose wiring or cables connected to the sensors to prevent them from becoming tangled or damaged.

Conclusion:

Aligning the sensors on your Chamberlain garage door opener is a relatively simple task that can significantly improve the safety and reliability of your door system. By following the step-by-step instructions outlined in this guide and conducting regular inspections and adjustments, you can ensure that your garage door sensors are always working correctly, providing you with peace of mind and protection against accidents or damage.

Roadrunner Garage Doors

8616 4th Street, Frisco TX 75034

1-713-473-8168

How Much Horsepower Does My Garage Door Opener Need – Martin Garage Door

When it comes to Garage Door Repair Parker CO, horsepower plays a crucial role in determining their performance and suitability for your garage door.

But how much horsepower does your garage door opener really need? In this comprehensive guide, we’ll explore the factors that influence horsepower requirements, how to calculate the right horsepower for your garage door opener, and other essential considerations to ensure optimal functionality.

Understanding Horsepower

Before we delve into the specifics of garage door openers, let’s clarify what horsepower means in this context. Horsepower is a unit of measurement that indicates the power output of an engine or motor. In the case of garage door openers, horsepower refers to the motor’s ability to lift and lower the door effectively.

Factors Affecting Horsepower Requirement

Several factors influence the amount of horsepower needed for a garage door opener to operate efficiently. The primary factors include the size, weight, and material of the garage door. Additionally, environmental factors such as temperature and altitude can impact horsepower requirements.

Calculating Horsepower Needs

Determining the appropriate horsepower for your garage door opener involves a simple calculation based on the door’s weight and size. By using a formula that takes these variables into account, you can estimate the minimum horsepower required for smooth operation.

Standard Horsepower Ratings

Residential garage door openers typically come in standard horsepower ratings ranging from ⅓ to 1¼ horsepower. Understanding these ratings can help you narrow down your options when selecting a new opener.

Matching Horsepower to Door Size

It’s essential to match the horsepower of your garage door opener to the size and weight of your door. An insufficient horsepower rating may strain the motor, leading to premature wear and tear and potentially costly repairs.

Considerations for Heavy Doors

If you have an oversized or heavy garage door, you’ll likely need a higher horsepower opener to ensure smooth and reliable operation. Heavy doors exert more force on the motor, requiring additional power to lift and lower them safely.

Energy Efficiency and Horsepower

While higher horsepower garage door openers offer greater lifting capacity, they also consume more energy. It’s essential to strike a balance between horsepower and energy efficiency to minimize operating costs.

Noise Levels

The horsepower of a garage door opener can significantly impact the noise levels during operation. Higher horsepower units tend to produce more noise, which may be a consideration if your garage is adjacent to living spaces.

Maintenance and Longevity

Proper maintenance is crucial for prolonging the lifespan of your garage door opener, regardless of its horsepower. Regular lubrication, alignment checks, and safety inspections can help prevent costly repairs and extend the longevity of your opener.

Cost Considerations

The cost of a garage door opener varies depending on its horsepower rating and features. While higher horsepower units may come with a higher price tag, they offer enhanced performance and durability, making them a worthwhile investment in the long run.

Choosing the Right Opener

When selecting a garage door opener, consider factors such as horsepower, type, features, and budget. By weighing these considerations carefully, you can choose an opener that meets your specific needs and preferences.

Installation and Professional Assistance

Installing a garage door opener, especially one with higher horsepower, requires precision and expertise. Hiring a professional installer ensures proper alignment, wiring, and setup, minimizing the risk of malfunctions and accidents.

Conclusion:

Choosing the right amount of horsepower for your garage door opener is essential for ensuring smooth operation and longevity. By considering factors such as door size, weight, and material, you can select an opener that meets your needs while minimizing energy consumption and noise levels.

Martin Garage Door

10411 S Parker Rd, Parker, CO 80134, United States

1-303-663-1310

How Much Garage Door Opener – Denzel Garage Doors

Garage Door Repair Marina Del Rey CA come in various types and models, each with its own features and price points.

Understanding the factors that influence the cost of garage door openers can help you choose the right one for your needs and budget.

Types of Garage Door Openers

There are several types of garage door openers to choose from, including:

Chain Drive

Chain drive garage door openers are the most common and affordable option. They use a metal chain to lift and lower the garage door but tend to be noisy during operation.

Belt Drive

Belt drive garage door openers use a rubber belt to operate the garage door, resulting in quieter operation compared to chain drive openers. They are slightly more expensive but offer smoother and more reliable performance.

Screw Drive

Screw drive garage door openers use a threaded steel rod to move the garage door, providing a balance between price and performance. They are relatively quiet and require less maintenance than chain drive openers.

Direct Drive

Direct drive garage door openers have a motor that moves along a stationary chain, eliminating the need for a belt or threaded rod. They are known for their quiet operation and minimal maintenance requirements but tend to be more expensive.

Factors Affecting the Cost

Several factors can influence the cost of a garage door opener:

Type of Opener

The type of garage door opener you choose will have a significant impact on the cost. Chain drive openers are typically the most affordable, while direct drive openers are the most expensive.

Horsepower

The horsepower rating of the garage door opener can affect its performance and cost. Higher horsepower openers are capable of lifting heavier garage doors and may be more expensive.

Additional Features

Garage door openers come with a range of features and options, such as remote controls, keypads, battery backup systems, and Wi-Fi connectivity. The more features a garage door opener has, the higher the cost may be.

Average Cost Estimates

The average cost of a garage door opener typically ranges from $200 to $600, depending on the type of opener, horsepower rating, and additional features.

Additional Costs to Consider

In addition to the cost of the garage door opener itself, there may be additional costs to consider:

Professional Installation

While some homeowners may choose to install their garage door opener themselves to save money, professional installation can ensure proper installation and may be worth the additional cost for peace of mind.

Remote Controls and Keypads

If your garage door opener does not come with remote controls or keypads, you may need to purchase them separately, which can add to the total cost.

Warranty and Maintenance Plans

Some garage door openers come with warranties and maintenance plans that can provide added peace of mind but may incur additional costs.

Tips for Saving Money

To save money on your garage door opener purchase, consider the following tips:

  • Shop around and compare prices from multiple retailers to find the best deal.
  • Opt for a basic garage door opener model without unnecessary features or upgrades.
  • Consider purchasing a refurbished or lightly used garage door opener to save money.

Conclusion:

The cost of a garage door opener can vary depending on factors such as the type of opener, horsepower rating, and additional features. By understanding these factors and considering additional costs, you can estimate the total cost of your garage door opener purchase and make an informed decision.

Denzel Garage Doors

17841 Welby Way Reseda , CA 91335

1-619-496-9419

How To Install Chain Drive Garage Door Opener – Team Taylor Doors

Installing a  Garage Door Repair Lee Summit MO is a practical and relatively straightforward process that can enhance the convenience and security of your home. Chain drive openers are known for their durability and reliability, making them a popular choice among homeowners.

In this comprehensive guide, we’ll walk you through the step-by-step process of installing a chain drive garage door opener to ensure smooth and trouble-free operation of your garage door.

Tools and Materials Needed

Before you begin the installation process, gather the following tools and materials:

  1. Chain drive garage door opener kit
  2. Power drill
  3. Screwdriver set
  4. Measuring tape
  5. Level
  6. Step ladder
  7. Safety goggles
  8. Pencil
  9. Mounting hardware (included with the opener)
  10. Remote control or keypad (if not included)

Step-by-Step Installation Process

1. Read the Manual

Before you begin the installation process, carefully read the instruction manual provided with your garage door opener kit. Familiarize yourself with the components and steps involved in the installation to ensure a smooth process.

2. Prepare the Garage Door

Ensure that your garage door is in good working condition and properly balanced. Check for any loose or damaged hardware, and make any necessary repairs before proceeding with the installation.

3. Install the Rail

Begin by installing the rail assembly according to the manufacturer’s instructions. The rail is typically attached to the ceiling of the garage and extends horizontally along the length of the door. Use a power drill and screws to secure the rail brackets to the ceiling joists.

4. Mount the Motor Unit

Next, mount the motor unit to the ceiling near the front of the garage, following the manufacturer’s instructions. Use a level to ensure that the motor unit is properly aligned and parallel to the garage door.

5. Attach the Chain and Trolley

Attach the chain to the motor unit and feed it through the rail assembly. Connect the chain to the trolley, making sure it is properly aligned and tensioned. Use the provided hardware to secure the chain and trolley in place.

6. Install the Safety Sensors

Mount the safety sensors near the bottom of the garage door opening, on either side of the door. Ensure that the sensors are aligned and facing each other, and use a power drill to secure them in place. Connect the sensor wires to the motor unit according to the manufacturer’s instructions.

7. Wire the Opener

Follow the wiring diagram provided in the instruction manual to connect the electrical wires from the motor unit to the power source and any additional accessories, such as wall-mounted control panels or remote transmitters. Be sure to turn off the power to the garage door opener circuit before making any electrical connections.

8. Test the Opener

Once the installation is complete and all wiring connections have been made, test the garage door opener to ensure it operates smoothly and without any issues. Use the wall-mounted control panel or remote transmitter to open and close the garage door several times, paying attention to any unusual noises or malfunctions.

9. Adjust the Settings

Adjust the opener settings as needed, such as the travel limits and force adjustments, to ensure smooth and reliable operation. Refer to the instruction manual for guidance on adjusting these settings properly.

10. Lubricate Moving Parts

To maintain optimal performance and prolong the life of your chain drive garage door opener, regularly lubricate the moving parts, such as the chain, rollers, and hinges, using a garage door lubricant.

Conclusion

Installing a chain drive garage door opener is a practical and rewarding project that can enhance the functionality and security of your home. By following the step-by-step instructions provided in this guide and referring to the manufacturer’s manual, you can successfully install a garage door opener that provides convenience, reliability, and peace of mind for years to come.

Team Taylor Doors

210 SW Market St Suite 144, Lee’s Summit, MO 64063, United States

1-816-408-6999

How Difficult Is It To Replace A Garage Door Opener – Brothers Garage Door Service

Garage Door Repair Livonia MI  may seem like a daunting task, especially for those who are not experienced in home improvement projects. However, with the right tools, knowledge, and a bit of patience, it is a task that can be accomplished by many homeowners.

In this comprehensive guide, we’ll explore the process of replacing a garage door opener, including the steps involved, common challenges, and tips for a successful installation.

Understanding Garage Door Openers

Before diving into the process of replacing a garage door opener, it’s essential to understand the role of this crucial component in your garage door system. The garage door opener is responsible for automating the opening and closing of your garage door, providing convenience and security for homeowners.

Types of Garage Door Openers

There are three main types of garage door openers: chain-drive, belt-drive, and screw-drive. Each type operates using a different mechanism, offering varying levels of noise, durability, and performance.

Factors to Consider Before Replacement

Before embarking on the replacement process, there are several factors to consider to ensure a smooth and successful installation.

Assessing the Condition of the Existing Opener

Evaluate the condition of your current garage door opener. Is it malfunctioning, outdated, or no longer meeting your needs? Identifying the reasons for replacement will help guide your decision-making process.

Choosing a New Garage Door Opener

Selecting the right replacement opener is crucial for optimal performance and longevity. Consider factors such as horsepower, noise level, safety features, and compatibility with your existing garage door system.

Steps to Replace a Garage Door Opener

While the specific steps may vary depending on the type and model of the garage door opener, the general process typically involves the following:

1. Preparation

Gather all necessary tools and equipment, including a ladder, wrenches, screwdrivers, and the new garage door opener kit. Ensure that the power to the garage door opener is turned off to prevent accidents.

2. Removal of the Old Opener

Disconnect the power source and release the tension on the garage door springs. Carefully detach the existing opener from the ceiling and remove any mounting brackets or hardware.

3. Installation of the New Opener

Follow the manufacturer’s instructions provided with the new garage door opener kit. Install the rail, motor unit, and other components according to the specified guidelines, ensuring proper alignment and secure attachment.

4. Wiring and Programming

Connect the wiring harness and safety sensors according to the wiring diagram included with the opener. Program the remote controls and keypad, testing the functionality of the opener to ensure smooth operation.

5. Final Adjustments and Testing

Make any necessary adjustments to the travel limits, force settings, and safety features of the garage door opener. Test the opener multiple times to verify proper operation and safety compliance.

Common Challenges and Tips for Success

While replacing a garage door opener is a manageable DIY project for many homeowners, there are some common challenges that may arise:

1. Electrical Wiring Issues

Ensure that the power is turned off before working on any electrical components to prevent shocks or damage to the opener. Follow the wiring diagram carefully and double-check all connections for accuracy.

2. Proper Alignment and Installation

Take your time during the installation process to ensure that all components are aligned correctly and securely fastened. Use a level to check for straightness and adjust as needed.

3. Compatibility and Integration

Verify that the new garage door opener is compatible with your existing garage door system, including the rails, springs, and accessories. Consult with a professional if you have any doubts or concerns about compatibility issues.

4. Safety Precautions

Prioritize safety throughout the replacement process, wearing protective gear and following all safety guidelines outlined in the manufacturer’s instructions. Be cautious when working with heavy components and moving parts.

Conclusion:

While replacing a garage door opener may seem like a challenging task, it is a manageable project that can be accomplished with the right tools, knowledge, and attention to detail. By following the steps outlined in this guide and taking necessary safety precautions, homeowners can successfully replace their garage door opener and enjoy the convenience and security of a fully functional garage door system.

Brothers Garage Door Service

29522 Wentworth St, Livonia, MI 48154, United States

1-734-292-0971

Can You Open An Automatic Garage Door Manually – Allgood Garage Doors Services

Most Garage Door Repair Las Vegas IN systems are equipped with a manual release mechanism that allows you to disengage the door from the motor and operate it manually.

This feature provides a backup method for accessing your garage and should be used when necessary. Let’s explore how to manually open an automatic garage door in more detail:

1. Locate the Manual Release Mechanism: The first step is to locate the manual release mechanism on your automatic garage door opener. This mechanism is typically a red cord or handle hanging from the trolley that connects the door to the motor. It may also be located on the motor unit itself or along the garage door track.

2. Pull the Manual Release Cord or Handle: Once you have located the manual release mechanism, pull the cord or handle in the direction indicated by the manufacturer’s instructions. This action disengages the garage door from the motor, allowing you to operate it manually.

3. Lift the Garage Door: With the manual release activated, you can now lift the garage door manually. Stand inside the garage facing the door and grip the bottom edge or handles firmly. Lift the door slowly and evenly, taking care not to strain yourself or damage the door.

4. Secure the Door in the Open Position: Once the garage door is fully open, secure it in the open position to prevent it from closing unexpectedly. You can use a locking mechanism if available, or prop the door open with a sturdy object such as a broomstick or wooden block.

5. Close the Garage Door Manually: To close the garage door manually, simply reverse the process. Lower the door slowly and carefully, guiding it back into the closed position. Ensure that the door is aligned properly and latched securely before releasing it.

6. Re-engage the Automatic Opener: After closing the garage door manually, re-engage the automatic opener mechanism to restore normal operation. This typically involves pulling the manual release cord or handle in the opposite direction until it clicks back into place, re-engaging the door with the motor.

7. Test the Automatic Operation: Once the manual release mechanism is re-engaged, test the automatic operation of the garage door to ensure that it is functioning correctly. Use the wall-mounted control panel or remote transmitter to open and close the door, observing its movement and listening for any unusual sounds.

8. Address Any Issues: If you encounter any issues or difficulties during the manual operation or re-engagement process, refer to the manufacturer’s instructions or contact a professional garage door technician for assistance. It’s important to address any problems promptly to ensure the safe and reliable operation of your garage door.

9. Perform Regular Maintenance: To prevent future issues and ensure optimal performance, perform regular maintenance on your automatic garage door system. This may include lubricating moving parts, inspecting springs and cables for wear, testing safety sensors, and checking for proper alignment.

10. Prepare for Emergency Situations: Familiarize yourself with the manual release mechanism and practice manually opening and closing the garage door periodically, especially in preparation for potential emergencies such as power outages or equipment failures.

In conclusion, Garage Door Repair Las Vegas IN is a straightforward process that can be done when necessary using the manual release mechanism provided by the manufacturer. By following the steps outlined above and taking proper precautions, you can safely and effectively operate your garage door manually in emergency situations.

Allgood Garage Doors Services

8565 S Eastern Ave 150 a, Las Vegas, NV 89123

1-702-343-2252

How Much To Replace Garage Door Tension Spring – A 24 Hour Door Service

Replacing a Garage Door Repair Madison MS tension spring is a task that requires skill and knowledge of garage door mechanisms.

The cost of replacing a garage door tension spring can vary depending on factors such as the type of spring, the size and weight of the garage door, and whether professional installation is required. Let’s explore this topic in more detail to understand the factors influencing the cost of replacing a garage door tension spring.

Understanding Garage Door Tension Springs: Garage door tension springs are essential components of the garage door system, responsible for counterbalancing the weight of the door and facilitating smooth opening and closing. There are two main types of garage door tension springs:

  1. Torsion Springs: Torsion springs are mounted above the garage door and wind up and unwind to generate the necessary tension. They are typically used in heavier garage doors and provide smoother operation compared to extension springs.
  2. Extension Springs: Extension springs are mounted on either side of the garage door and stretch and contract to provide tension. They are commonly used in lighter garage doors and are less expensive than torsion springs.

Factors Influencing Cost: Several factors can influence the cost of replacing a garage door tension spring:

  1. Type of Spring: The type of spring being replaced—whether torsion or extension—affects the cost. Torsion springs are generally more expensive than extension springs due to their design and installation requirements.
  2. Size and Weight of Door: The size and weight of the garage door play a significant role in determining the appropriate size and strength of the tension spring needed. Larger and heavier doors require stronger springs, which can increase the cost.
  3. Quality of Spring: The quality of the replacement spring can vary depending on factors such as material, durability, and manufacturer. Higher-quality springs may come with a higher price tag but offer better performance and longevity.
  4. Professional Installation: While some homeowners may attempt to replace garage door tension springs themselves, professional installation is recommended due to the potential safety risks and technical challenges involved. Hiring a professional garage door technician will incur additional labor costs but ensures the job is done safely and correctly.
  5. Additional Parts and Services: In some cases, replacing a garage door tension spring may require additional parts or services, such as cable replacement, bearing replacement, or adjustments to the garage door opener. These additional components and services can add to the overall cost.
  6. Warranty and Guarantees: Some garage door companies offer warranties or guarantees on their replacement springs, which may affect the cost. Opting for a higher-priced spring with a longer warranty period may provide added peace of mind and value in the long run.

Average Cost Range: The cost of replacing a garage door tension spring can vary widely depending on the factors mentioned above. On average, homeowners can expect to pay anywhere from $150 to $300 for a single garage door tension spring replacement. However, this cost may increase for larger or heavier doors, higher-quality springs, professional installation, or additional services.

Conclusion: Replacing a Garage Door Repair Madison MS tension spring is an important maintenance task that ensures the safe and efficient operation of the garage door. The cost of replacement can vary depending on factors such as the type of spring, size and weight of the door, quality of the spring, professional installation, additional parts and services, and warranty options. Homeowners should carefully consider these factors and consult with a reputable garage door technician to determine the best course of action for their specific needs and budget. Investing in high-quality replacement springs and professional installation can provide long-term reliability and peace of mind.

A 24 Hour Door Service

417 Post Oak Cove, Madison, MS 39110, United States

1-601-664-8935

How Much To Get A New Garage Door Opener – Allgood Garage Doors Services

If you’re considering upgrading your Garage Door Repair Las Vegas NV, you’re likely wondering about the costs involved. A new garage door opener can provide convenience, security, and peace of mind, but it’s essential to understand the factors influencing the cost before making a decision.

In this comprehensive guide, we’ll explore the various aspects that affect the price of a new garage door opener and provide valuable insights to help you budget effectively.

Understanding Garage Door Openers

Before delving into costs, let’s briefly review the different types of garage door openers available on the market:

Chain-Drive Openers

Chain-drive openers are the most common and affordable type of garage door opener. They use a metal chain to pull or push a trolley that moves the door up and down the track.

Belt-Drive Openers

Belt-drive openers operate similarly to chain-drive openers, but instead of a chain, they use a reinforced rubber belt. This makes them quieter and smoother in operation, ideal for homes with living spaces adjacent to or above the garage.

Screw-Drive Openers

Screw-drive openers utilize a threaded steel rod to move the trolley along the track, providing a more straightforward mechanism compared to chain or belt drives. They offer reliable performance with minimal maintenance requirements.

Direct-Drive Openers

Direct-drive openers feature a motor that glides along a stationary chain, eliminating the need for belts, chains, or screws. This design results in ultra-quiet operation and enhanced durability.

Factors Affecting Cost

Several factors influence the cost of purchasing and installing a new garage door opener:

  • Type of Opener: Chain-drive openers are typically the most budget-friendly option, while direct-drive openers tend to be more expensive due to their advanced technology and quiet operation.
  • Horsepower: Higher horsepower openers are capable of lifting heavier garage doors but come at a higher price point.
  • Additional Features: Modern garage door openers offer various features such as Wi-Fi connectivity, battery backup, motion sensors, and smartphone integration. These extra features can significantly impact the overall cost.
  • Installation Costs: Hiring a professional for installation incurs labor costs, which vary depending on the complexity of the installation and the contractor’s rates.

Average Cost of a New Garage Door Opener

The cost of a new garage door opener can vary widely depending on the factors mentioned above. On average, homeowners can expect to pay:

  • Chain-Drive Openers: Basic chain-drive openers typically range from $150 to $300, excluding installation costs.
  • Belt-Drive Openers: Belt-drive openers are slightly more expensive, with prices ranging from $200 to $400 for the opener alone.
  • Screw-Drive Openers: Screw-drive openers fall within the same price range as belt-drive openers, typically costing between $200 and $400.
  • Direct-Drive Openers: Direct-drive openers are the most expensive option, with prices ranging from $300 to $600 or more.

DIY vs. Professional Installation

While some homeowners may opt for a DIY installation to save money, it’s essential to consider the pros and cons:

  • DIY Installation: DIY installation can save on labor costs but requires technical expertise and may void the warranty if not done correctly.
  • Professional Installation: Hiring a professional ensures proper installation and may come with a warranty, but it adds to the overall cost.

Tips for Cost-Saving

To minimize the cost of getting a new garage door opener, consider the following tips:

  • Choose a Basic Model: If you’re on a tight budget, opt for a basic garage door opener without unnecessary features.
  • Reuse Existing Hardware: If your existing garage door opener hardware is in good condition, you may be able to save on installation costs by reusing it with the new opener.
  • Consider DIY Installation: If you’re handy with tools and have experience with home improvement projects, DIY installation can help save on labor costs.

Conclusion:

Investing in a Garage Door Repair Las Vegas NV can enhance the functionality, convenience, and security of your home. By understanding the factors influencing the cost and following the tips outlined in this guide, you can choose the right garage door opener for your needs and budget.

Allgood Garage Doors Services

494 Cape Alan Dr. Henderson, NV 89052

1-702-343-2252

How Can I Lubricate My Garage Door? – Atlas Door Company

Proper lubrication is essential for ensuring smooth operation and extending the lifespan of your Garage Door Repair system.

Over time, the moving parts can become dry and start to wear down, leading to noisy operation, sticking, and potentially even damage. By lubricating your garage door regularly, you can help prevent these issues and keep everything running smoothly.

Before you begin, it’s important to gather the necessary materials. You’ll need a garage door lubricant specifically designed for this purpose. While you can use lightweight household oils in a pinch, they may not provide adequate lubrication or could potentially damage the garage door components over time. It’s best to use a lubricant made explicitly for garage doors, which you can find at most hardware stores or online.

Additionally, you’ll need a clean rag or paper towels to wipe away any excess lubricant and a stepladder or sturdy stool to reach the top portions of the door and track.

Once you have your materials ready, follow these steps to lubricate your garage door properly:

  1. Start by opening the garage door fully. This will give you access to all the moving parts that require lubrication.
  2. Begin with the hinges that connect the individual panels of the garage door. Apply a small amount of lubricant to each hinge, working your way down from the top panel to the bottom. Be sure to lubricate both sides of each hinge for complete coverage.
  3. Next, move on to the roller tracks on both sides of the door. These are the horizontal tracks that the rollers attached to the door panels slide along. Spray or apply a thin line of lubricant along the entire length of each track, focusing on the areas where the rollers make contact.
  4. The rollers themselves also require lubrication. Carefully lift the garage door slightly and apply a small amount of lubricant to each roller, rotating it to ensure complete coverage.
  5. If your garage door has a torsion spring (the large spring mounted horizontally above the door opening), it’s essential to lubricate this component as well. Apply a thin coating of lubricant to the entire length of the spring, being careful not to get any on the cable drums or other nearby components.
  6. For doors with extension springs (the stretched springs on either side of the door), apply lubricant to the springs and any pulleys or hardware they interact with.
  7. Moving to the opener mechanism, locate the opener’s rail and apply lubricant along its entire length. This will help ensure smooth operation of the trolley that rides along the rail.
  8. If your opener has a chain or belt drive system, lubricate the length of the chain or belt with a thin coating of lubricant, taking care not to get any on the nearby sprocket or pulley.
  9. Finally, check the owner’s manual for your specific garage door opener model and follow any additional lubrication recommendations from the manufacturer.

Once you’ve completed lubricating all the necessary components, take a clean rag and wipe away any excess lubricant that may have dripped or spilled onto other parts of the door or opening mechanism. This will help prevent dirt and debris from sticking to those areas.

It’s generally recommended to lubricate your Garage Door Repair every six months to a year, depending on usage and environmental conditions. By taking the time to properly lubricate all the moving parts, you’ll not only ensure smooth, quiet operation but also extend the lifespan of your garage door system, saving you money on potential repairs or replacements down the line.

Atlas Door Company

6817 Sundance Cir W, Joshua, TX 76058, United States

1-817-295-3660

Page 3 of 77

Powered by WordPress & Theme by Anders Norén