Tag: garage door repair Roanoke TX

How to Fix Garage Door Panel-Roanoke TX Garage Door Repair

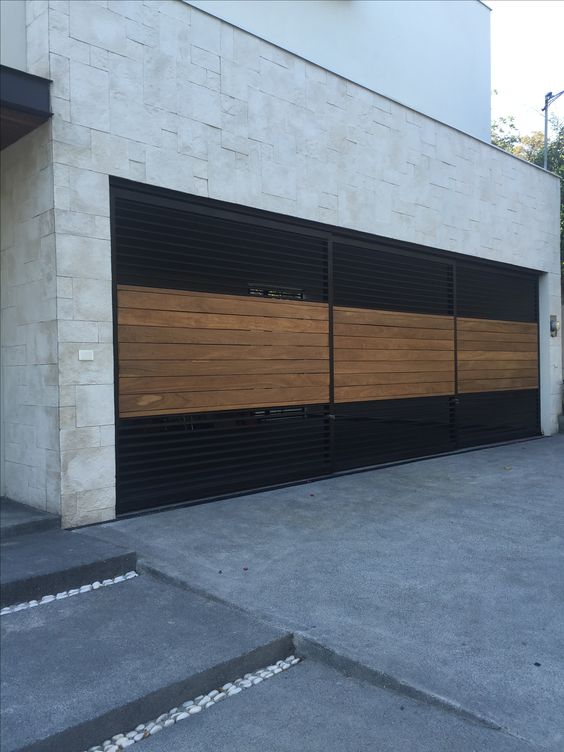
A malfunctioning Garage Door Repair Roanoke TX panel can be a significant inconvenience and compromise the security of your home.

However, with the right tools and some basic knowledge, you can fix the issue yourself. In this guide, we will provide you with a step-by-step approach to help you fix your garage door panel effectively. Remember, safety should always be a top priority when working with garage doors, so exercise caution throughout the process.

Tools Needed:

  1. Safety goggles
  2. Gloves
  3. Adjustable wrench
  4. Screwdriver (Phillips and flat-head)
  5. Pliers
  6. Hammer
  7. Replacement panel (if necessary)
  8. Self-tapping screws

Step 1: Evaluate the Damage Inspect the garage door panel to determine the extent of the damage. Look for cracks, dents, or any signs of wear and tear. If the damage is minor, it may be possible to repair the panel without replacing it. However, if the damage is severe or compromises the structural integrity of the door, you might need to replace the entire panel.

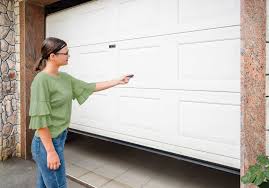
Step 2: Disconnect the Power Before you start working on the garage door panel, disconnect the power to prevent any accidental openings or closings. Locate the power source and unplug it or turn off the circuit breaker dedicated to the garage door opener.

Step 3: Remove the Damaged Panel Using a screwdriver or an adjustable wrench, carefully remove the screws or bolts holding the damaged panel in place. Keep them in a safe place, as you will need them later. Once the screws or bolts are removed, gently slide the panel out of its track and set it aside.

Step 4: Repairing Minor Damage If the damage to the panel is minor, you can attempt to repair it. For small dents, use a plunger or a hammer to gently push the dent out from the inside. If there are cracks, apply a quality adhesive to seal them. Allow the adhesive to dry completely before proceeding.

Step 5: Replacement Panel Installation If the damage is too severe to repair, you will need to install a replacement panel. Ensure that you have the correct panel size and type that matches your existing door. Carefully slide the replacement panel into the track, aligning it with the remaining panels. Secure the panel using the screws or bolts you removed earlier, tightening them adequately but not excessively.

Step 6: Adjusting the Track If the door is not functioning smoothly or is misaligned, you may need to adjust the track. Use a screwdriver or a wrench to loosen the screws holding the track in place. Gently tap the track with a hammer to realign it, and then tighten the screws again. Test the door’s movement to ensure it operates smoothly.

Step 7: Lubrication and Maintenance To keep your garage door in good working condition, apply lubricant to the hinges, rollers, and tracks regularly. This helps reduce friction and extends the lifespan of the door. Additionally, inspect the other components of the door, such as the springs and cables, and address any issues promptly.

Step 8: Reconnect the Power After completing the repair or replacement process, reconnect the power to the garage door opener. Test the door several times to ensure it operates correctly and without any issues.

Conclusion: Repairing or replacing a Garage Door Repair Roanoke TX panel is a task that can be accomplished with the right tools, careful steps, and a bit of patience. By following this step-by-step guide, you should be able to fix your garage door panel effectively. However, if you encounter any difficulties or feel unsure about any part of the process, it is always advisable to seek professional assistance to ensure safety and proper repair.

Roanoke TX Garage Door Repair

112 US-377 #9, Roanoke, TX 76262, Estados Unidos

817-873-2942

How Much Does Garage Doors Cost? – South Denton Overhead Garage Door

When I decided to replace my garage door, one of the essential factors I considered was the cost involved. Garage door prices can vary significantly depending on several factors. In this personal account, I will share my experience and insights into the various factors that influence the cost of garage doors.

As stated in Garage Door Roanoke TX, by understanding the materials, size, style, insulation, additional features, and installation requirements, you can gain a better understanding of the price range associated with garage doors.

Factors Affecting Garage Door Costs:

  1. Materials: The choice of materials significantly impacts the cost of garage doors. I found that steel and aluminum doors tend to be more affordable compared to wood, vinyl, or composite options.
  2. Size: The size of the garage door directly affects the cost. I discovered that larger doors require more materials and often involve higher installation costs.
  3. Style and Design: I realized that the style and design of the garage door can influence the price. Customized or unique designs may come at a higher cost compared to standard styles.
  4. Insulation: I found that opting for an insulated garage door, although more expensive upfront, offers benefits such as energy efficiency and noise reduction.
  5. Windows and Decorative Hardware: Adding windows and decorative hardware can enhance the appearance of the garage door but may increase the overall cost. I considered whether these additions were essential for my aesthetic preferences and budget.
  6. Installation: Professional installation costs can vary depending on factors such as the complexity of the project and labor rates in my area. I obtained multiple quotes from reputable installers to compare prices.

Price Ranges for Garage Doors: Throughout my research, I found the following price ranges to be indicative of the cost of garage doors:

  1. Single-car garage doors: Prices can range from $500 to $2,500, depending on materials, insulation, and additional features.
  2. Double-car garage doors: Prices typically range from $800 to $5,000 or more, depending on materials, insulation, and design complexity.
  3. Custom or high-end garage doors: Customized or high-end garage doors can cost anywhere from $2,000 to $10,000 or more, depending on materials, design, and additional features.
  4. Installation costs: Professional installation generally adds around $500 to $1,500 to the total cost, depending on the complexity of the project and local labor rates.

Overall, according to Garage Door Roanoke TX and my experience with garage door costs taught me the significance of considering factors such as materials, size, style, insulation, additional features, and installation requirements. By doing thorough research, obtaining quotes, and understanding the specific needs and budget, I was able to make an informed decision. Consulting with local professionals and suppliers helped me gain accurate cost estimates and choose the best garage door option for my requirements. Remember that garage door costs can vary based on different factors and geographic location, so it’s essential to gather information and make a decision that aligns with your needs and budget.

South Denton Overhead Garage Door

112 US-377 #9, Roanoke, TX 76262, United States

817-873-2942

How to Insulate a Garage Door-Roanoke Garage Door Repair

Insulating a Garage Door Repair Roanoke TX can be an effective way to make your garage more comfortable, energy-efficient, and even reduce noise. A garage door can be a significant source of heat loss in the winter and heat gain in the summer, which can result in higher energy bills.

In this article, we will discuss the steps you can take to insulate a garage door effectively.

Step 1: Determine the Type of Garage Door Before you start insulating your garage door, you need to determine the type of garage door you have. There are three main types of garage doors: steel, aluminum, and wood. Steel and aluminum garage doors are easier to insulate than wood garage doors, as they have flat surfaces that are easier to work with. If you have a wood garage door, you may need to install a layer of sheathing before you can insulate it.

Step 2: Measure the Garage Door To determine how much insulation you need, measure the garage door’s width and height. Multiply the width and height to get the square footage of the door. You will need enough insulation to cover the entire door’s surface.

Step 3: Choose the Insulation Material There are several insulation materials you can use to insulate your garage door. Here are some of the most popular options:

  • Fiberglass batts: These are the most commonly used insulation material for garage doors. They come in pre-cut panels that fit into the door’s sections.
  • Reflective insulation: This type of insulation reflects heat away from the garage, making it a good choice for hot climates. It comes in rolls and is easy to install.
  • Foam board insulation: This is a rigid insulation material that is easy to cut and shape. It comes in sheets that you can cut to fit the door’s sections.

Step 4: Install the Insulation Material Now that you have chosen your insulation material, it’s time to install it. Here are the steps you should follow:

  • Wear protective gear, such as gloves, goggles, and a mask, when working with insulation materials.
  • Cut the insulation material to fit the door’s sections. Make sure to leave a little bit of extra insulation around the edges.
  • Insert the insulation material into each section of the door. If you are using fiberglass batts, you may need to hold them in place with tape or adhesive.
  • Once you have inserted the insulation material, use a utility knife to trim any excess insulation.

Step 5: Add Weatherstripping Weatherstripping is an essential part of insulating a garage door. It helps to seal any gaps around the door, which can reduce heat loss and air leaks. Here are the steps you should follow to add weatherstripping:

  • Measure the gaps around the garage door. You can use a ruler or tape measure to do this.
  • Choose the appropriate weatherstripping material for your garage door. There are several options available, including foam, vinyl, and rubber.
  • Cut the weatherstripping to the appropriate length.
  • Attach the weatherstripping to the door’s edges using adhesive or nails. Make sure that the weatherstripping is snug against the door.

Step 6: Install a Garage Door Insulation Kit If you want an easier and more convenient way to insulate your garage door, you can install a garage door insulation kit. These kits come with all the materials you need to insulate your garage door, including insulation panels, tape, and fasteners. Here are the steps you should follow to install a garage door insulation kit:

  • Clean the garage door’s surface with soap and water.
  • Peel the adhesive backing off the insulation panels and stick them to the door’s sections.
  • Use the fasteners that come with the kit to secure the panels in place.
  • Use the tape that comes with the kit to seal any gaps between the panels and around the edges of the door.
  • Install the weatherstripping around the edges of the door to seal any remaining gaps.

Step 7: Consider Other Insulation Options In addition to insulating your garage door, there are other insulation options you can consider to make your garage more energy-efficient. Here are some ideas:

  • Insulate the walls: Insulating the walls of your garage can help to further reduce heat loss and gain. You can use the same insulation materials and methods that you used for the garage door.
  • Install a garage door threshold: A garage door threshold is a strip of rubber or vinyl that is installed along the bottom of the garage door. It helps to seal the gap between the door and the floor, which can reduce air leaks and drafts.
  • Upgrade your garage door opener: If your garage door opener is old or inefficient, upgrading it can help to reduce energy consumption and noise.
  • Consider a garage door with built-in insulation: If you are in the market for a new garage door, consider choosing one with built-in insulation. These doors are designed to be more energy-efficient and can provide better insulation than traditional garage doors.

In conclusion, insulating your Garage Door Repair Roanoke TX can be a relatively simple and cost-effective way to make your garage more comfortable and energy-efficient. By following the steps outlined in this article, you can insulate your garage door effectively and enjoy the benefits of a better-insulated garage.

Roanoke Garage Door Repair

Grayson County Doors and Gates
Roanoke, TX

817-904-9300

How to Balance a Garage Door – South Denton Overhead Garage Door

Balancing a Garage Door Repair Roanoke TX is an important task that ensures the proper functioning of the door and prevents damage to the door, opener, and other components.

A balanced Garage Door Repair Roanoke TX is one that can be opened and closed smoothly without any resistance. If your garage door is unbalanced, it can be a safety hazard and can cause damage to your door or opener.

  1. Inspect the Garage Door

The first step in balancing a garage door is to inspect the door for any signs of damage or wear and tear. Check the rollers, tracks, hinges, and springs for any signs of wear and tear. If you notice any signs of damage, you will need to repair or replace the damaged components before attempting to balance the door.

  1. Release the Automatic Opener

The next step is to release the automatic opener from the door by pulling the emergency release cord. This will allow you to manually open and close the door.

  1. Lift the Door

Next, lift the door manually and check if it stays in place or if it falls back down. A properly balanced door should stay in place when lifted to the halfway point.

  1. Adjust the Tension Springs

If the door falls back down, it could be a sign that the tension springs need to be adjusted. The tension springs are located above the door and help counterbalance the weight of the door. Adjusting the tension springs is a job for a professional, as it can be dangerous and requires specialized tools and knowledge.

  1. Adjust the Extension Springs

If your door has extension springs, which are located on either side of the door, you can adjust the tension yourself. To adjust the tension, you will need to move the hook on the end of the spring to a different hole on the track. Moving the hook towards the door will increase tension, while moving it away from the door will decrease tension. Adjust the tension until the door stays in place when lifted to the halfway point.

  1. Adjust the Track Alignment

If the door still does not stay in place after adjusting the tension springs, it could be a sign that the tracks are misaligned. To adjust the track alignment, loosen the bolts holding the track to the wall and move the track until it is straight. Tighten the bolts and check the door again to see if it stays in place.

  1. Check the Rollers

If the door still does not stay in place, check the rollers for signs of damage or wear and tear. Replace any damaged or worn-out rollers with new ones.

  1. Lubricate Moving Parts

To ensure that the door operates smoothly, lubricate all moving parts, including the rollers, tracks, and hinges, with a high-quality garage door lubricant.

  1. Test the Door

After making any adjustments, test the door again to see if it is properly balanced. If the door stays in place when lifted to the halfway point, it is properly balanced.

  1. Adjust the Automatic Opener

Finally, if the door is properly balanced, you can re-engage the automatic opener by pulling the emergency release cord and then pushing the button on the opener. If the door does not open or close smoothly, adjust the automatic opener’s force and limit settings until it operates correctly.

In conclusion, balancing a garage door is an important task that ensures the proper functioning of the door and prevents damage to the door and opener. By following these steps, you can balance your garage door and ensure that it operates smoothly and safely. If you are unsure about any of the steps or do not have the necessary tools and knowledge, it is best to call a professional garage door technician to help you with the job.

South Denton Overhead Garage Door

112 US-377 #9, Roanoke, TX 76262, United States

1-817-873-2942

How to Replace Garage Door Opener – South Denton Overhead Garage Door

Replacing a garage door opener is not a particularly difficult task, but it does require some mechanical skill and knowledge. Before starting the project, it is important to gather all the necessary tools and materials, as well as familiarize yourself with the specific steps involved in replacing your particular model of Garage Door Repair Roanoke TX opener.

The following guide outlines the general steps involved in replacing a Garage Door Repair Roanoke TX opener:

Step 1: Gather materials and tools To replace a garage door opener, you will need a new garage door opener unit, which can be purchased from most hardware stores or online retailers. You will also need a ladder, a drill, drill bits, a screwdriver, pliers, wire strippers, electrical tape, and screws. Additionally, it may be helpful to have a helper on hand to assist with the installation.

Step 2: Remove the old garage door opener Before you begin removing the old garage door opener, make sure that the power to the garage is turned off at the circuit breaker. Next, use a ladder to access the garage door opener and disconnect any wires that are connected to it. You may need to use pliers or wire strippers to do this. Once all of the wires are disconnected, remove any screws or bolts that are holding the garage door opener in place and carefully remove it from the ceiling.

Step 3: Install the new garage door opener Begin by installing the bracket that came with the new garage door opener onto the ceiling of the garage. You will need to drill holes in the ceiling for the screws that will hold the bracket in place. Once the bracket is securely attached, attach the rail to the bracket and the trolley to the rail. Next, connect any wires that need to be connected according to the manufacturer’s instructions. Finally, attach the garage door opener unit to the bracket using the screws provided.

Step 4: Program the garage door opener Once the new garage door opener is installed, you will need to program it to work with your garage door. To do this, follow the instructions that came with the unit. Typically, this will involve pressing a button on the garage door opener and then pressing a button on the remote control that came with the unit.

Step 5: Test the garage door opener Before using the garage door opener, test it to make sure that it is functioning properly. Make sure that the garage door is closed and then press the button on the remote control to open it. The door should open smoothly and without any jerking or hesitating. Once the door is fully open, test it again by closing it using the remote control.

Step 6: Finish up Once you have confirmed that the garage door opener is functioning properly, you can tidy up the installation area. Dispose of any old hardware or materials and clean up any dust or debris that may have accumulated during the installation process.

In conclusion, replacing a garage door opener is a relatively straightforward task that can be completed by most homeowners. By following the steps outlined above, you should be able to successfully replace your garage door opener and enjoy the benefits of a new and improved system. However, if you are uncomfortable with any aspect of the installation process or are unsure of your abilities, it may be best to hire a professional to do the job for you.

South Denton Overhead Garage Door

112 US-377 #9, Roanoke, TX 76262, United States

1-817-873-2942

Powered by WordPress & Theme by Anders Norén